In video conferences, participants can send messages in real-time in the chat area, share opinions and ideas, and create a relaxed and pleasant communication environment by exchanging emoticons and animations. To maintain the order of the meeting, the host or administrator can set to prohibit participants from sending messages in the chat, ensuring the focus and efficiency of the conference content. By flexibly using these features, video conferences can provide efficient and convenient communication experiences for various scenarios.
Feature Introduction
Text, Multimedia Information Interaction
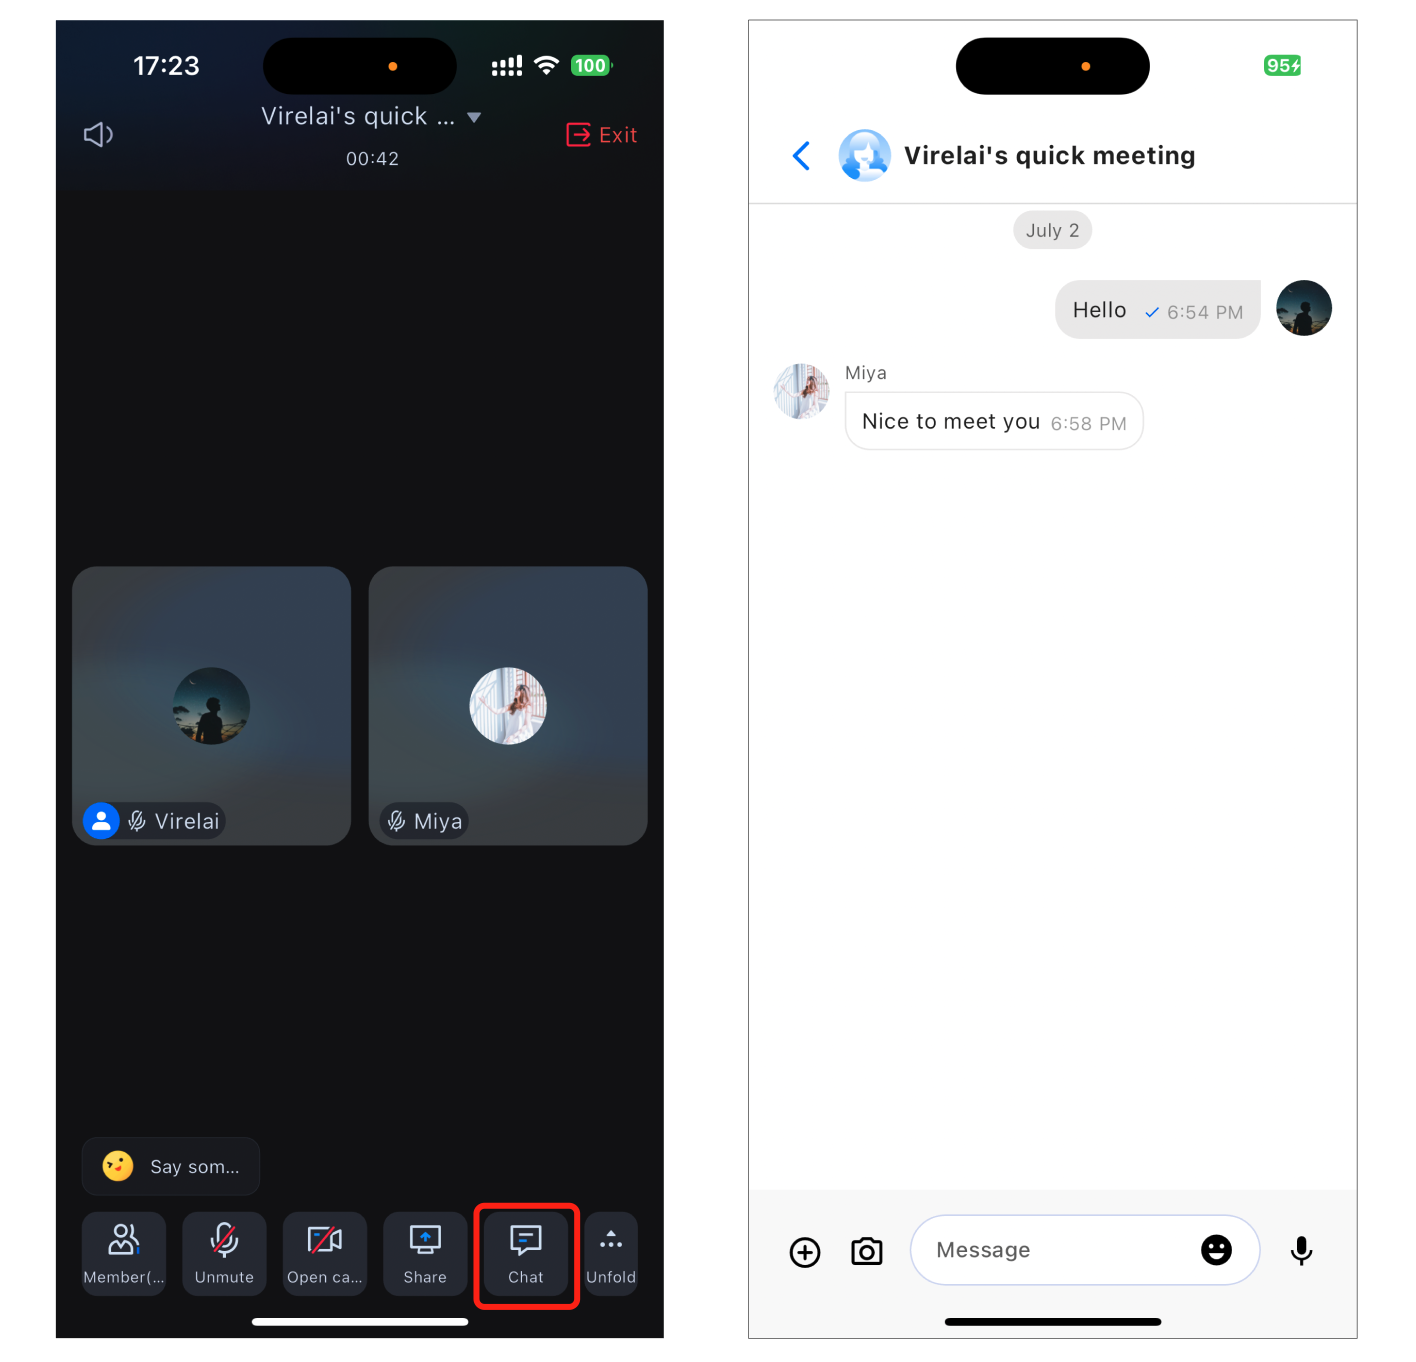
Click the Chat option at the bottom of the conference interface to access the chat interface. Participants can freely send text, pictures, videos, and voice messages, enabling real-time communication without disrupting the conference flow.
Emoji Interaction
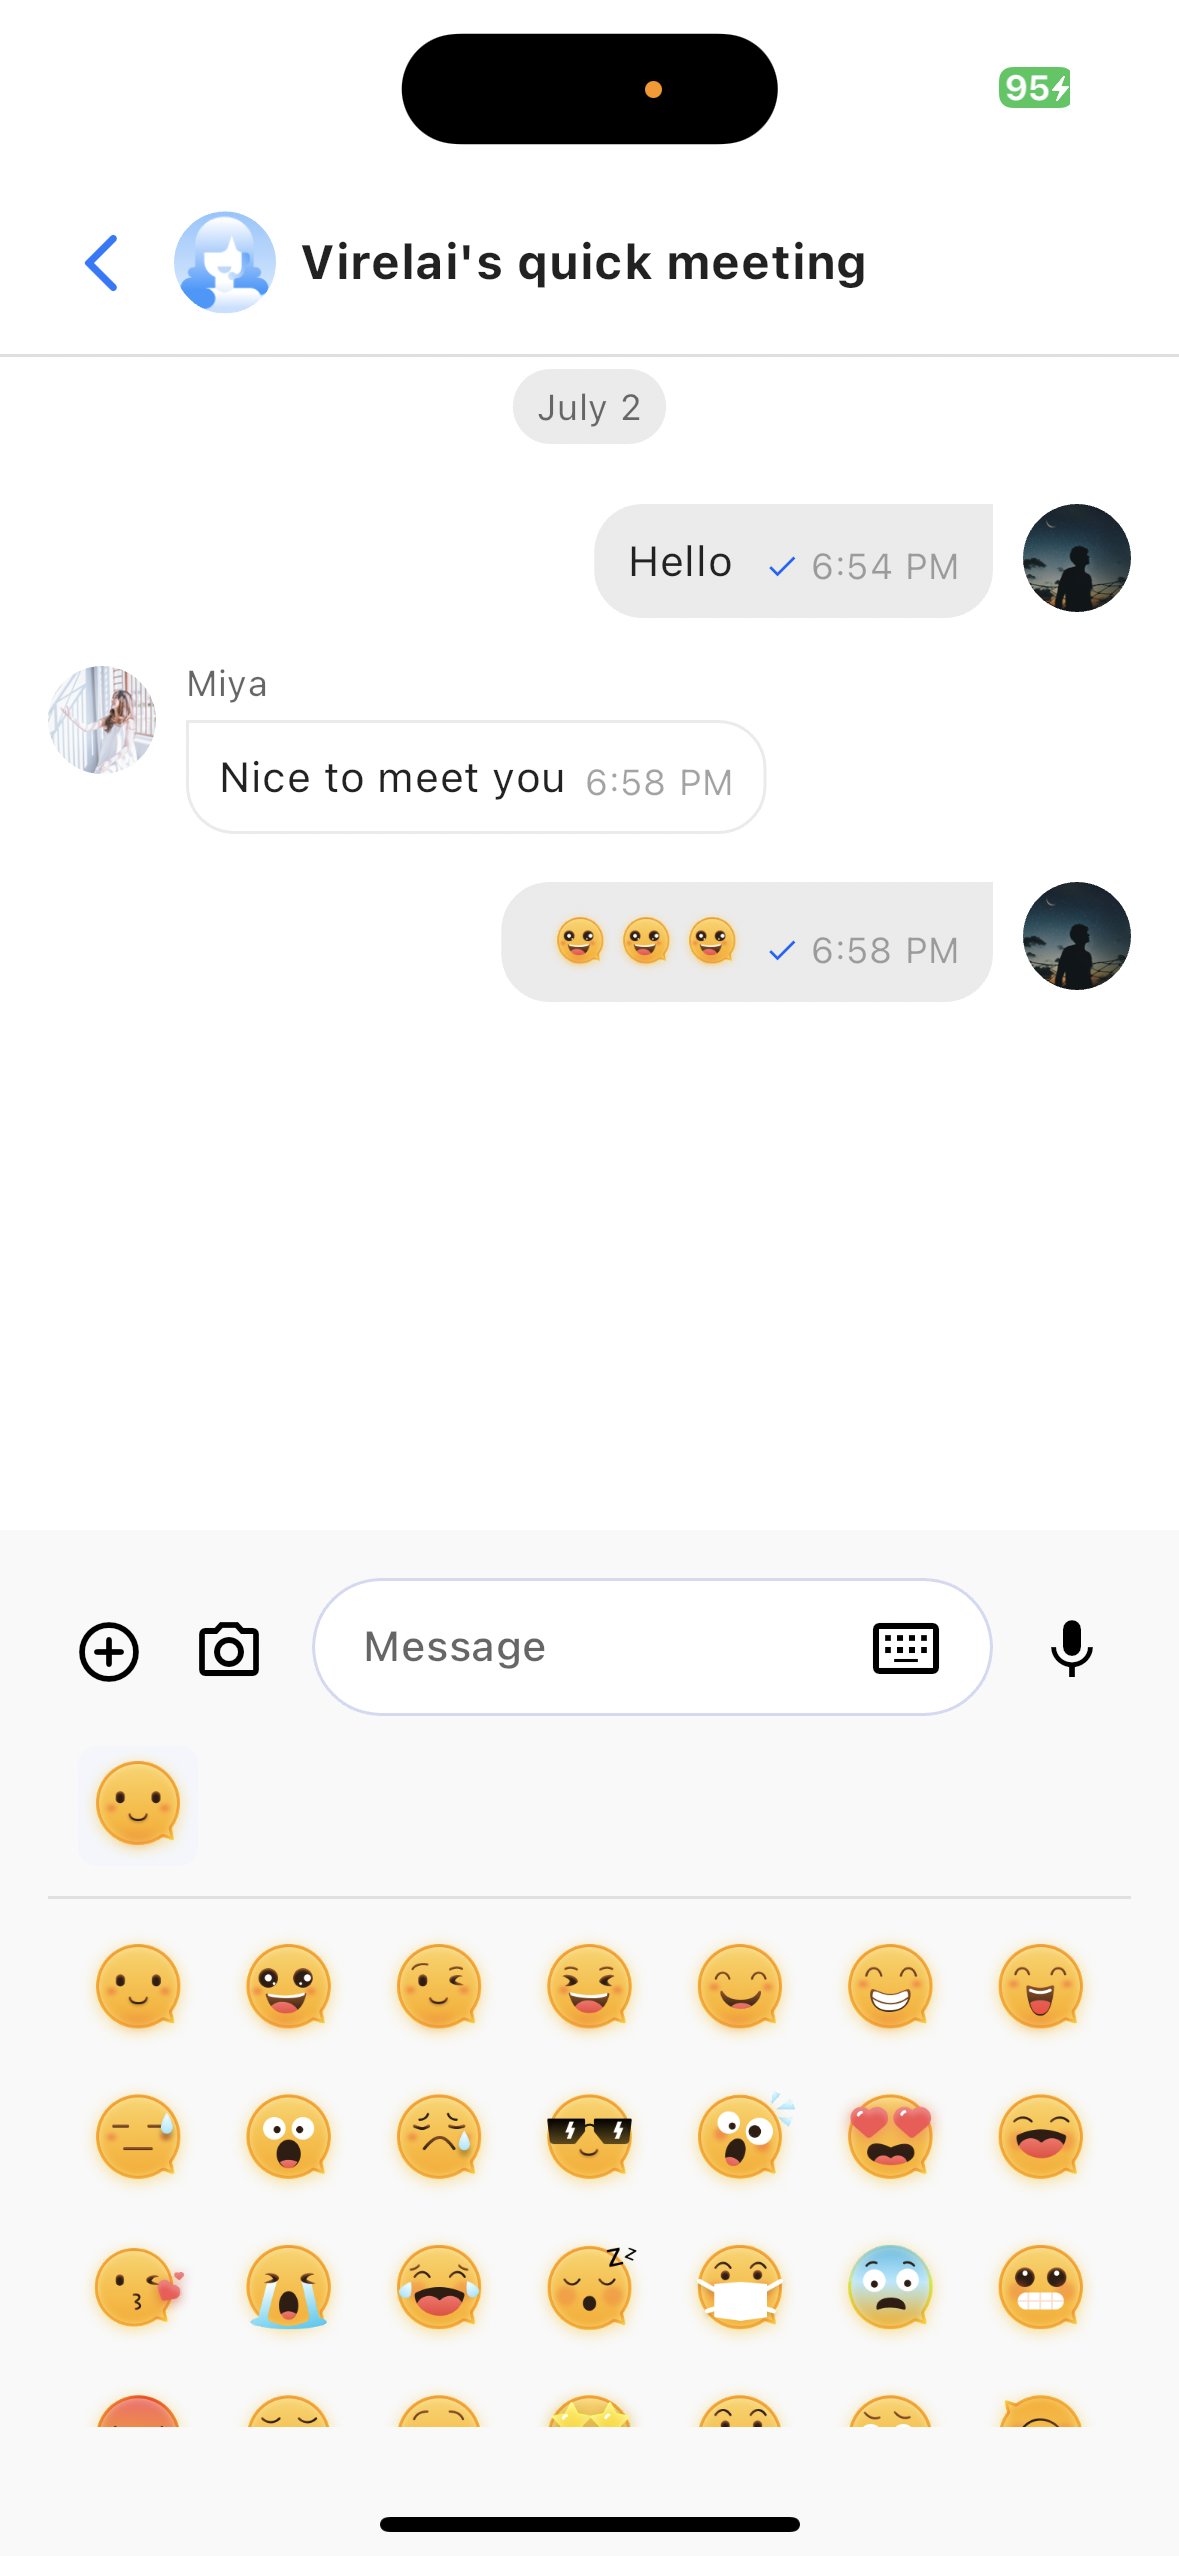
Click the Emoji Icon in the message board editor in the chat interface to bring up the emoji list. Click the corresponding emoji to display it in the message board for sending.
Chat permissions in the control panel
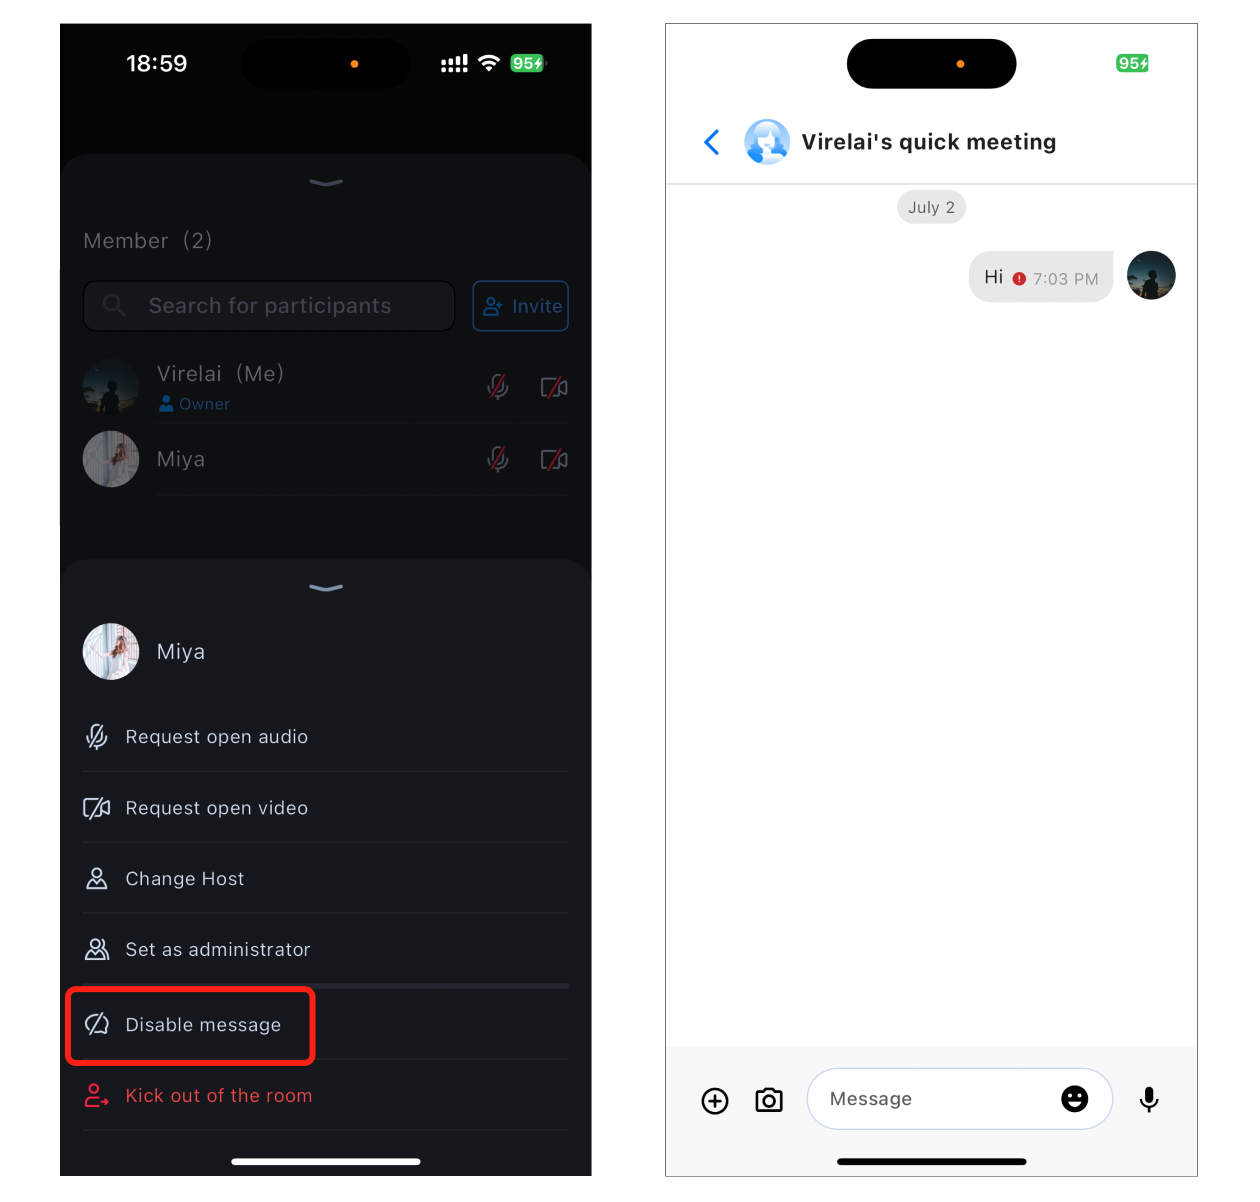
The host/administrator can set a member’s chat permissions in Member Management. If muted, regular members will not be able to send messages.
Next, add the localization configuration to entries provided by third-party packages such as MaterialApp or GetMaterialApp. Here, GetMaterialApp is used as an example:
Add the following code to your project. Its function is to complete the initialization and log in to by calling the relevant interfaces in the chat component. This step is crucial, as the chat can only be used normally after initialization. Therefore, please be patient and check whether the relevant parameters are configured correctly. Among the parameters, sdkAppId, userID, and userSig, you have already used them when logging in to TUIRoomKit.
useDefaultSticker:true,// Default stickers, only this sticker pack can interoperate with TUIRoomKit from other platforms.
useDefaultCustomFace_4350:false,// If you do not need to use TUIRoomKit from other platforms, you can enable the following emoji pack.
useDefaultCustomFace_4351:false,
useDefaultCustomFace_4352:false,
userID:'userId',// Your userId
).toJson(),
pluginInstance:TencentCloudChatStickerPlugin(
context: context,
),
),
],
Note:
To respect the copyright of emoji designs, the TUIRoomKit example project does not include large emoji cut elements. Before official commercial use, please replace them with your own designs or other emoji packs you have copyright to. The default Little Yellow Face emoji pack is copyrighted by Tencent Cloud, and can be licensed for a fee. If you wish to obtain a license, you can Submit a ticket to contact us.
Using Chat
When you create or join a conference successfully, you need to pass the chatWidget into the conference page, ConferenceMainPage. After passing it in, the chat button will display in the bottom toolbar. Clicking the chat button will automatically navigate to chatWidget.
Navigator.push(
context,
MaterialPageRoute(
builder:(context)=>ConferenceMainPage(// Conference main page
chatWidget:TencentCloudChatMessage(
options:TencentCloudChatMessageOptions(groupID: 'yourConferenceId'),// Your Confere
),
),
),
);
After completing the above configuration, you can click the chat button to chat during the conference.