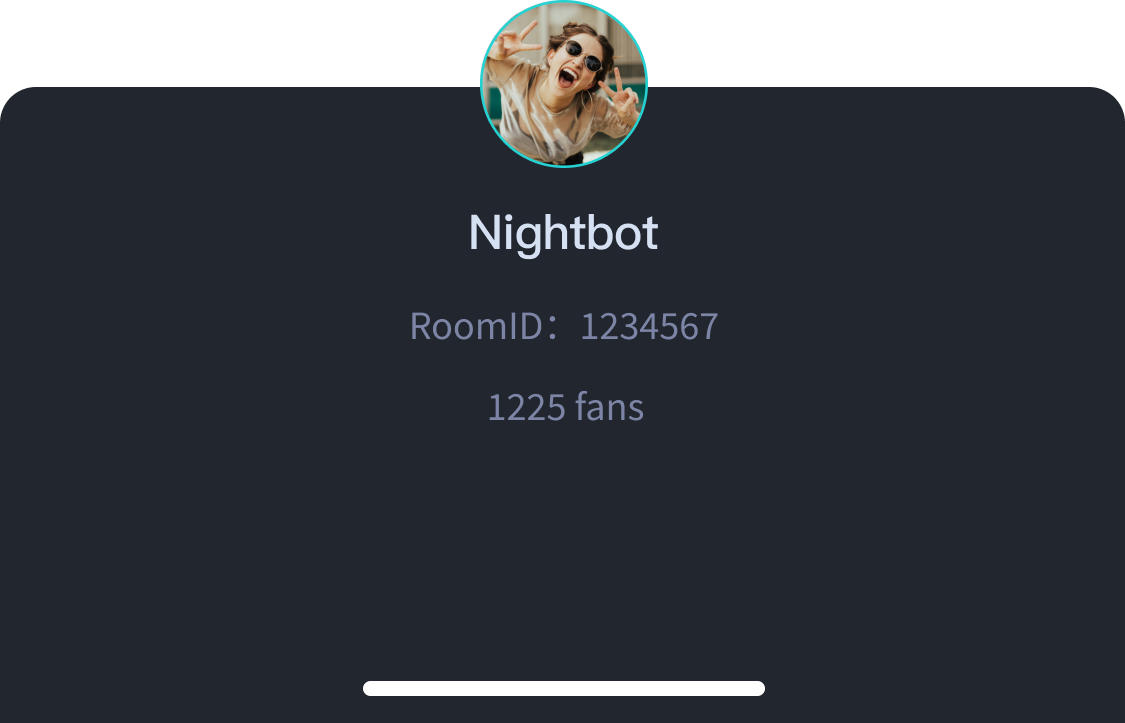
The live room information component mainly provides the following features: display live room information, display anchor information, show the relationship between viewers and anchors, allow viewers to follow anchors or unfollow them, and view the number of followers of anchors.
Notes:
The "Follow Host" feature in the component requires the corresponding application (SDKAppID) to be Live Free Trial or Pro to be usable. Currently only supports Singapore data center, does not support Silicon Valley data center.</Note>
Live Room Information Component
Show Live Room Information Details Panel after Clicking Component
Effect Display after Integration
Component Integration
Android
iOS
Flutter
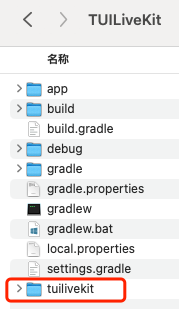
step 1:Download the TUILiveKit component
Clone/download the code from GitHub, then copy the tuilivekit subdirectory under the Android directory to the same-level directory as your app in the current project, as shown in the figure below:
step 2:Project Configuration
1. Add the jitpack repository address in the settings.gradle.kts (or settings.gradle) file in the project root directory: add the jitpack repository dependency (to download the SVGAPlayer third-party library for playing gift svg animations).
2. Add the following code in the settings.gradle.kts (or settings.gradle) file in the project root directory. It enables importing the downloaded tuilivekit component into your current project:
settings.gradle.kts
settings.gradle
include(":tuilivekit")
include ':tuilivekit'
3. Locate the build.gradle.kts (or build.gradle) file under the app directory and add the following code in it. It enables declaring the current app's dependency on the newly joined tuilivekit component:
build.gradle.kts
build.gradle
api(project(":tuilivekit"))
api project(':tuilivekit')
Note:
Note: The TUILiveKit project internally depends on TRTC SDK, IM SDK, tuiroomengine, and the public library tuicore by default. Developers do not need to separately configure them. If needed, just modify the tuilivekit/build.gradle file to upgrade.
4. Since we use Java reflection features internally in the SDK, some classes in the SDK need to be added to the non-obfuscation list. Therefore, you need to add the following code in the proguard-rules.pro file:
-keep class com.tencent.** { *; }
-keep class com.trtc.uikit.livekit.livestreamcore.** { *; }
-keep class com.trtc.uikit.livekit.component.gift.store.model.** { *; }
-keep class com.squareup.wire.** { *; }
-keep class com.opensource.svgaplayer.proto.** { *; }
-keep class com.tcmediax.** { *; }
-keep class com.tencent.** { *; }
-keep class com.tencent.xmagic.** { *; }
-keep class androidx.exifinterface.** {*;}
-keep class com.google.gson.** { *;}
# Tencent Effect SDK - beauty
-keep class com.tencent.xmagic.** { *;}
-keep class org.light.** { *;}
-keep class org.libpag.** { *;}
-keep class org.extra.** { *;}
-keep class com.gyailib.**{ *;}
-keep class com.tencent.cloud.iai.lib.** { *;}
-keep class com.tencent.beacon.** { *;}
-keep class com.tencent.qimei.** { *;}
-keep class androidx.exifinterface.** { *;}
5. Find the AndroidManifest.xml file under the app directory, add tools:replace="android:allowBackup" and android:allowBackup="false" in the application node, overwrite the setting within component, and use your own setting.
// app/src/main/AndroidManifest.xml
<application
...
// add the following configuration to overwrite the configuration in the dependent sdk
android:allowBackup="false"
tools:replace="android:allowBackup">
Import components using CocoaPods. The specific steps for importing components are as follows:
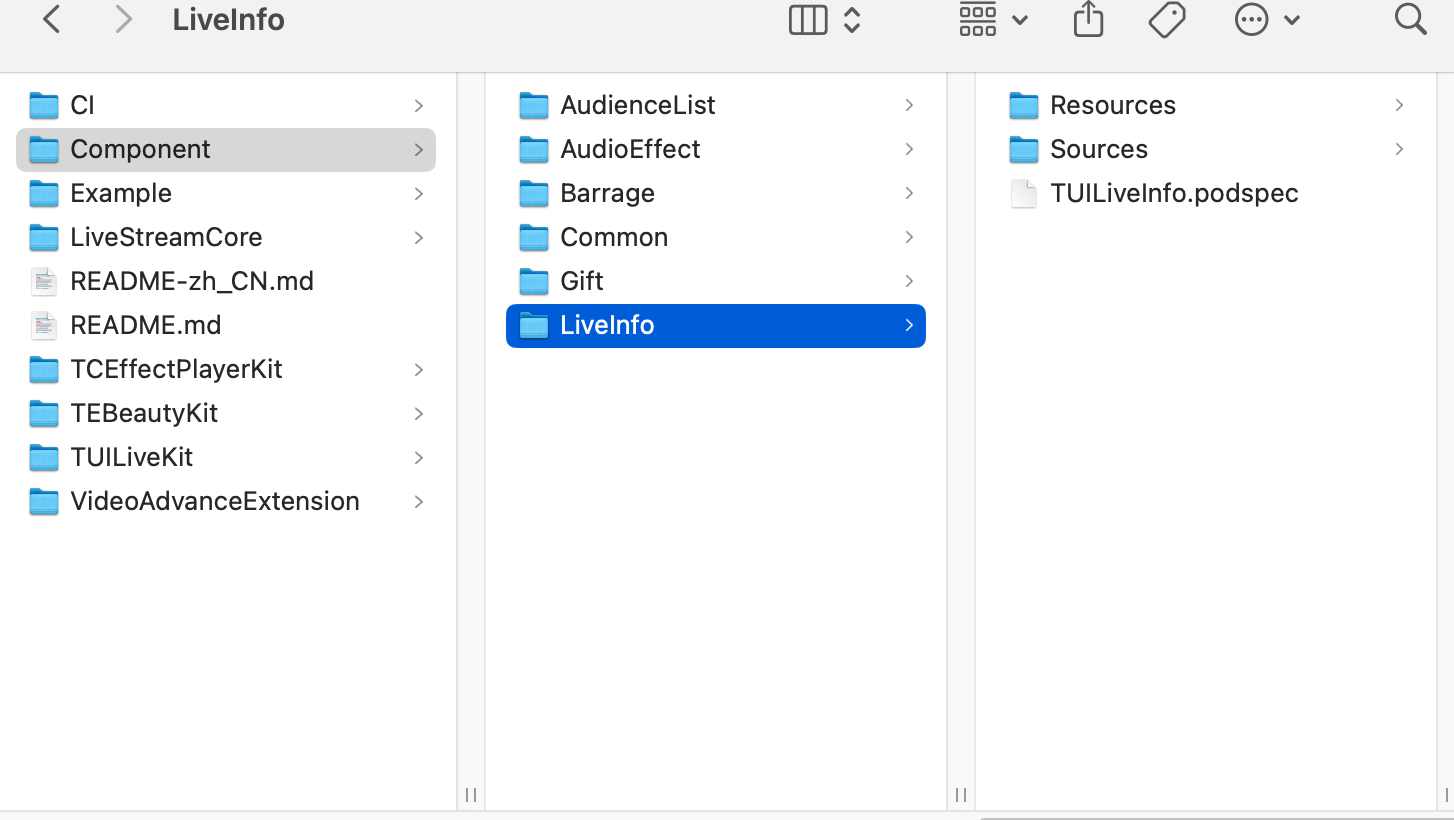
1. You need to download the GitHubLiveInfo and Common folders to your local system.
2. Add pod 'TUILiveInfo' and pod 'TUILiveResources' dependencies in your Podfile.
Swift
target 'xxxx'do
...
...
pod 'TUILiveResources', :path =>'../Component/Common/TUILiveResources.podspec'
//The path is the relative path between your Podfile file and TUILiveResources.podspec file
pod 'TUILiveInfo', :path =>'../Component/LiveInfo/TUILiveInfo.podspec'
//The path is the relative path between your Podfile file and TUILiveInfo.podspec file
end
If you don't have a Podfile file, first use the terminal to cd into the xxxx.xcodeproj directory, then create it with the following command:
pod init
3. In the terminal, first cd to the Podfile directory, then execute the following commands to install components.
pod install
4. Any issues you encounter during integration or use are welcome to be reported.
1. Create a directory named livekit_component under the lib directory in your project, and copy the common directory and component/live_info directory from the livekit/lib directory on github to the livekit_component directory you created.
2. Adjust the import directory and change the import path to a relative path within your own project.
Using Components
Notes:
Since live room information is only obtained within the live streaming room. When using the live room information component, note the usage limits and use it only after successfully entering the live streaming room.
Creating Components
Android
iOS
Flutter
You can create a live streaming room information component in two ways, as follows: