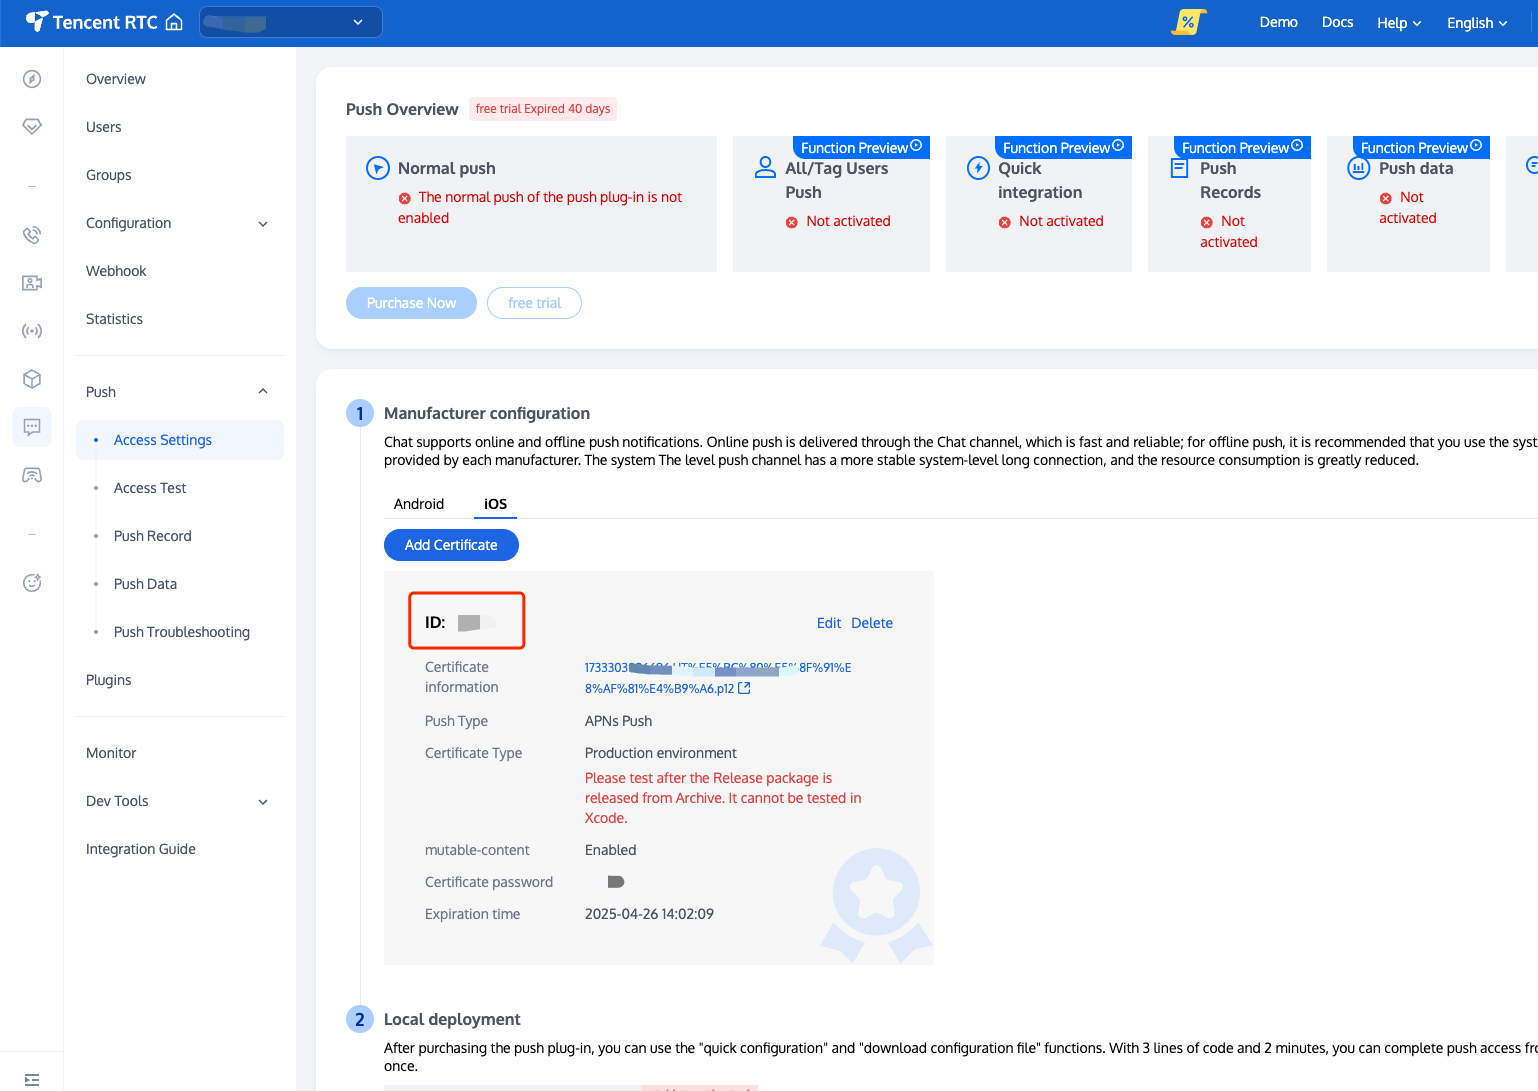
Upload the iOS APNs Push Certificate obtained from the manufacturer configuration process to the Chat console.
The Chat console will allocate a certificate ID for you, as shown below:
You need to create file UnityIMPush.mm under the directory Assets/Plugins/iOS (if the directory does not exist, create it manually), and implement the - businessID protocol method in the file to return the certificate ID. See the implementation as follows:
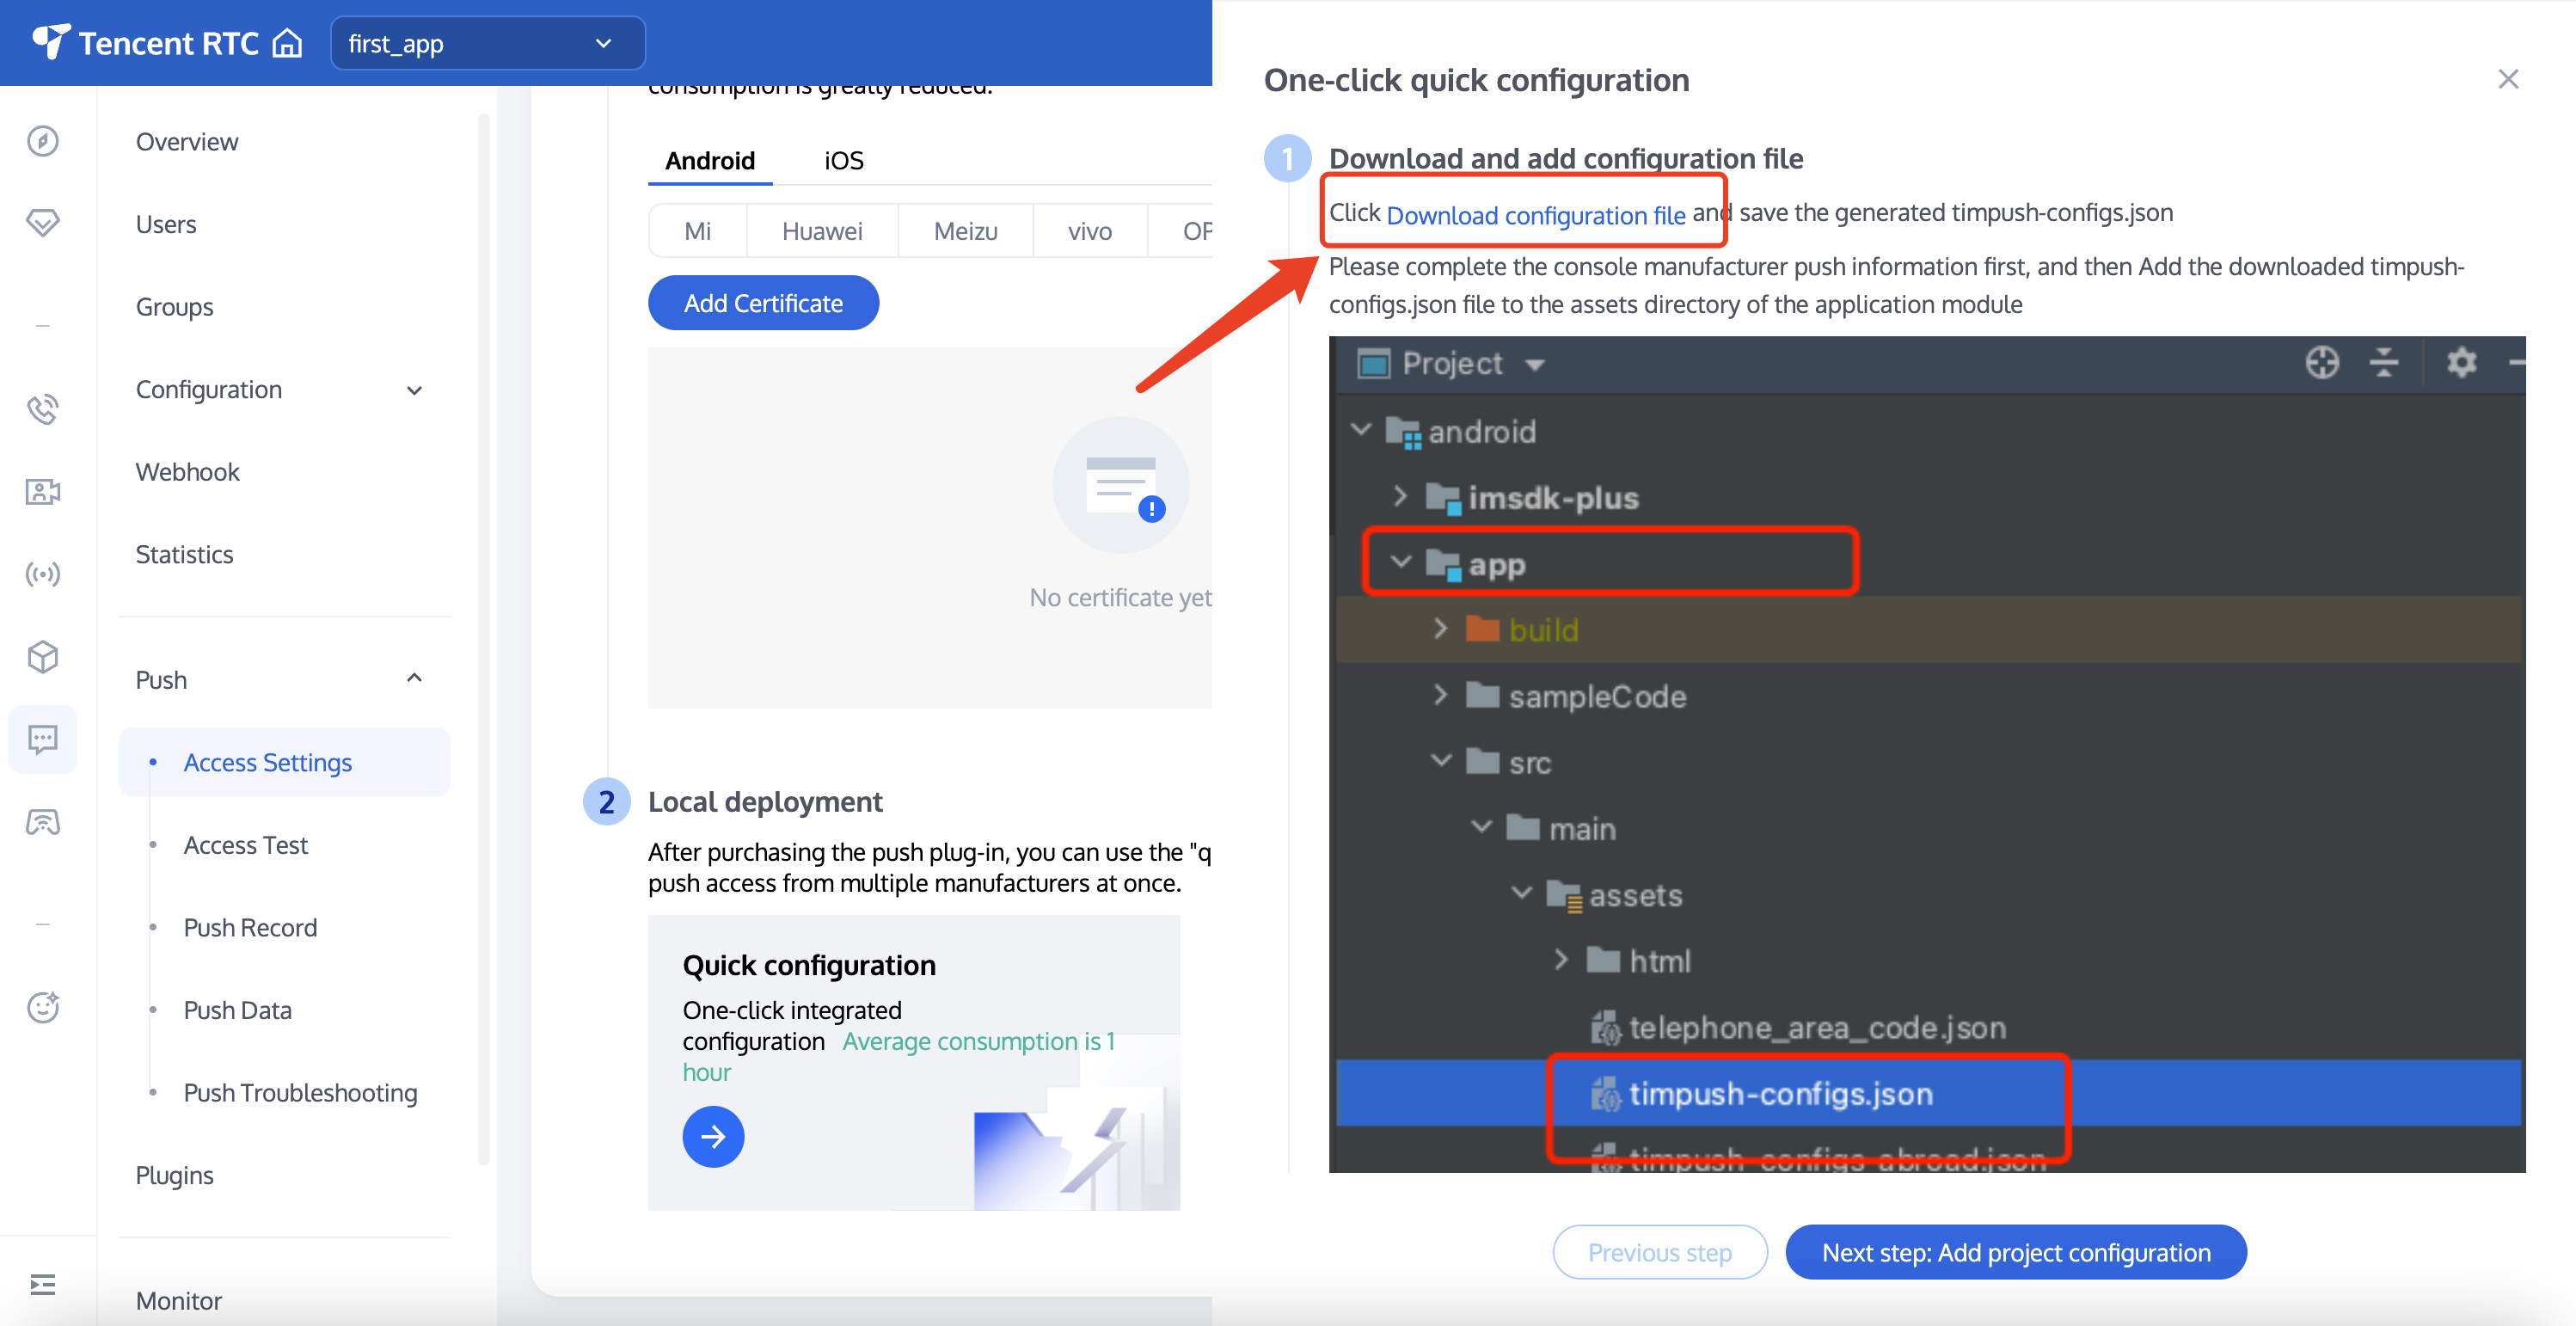
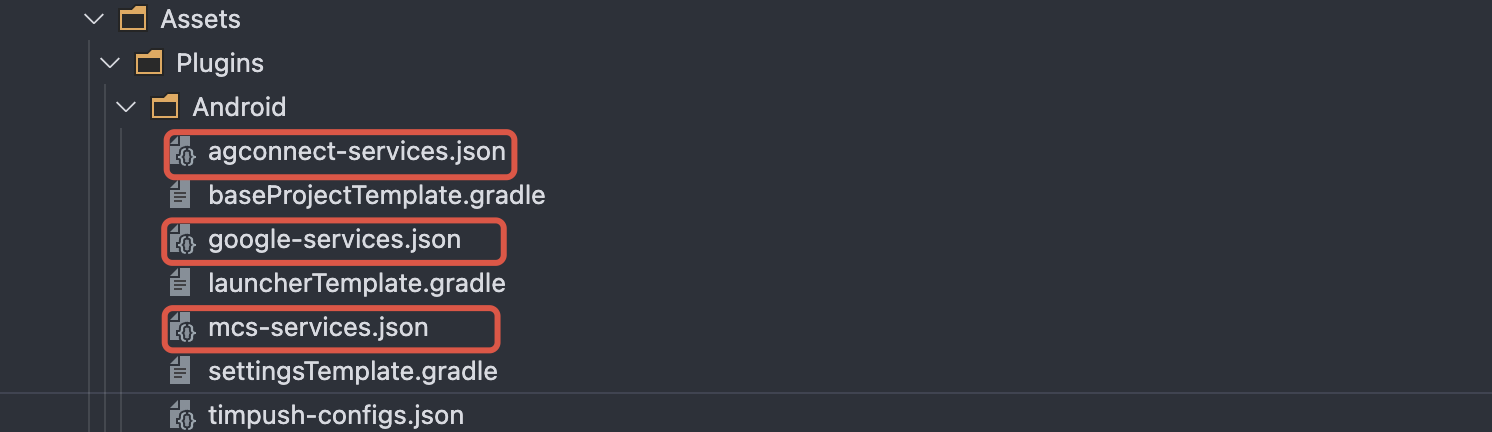
After completing the console manufacturer push information, download and add the configuration file to the project. Add the downloaded timpush-configs.json file to the Assets/Plugins/Android directory of the project. If the directory does not exist, create it manually.
Step 3: Client Vendor Configuration
iOS
Android
No need to perform this step on iOS.
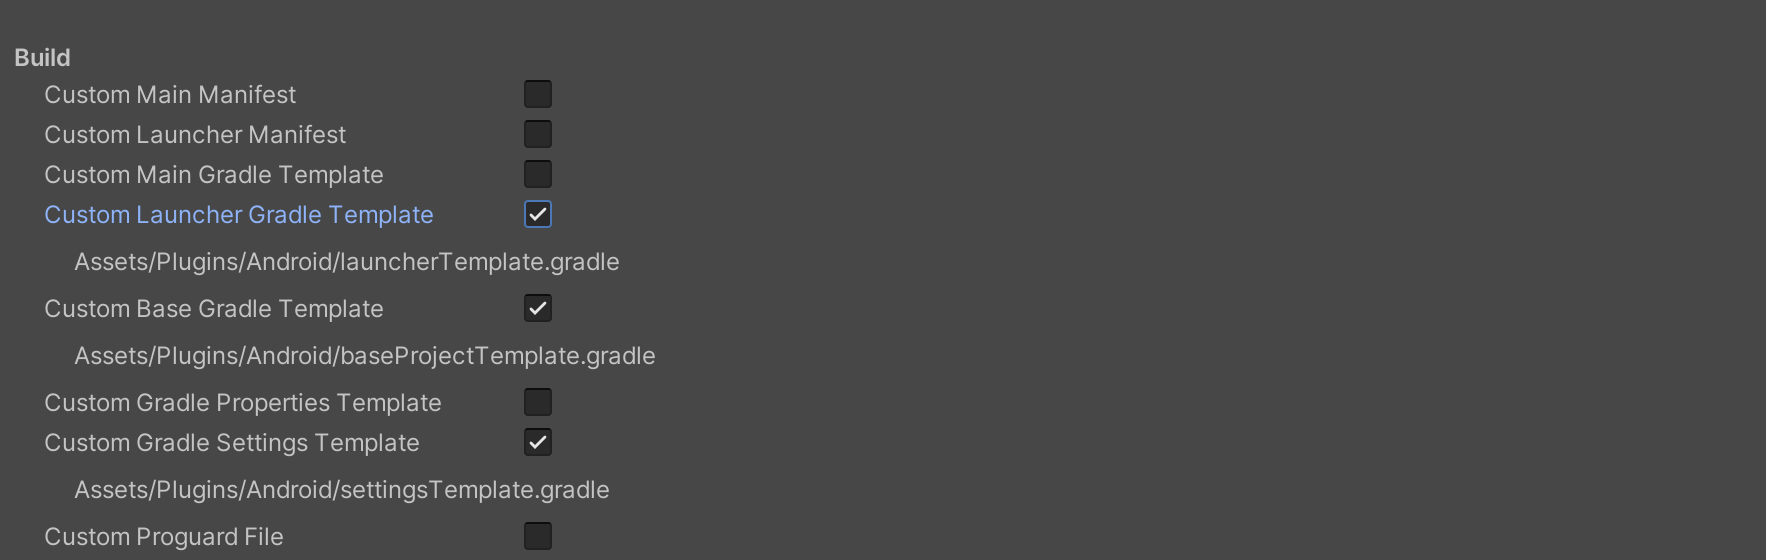
File > Build Settings > Player Settings, then go to Publishing Settings > Build in the Android platform settings and check the following three configurations:
Find the Assets/Plugins/Android/launcherTemplate.gradle file, add the dependencies configuration at the end of the file, and as needed, introduce all or part of the manufacturer's push packages. Only by introducing the corresponding manufacturer's push package can you enable its native push capability.
dependencies {
// Version number "VERSION" please visit update log to get configuration.
// Integration of the push main package is mandatory
// If only the FCM channel is needed, the following packages do not need to be integrated; if you want to prioritize the FCM channel, call the API forceUseFCMPushChannel
According to the vivo and Honor vendor access guide, APPID and APPKEY need to be added to the manifest file, which can be done by modifying the Assets/Plugins/Android/launcherTemplate.gradle file.
// Assets/Plugins/Android/launcherTemplate.gradle
android {
...
defaultConfig {
...
manifestPlaceholders =[
"VIVO_APPKEY":"The cert APPKEY assigned to your app",
"VIVO_APPID":"The cert APPID assigned to your app",
"HONOR_APPID":"The cert APPID assigned to your app"
]
}
}
Huawei, Honor, and Google FCM adaptation
Integrate the plugin and json configuration file by vendor method.
Note:
The following Honor adaptation requires configuration for version 7.7.5283 and above.
1.1 Download the configuration file and add it to the project root directory Assets/Plugins/Android/JsonConfigs. Create the directory manually if it does not exist.
Huawei
Honor
Google FCM
Operation Path
1.2 In the Assets/Plugins/Android/baseProjectTemplate.gradle file, add the following configurations under buildscript -> dependencies (if it is necessary to add a new buildscript, place it at the top of the file):
Gradle 7.1 and above Versions
Gradle 7.0 Version
Gradle 7.0 and below Versions
In the Assets/Plugins/Android/baseProjectTemplate.gradle file, add the following configurations under buildscript -> dependencies:
buildscript {
dependencies {
...
classpath 'com.huawei.agconnect:agcp:1.6.0.300'
classpath 'com.hihonor.mcs:asplugin:2.0.1.300'
classpath 'com.google.gms:google-services:4.3.15'
}
}
In the Assets/Plugins/Android/settingsTemplate.gradle file, add the following repository configurations under buildscript -> repositories and allprojects -> repositories:
// Configure the Maven repository address for HMS Core SDK.
maven {url 'https://developer.huawei.com/repo/'}
maven {url 'https://developer.hihonor.com/repo'}
}
}
1.3 In the Assets/Plugins/Android/launcherTemplate.gradle file, add the following configurations:
apply plugin: 'com.google.gms.google-services'
apply plugin: 'com.huawei.agconnect'
apply plugin: 'com.hihonor.mcs.asplugin'
Step 5: Handling Message Click Callback and Parsing Parameters
If you need to customize the parsing of received remote push, you can implement it by the following method.
Note:
1. Register the callback timing in the program entry function.
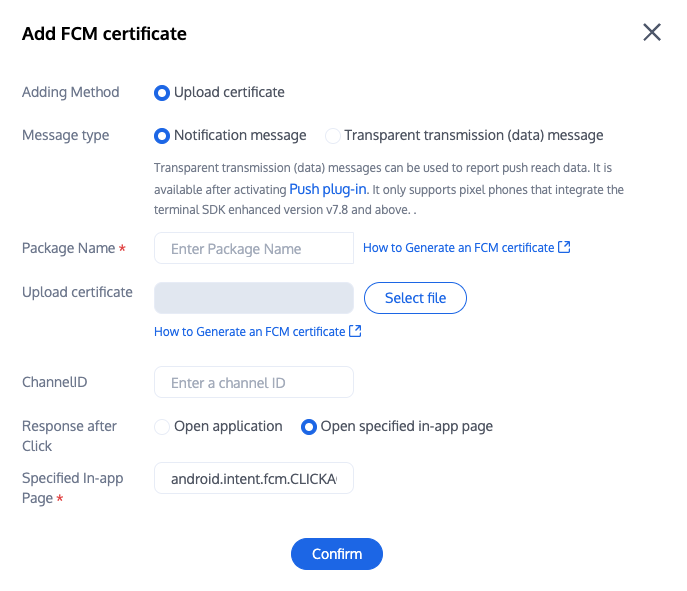
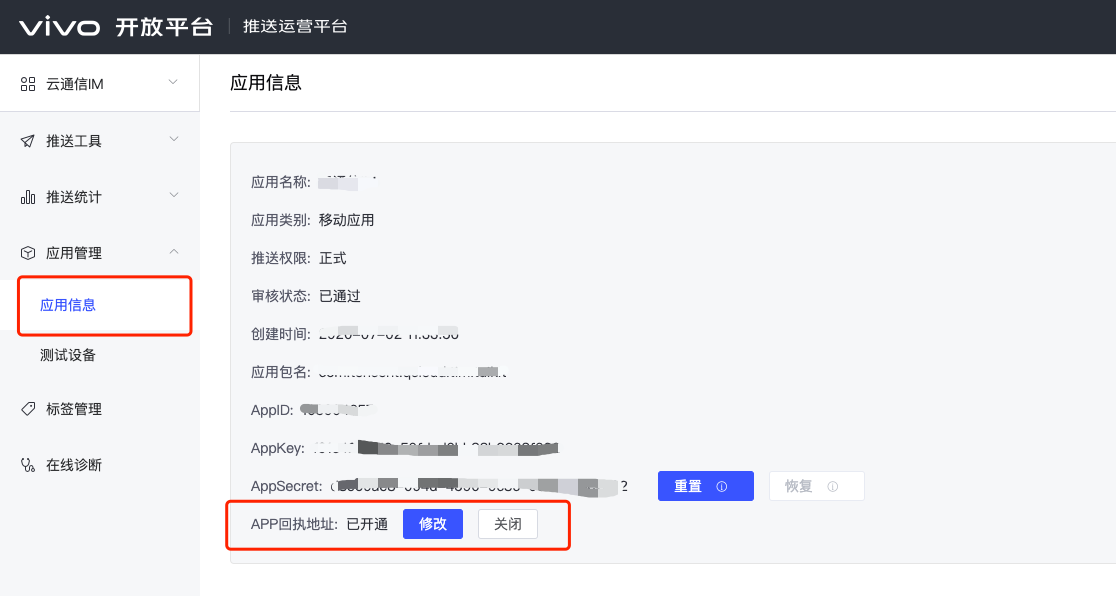
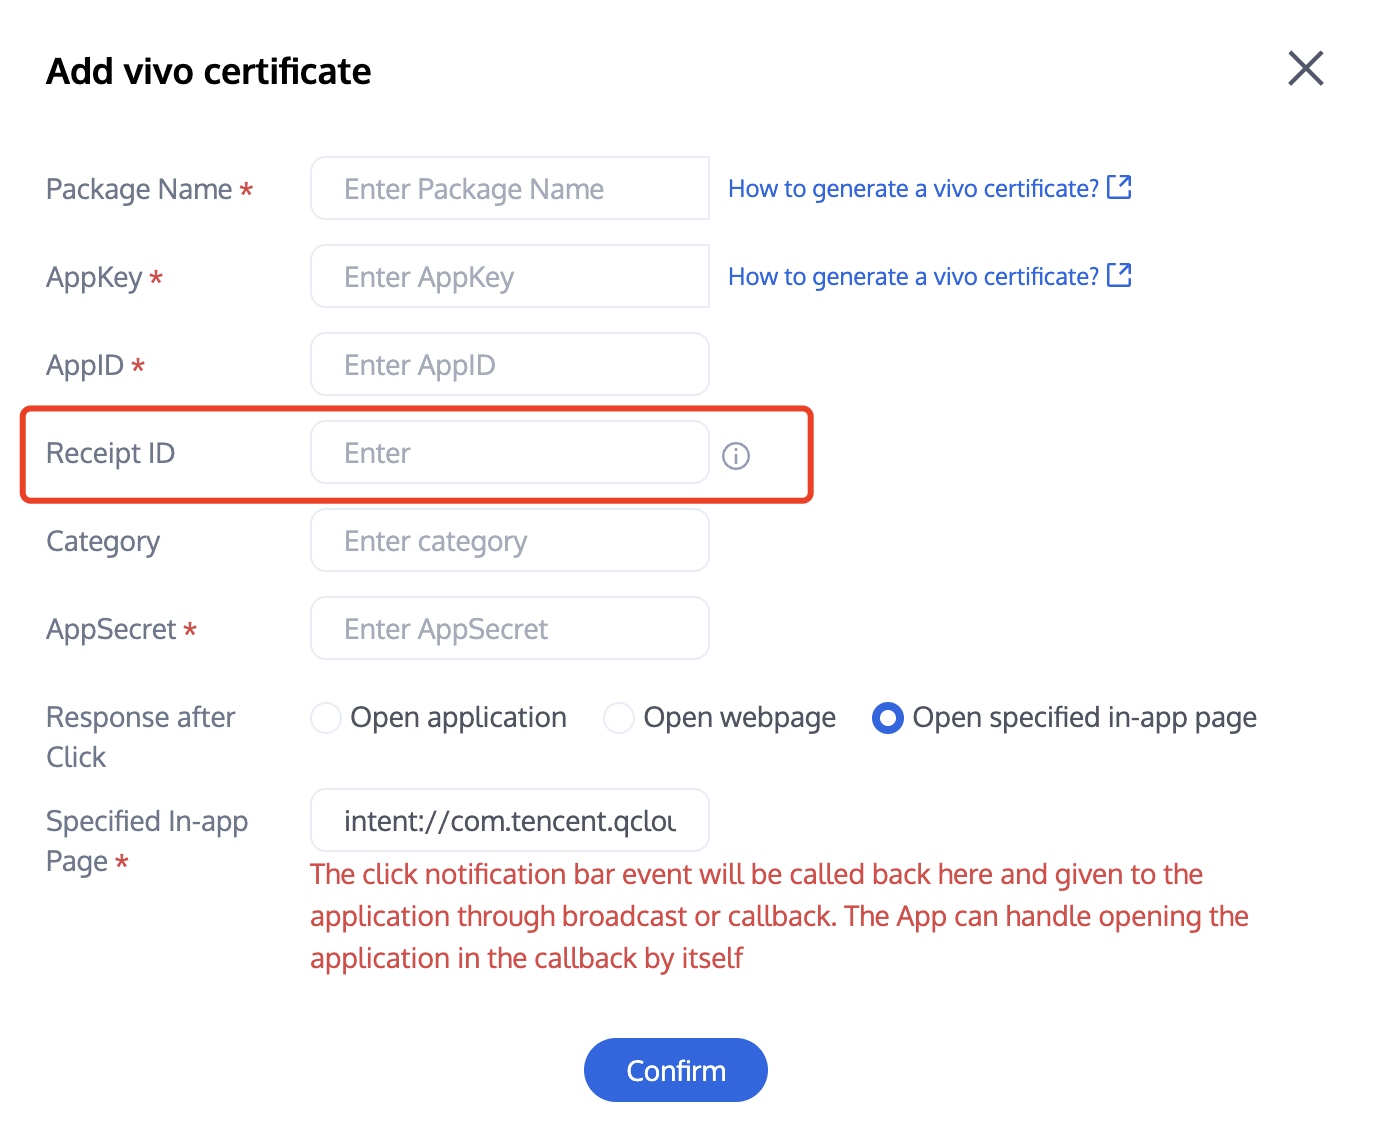
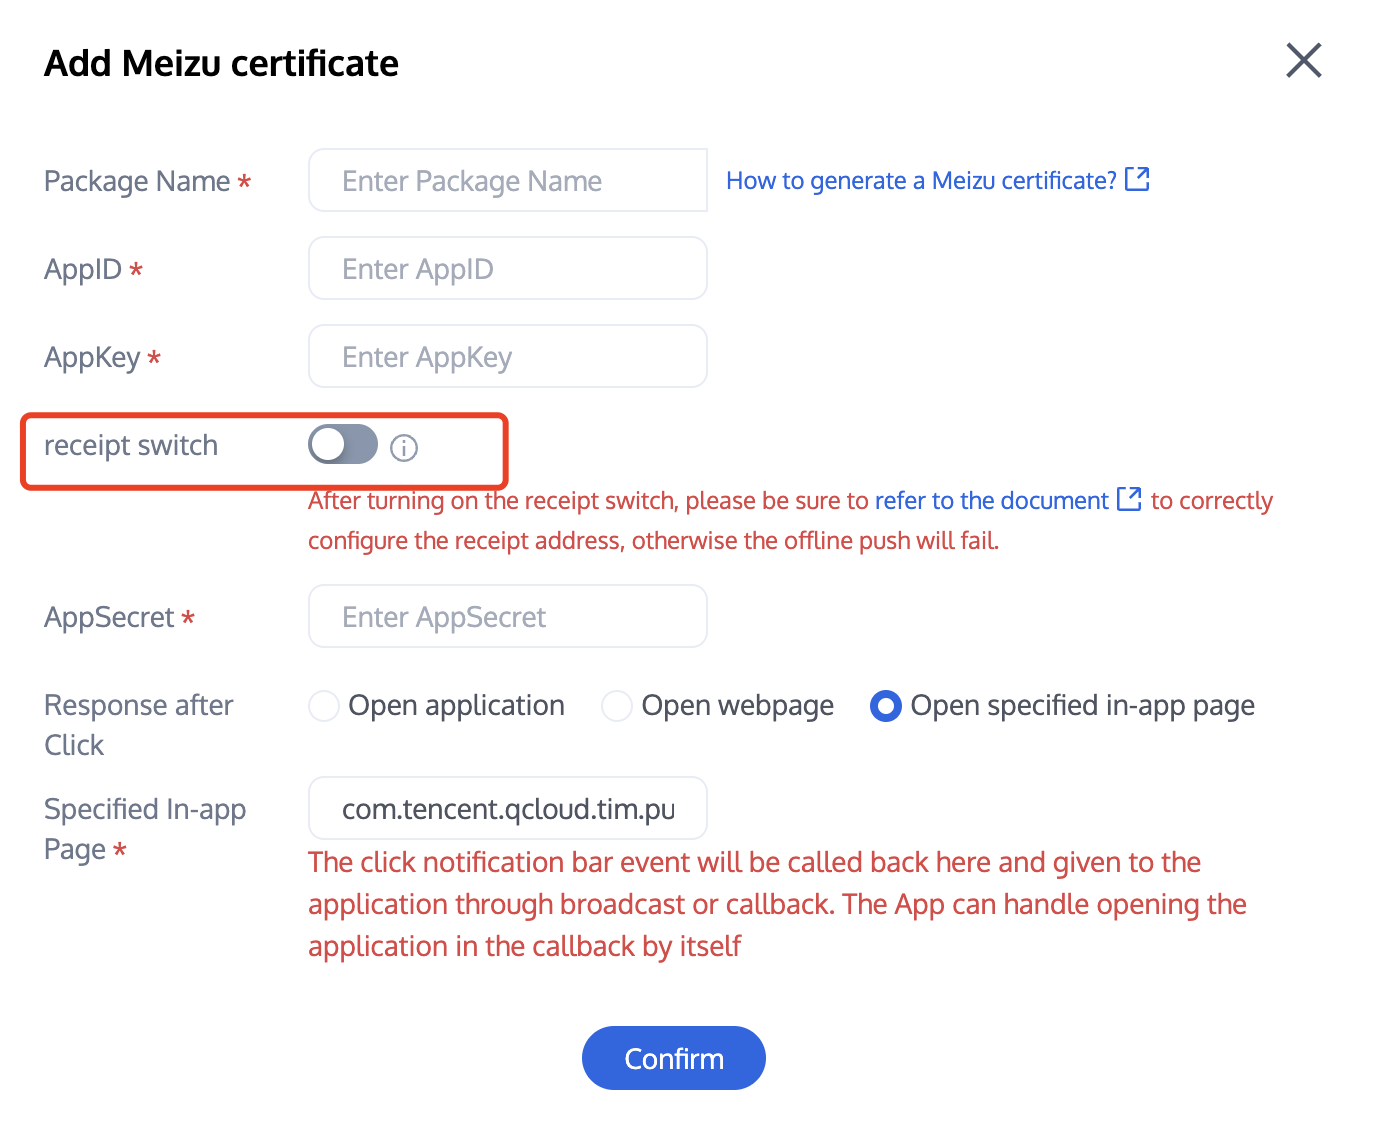
2. Configure the console to click subsequent actions with the following configuration, select open specified in-app page, do not modify and use default values.
Upon success of calling the PushManager.RegisterPush method, you can receive offline push notifications.
Note:
Note: If you have already integrated the Chat product and call this API after successful log-in, set the appKey parameter to null. Otherwise, the Chat account will be taken offline.
PushManager.RegisterPush(sdkAppId: your sdkAppId, appKey:"client key",newPushCallback(onSuccess:(data)=>{
Note: Huawei Push certificate ID <= 11344 uses Huawei Push v2 version interface with no support for reachability and Receipt Click. Please regenerate the certificate ID.
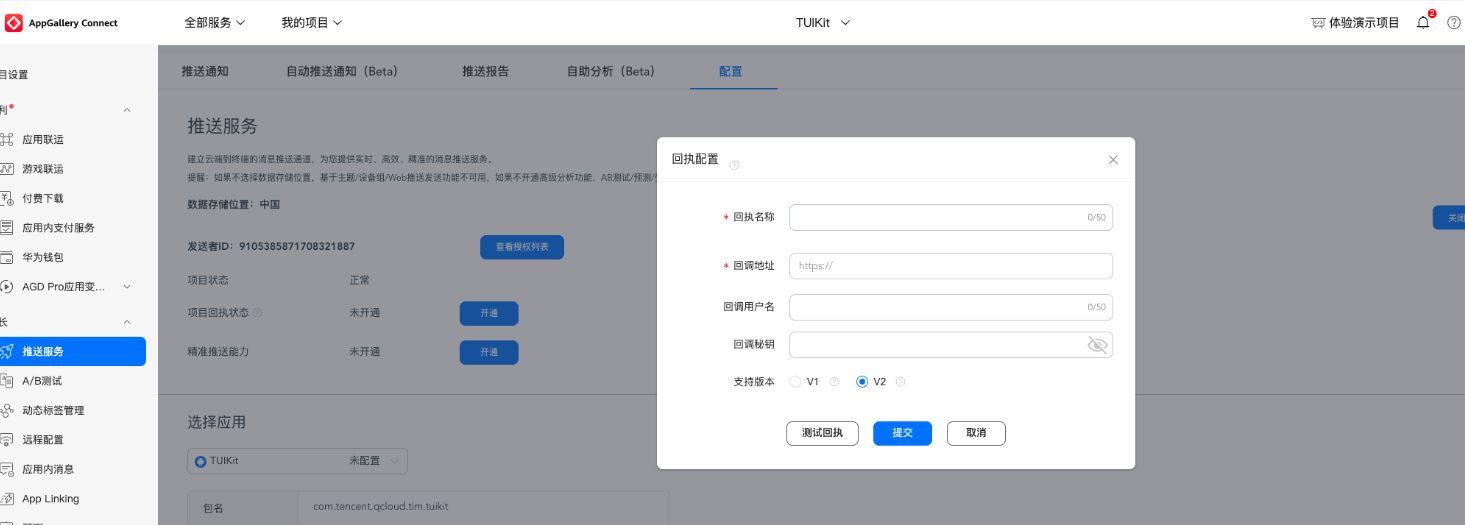
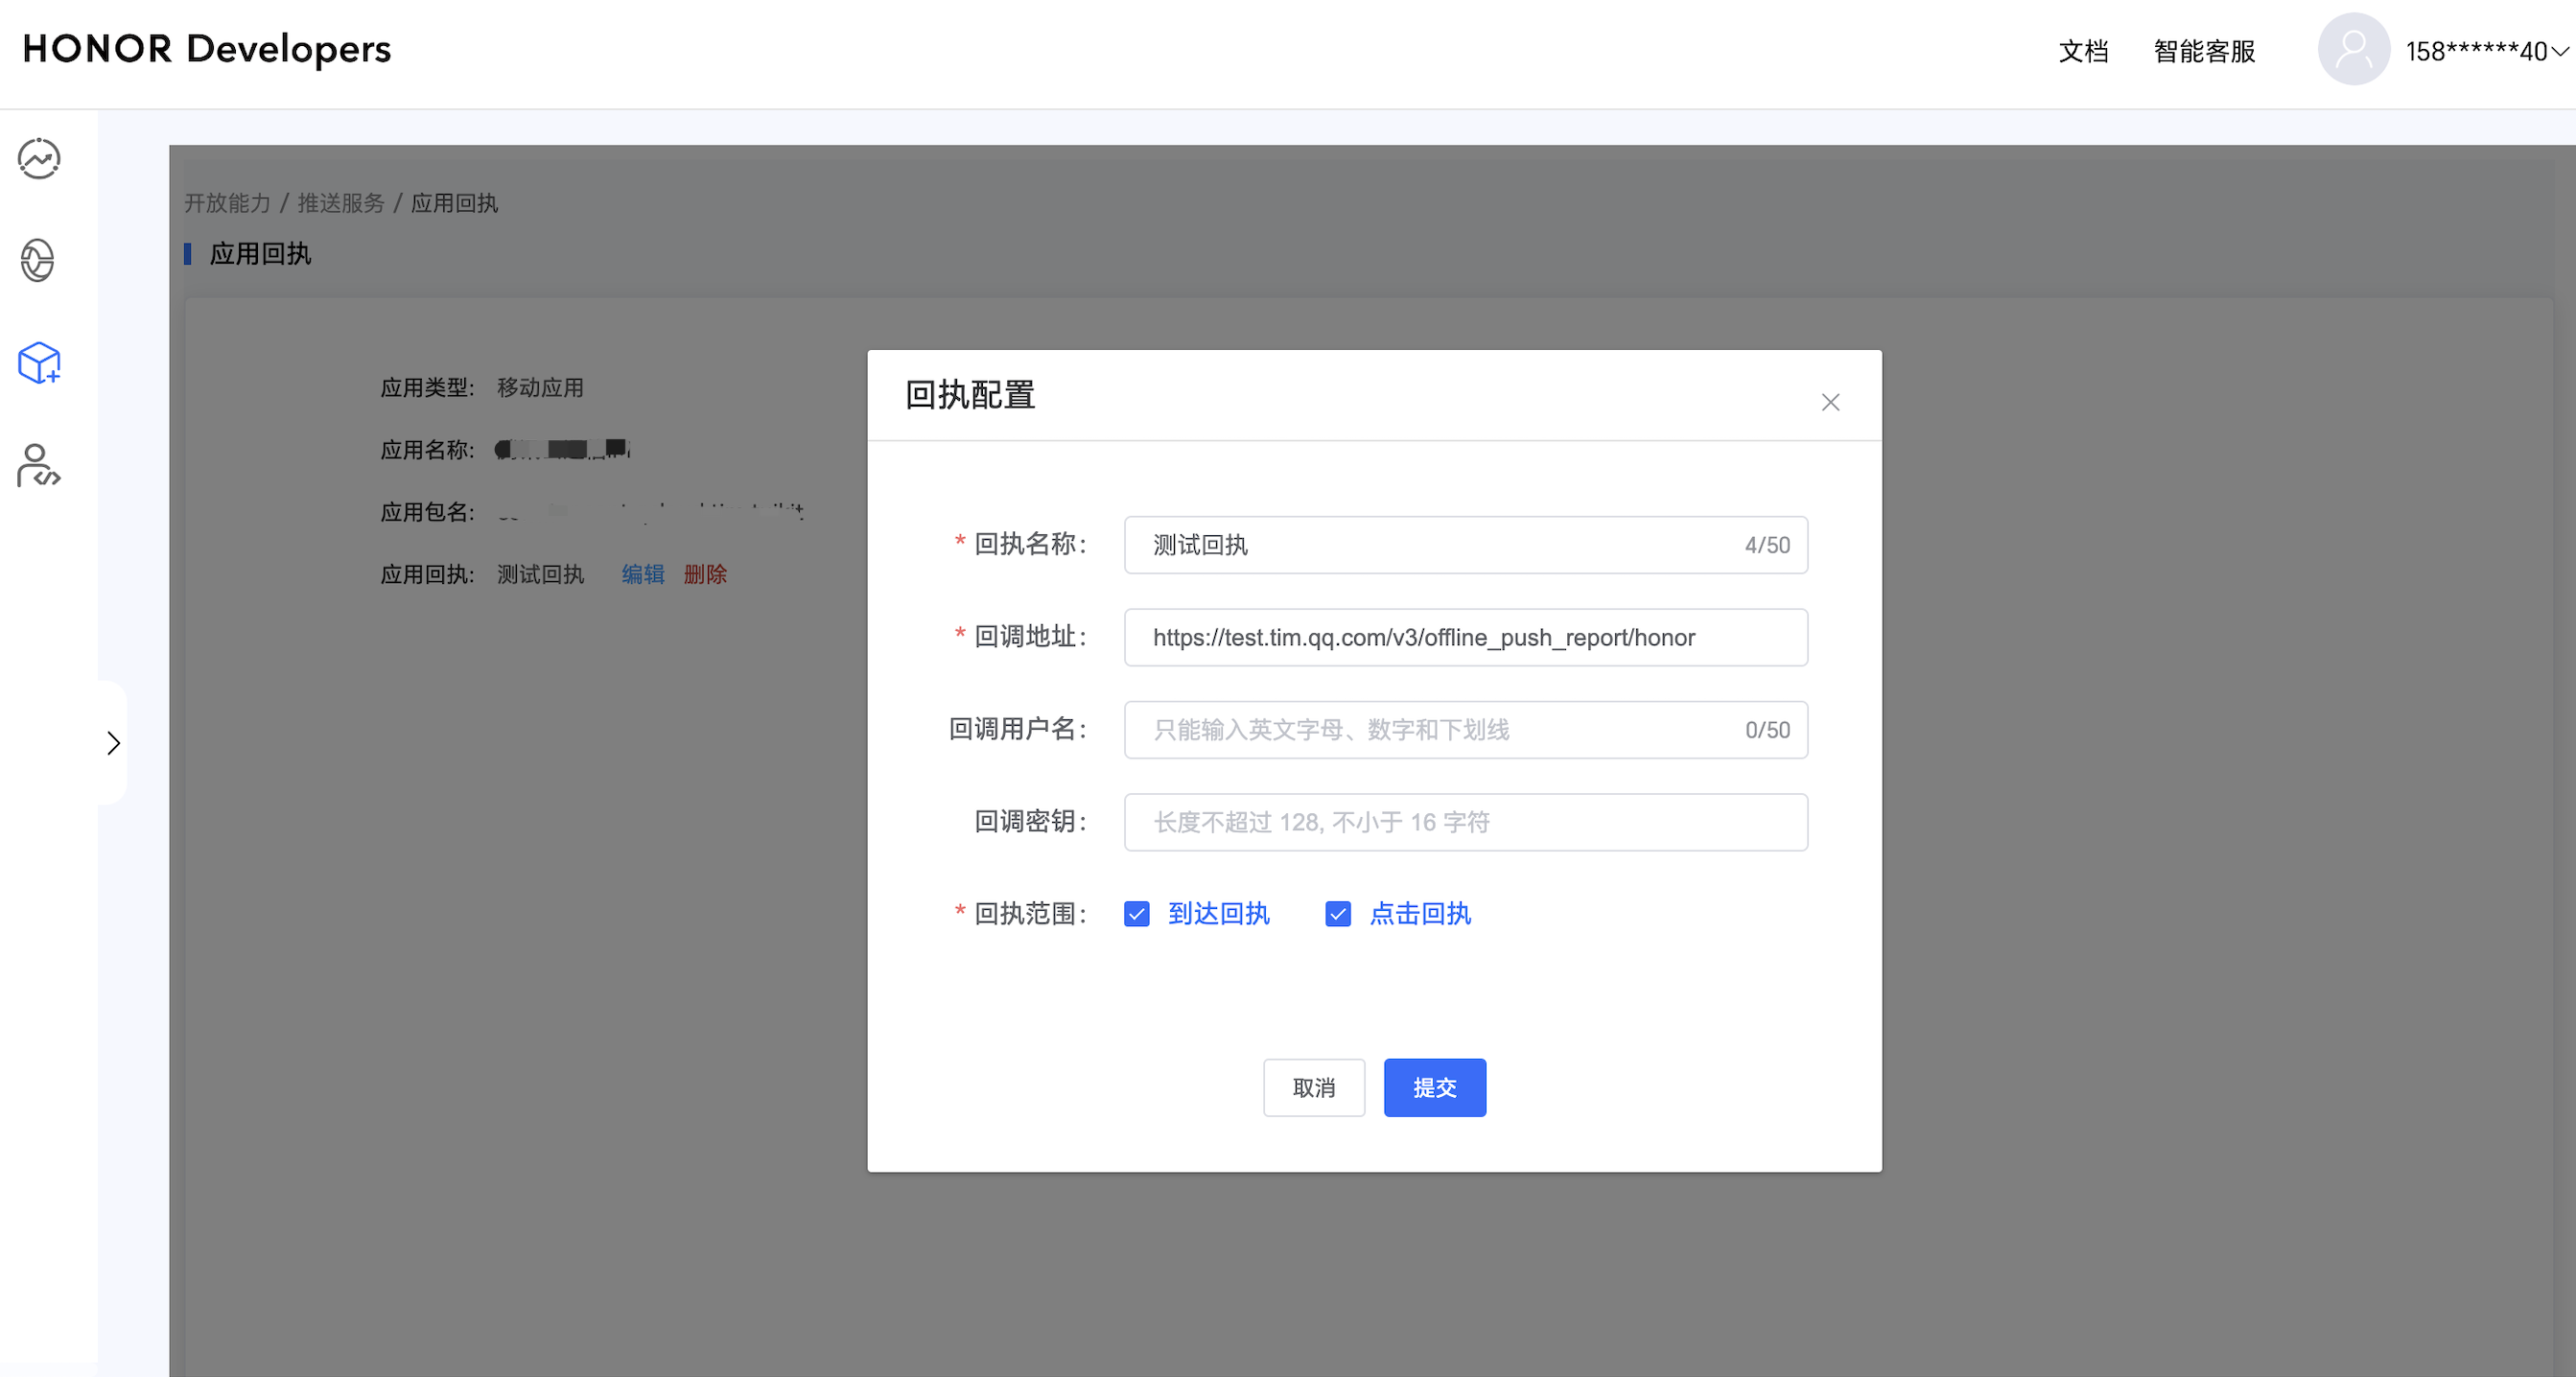
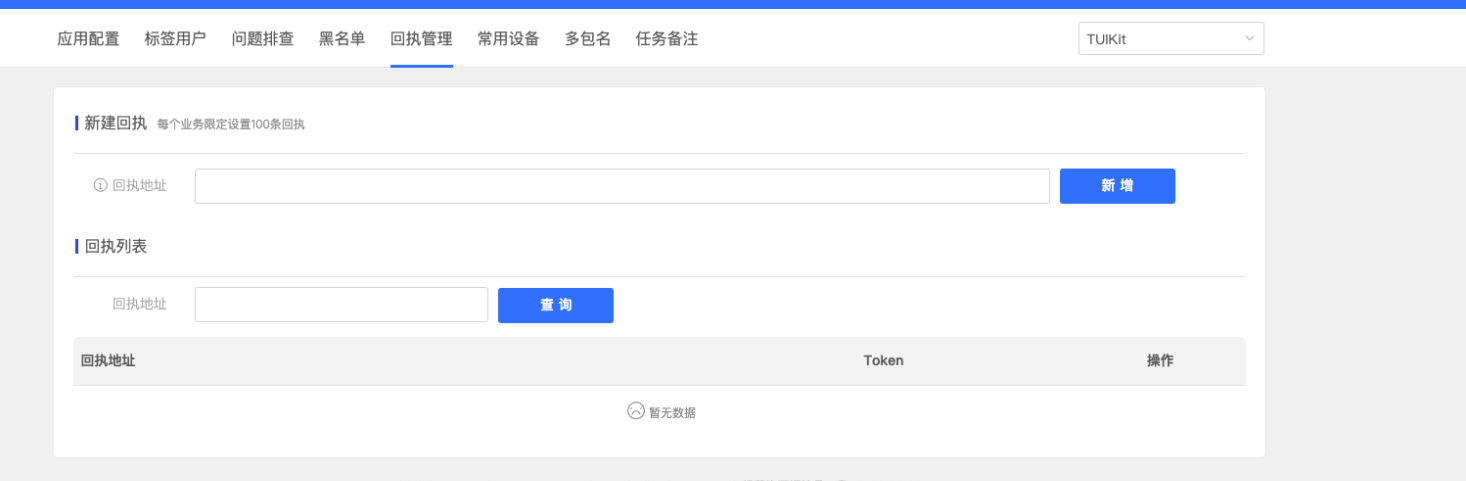
Note: After enabling the receipt switch, please ensure the receipt address is configured correctly. Without configuring or with an incorrect address, it will impact the push notification feature.
//appGroup indicates the App Group shared between the main APP and Extension. The App Groups capability needs to be configured in the main APP's Capability.
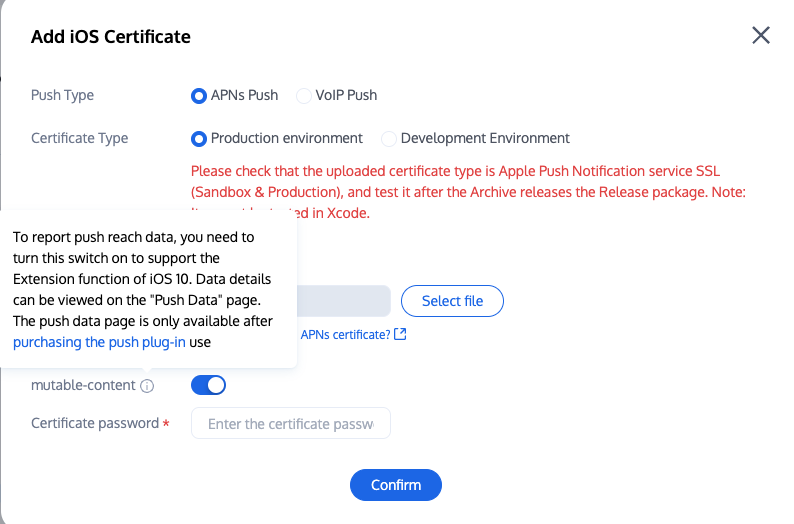
1. Report push reach data. The mutable-content switch requires enabling to support the iOS 10 Extension function.
2. Data details can be viewed on the push data page. The push data page is only available after purchasing the push plugin.
The rest support manufacturers with no need to configure. FCM does not currently support the push notification statistics feature.
Congratulations on completing the access of the push plugin. Please note: After the trial or purchase expiry of the push plugin, it will automatically stop providing push service (including regular message offline push, all users/tag push, etc.). To avoid affecting your normal business operation, please advise in advance to purchase/renew.