
Host Broadcasting
UILiveKit Voice Chat Room is a ready-to-use interface providing all the core functionalities for starting a live stream. It enables you to integrate a host broadcasting flow into your app with simple steps.Feature Overview
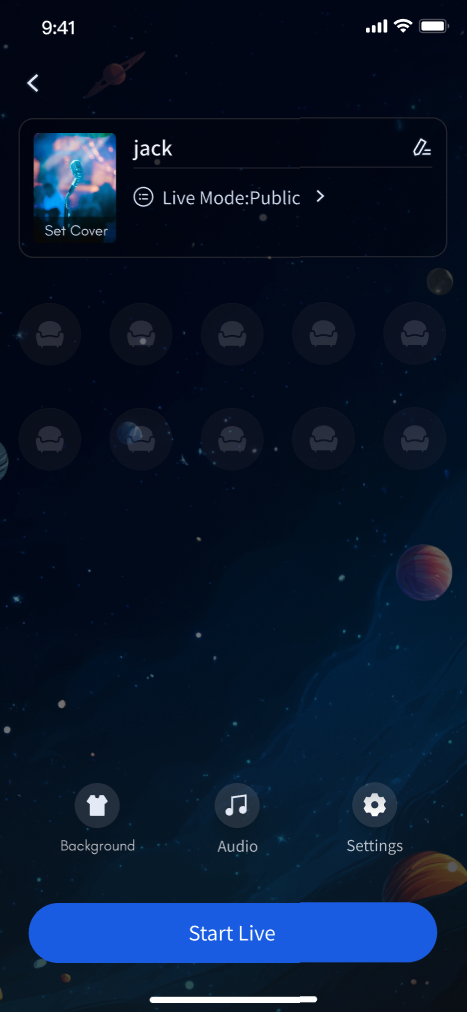
Pre-Live Preview: Allows hosts to configure personalized settings such as room name and cover image before going live.
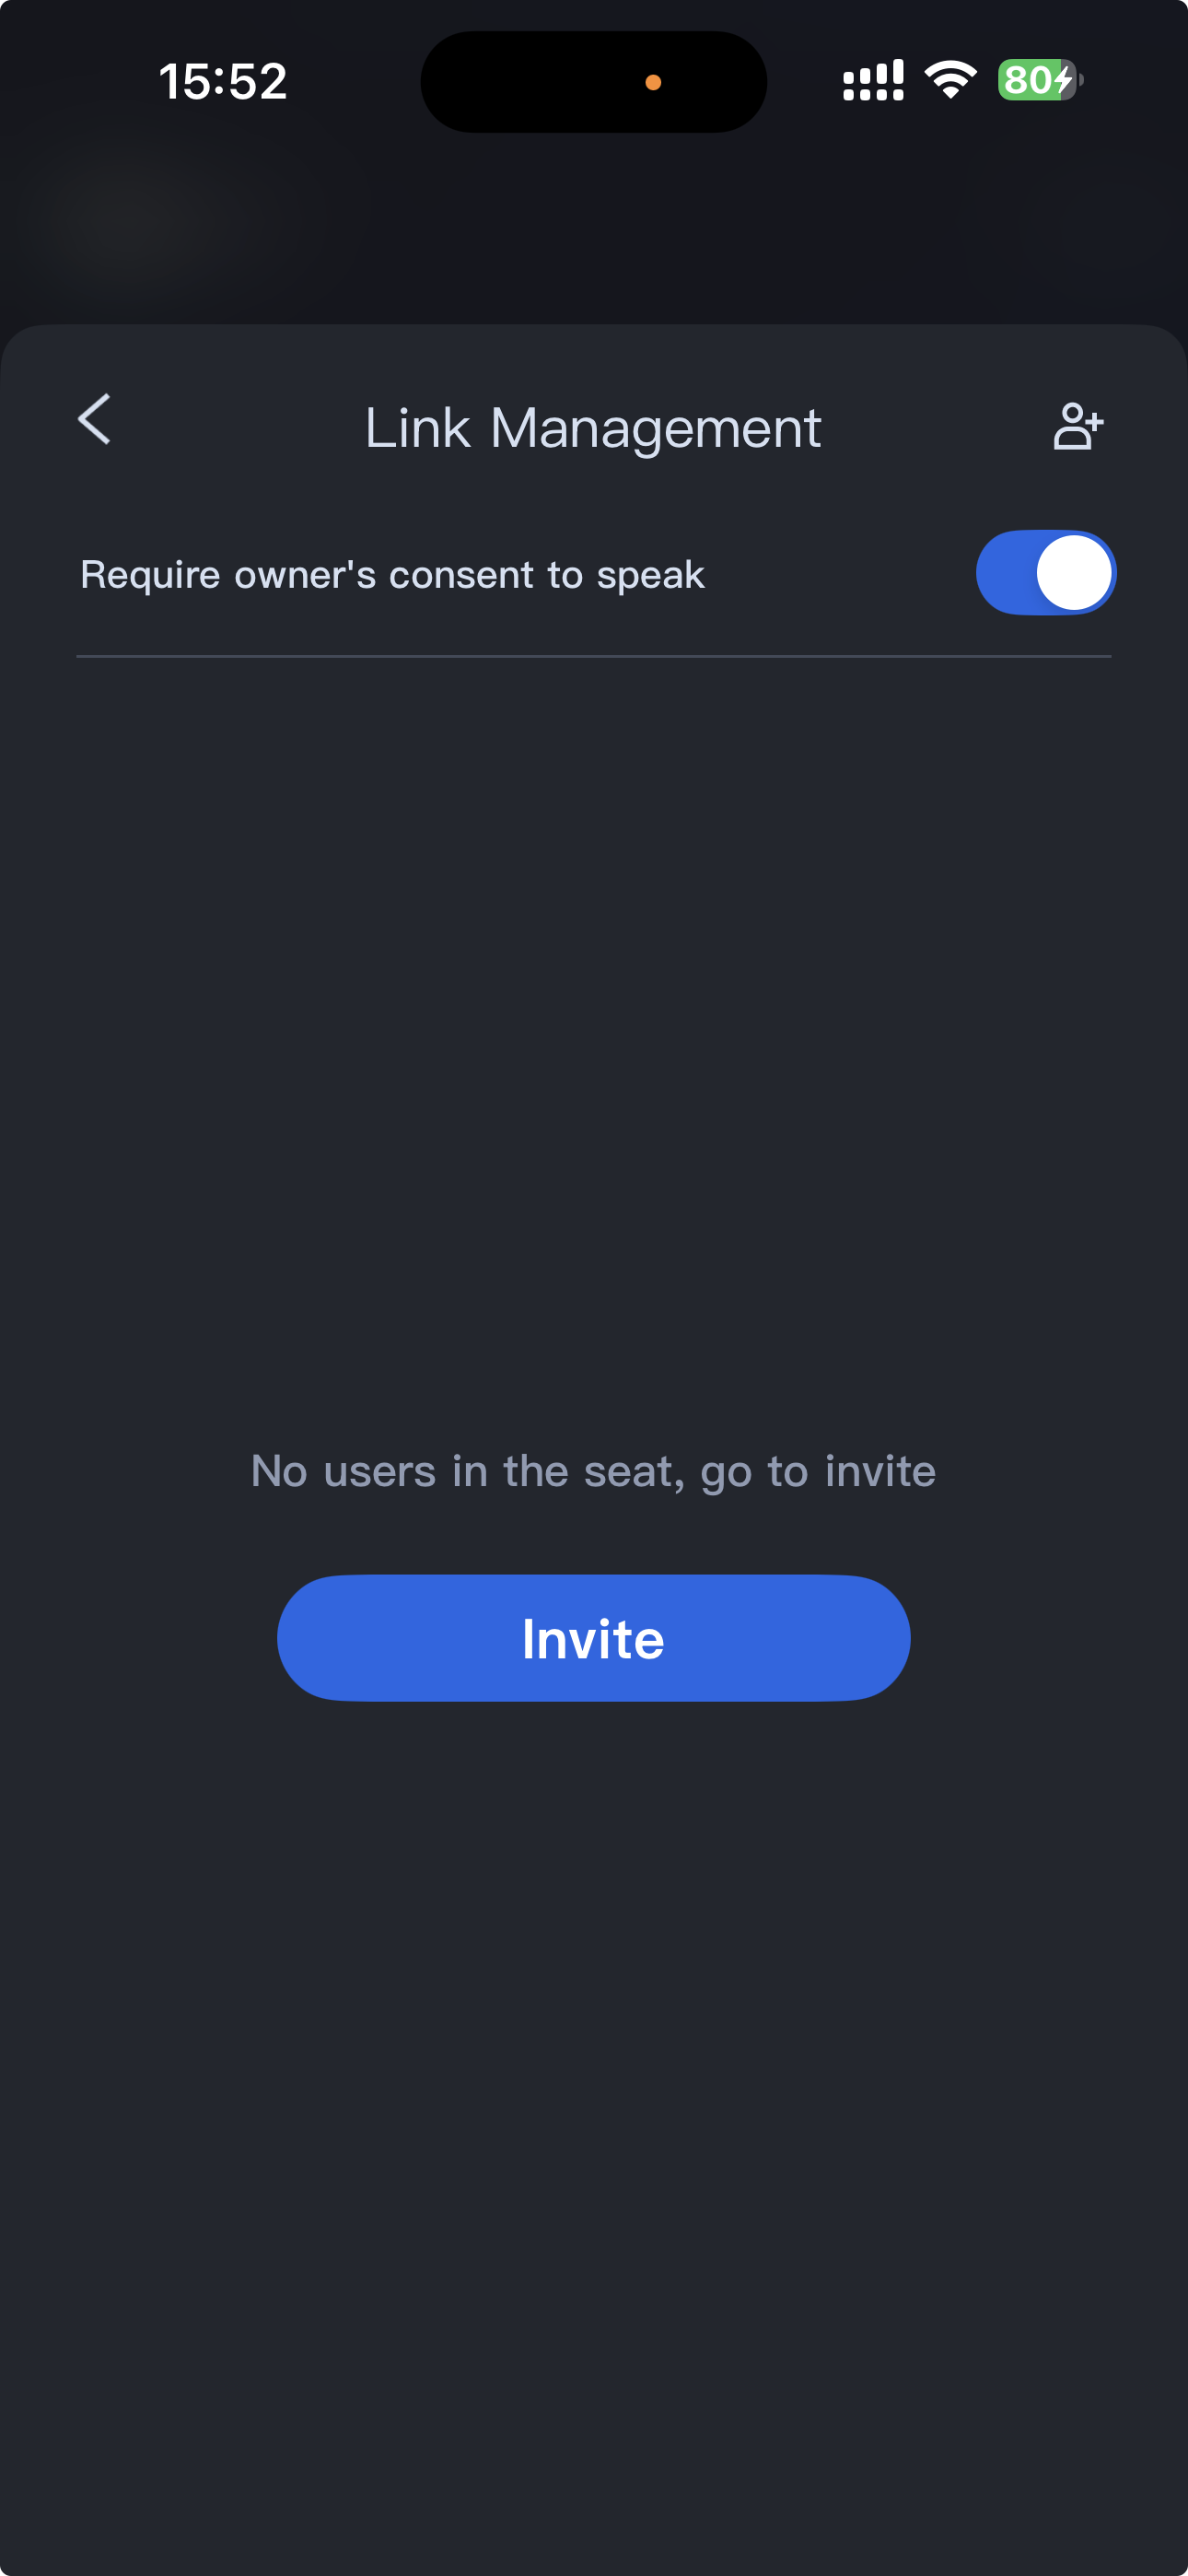
Seat Management: Supports seat management operations including taking a seat, leaving a seat, muting, and locking seats.
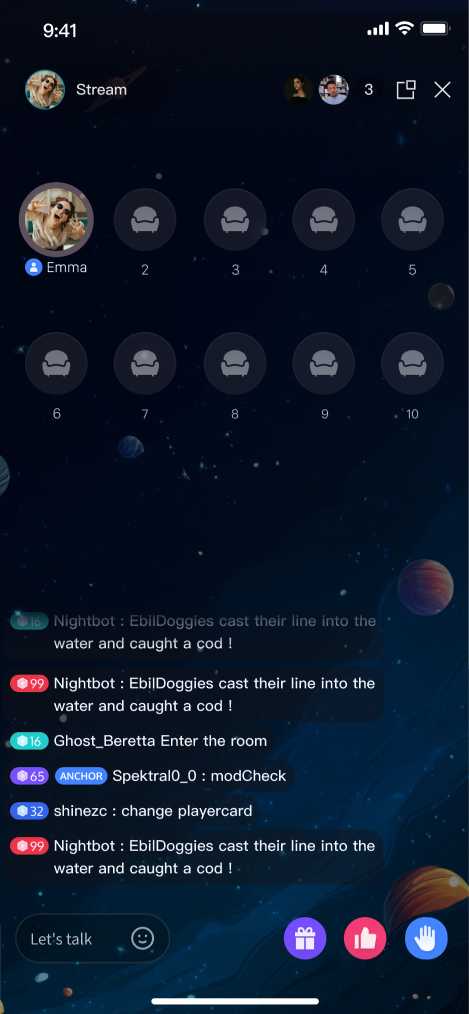
Audience Interaction: Enables interactive features such as live chat (bullet comments), virtual gifts, and likes.
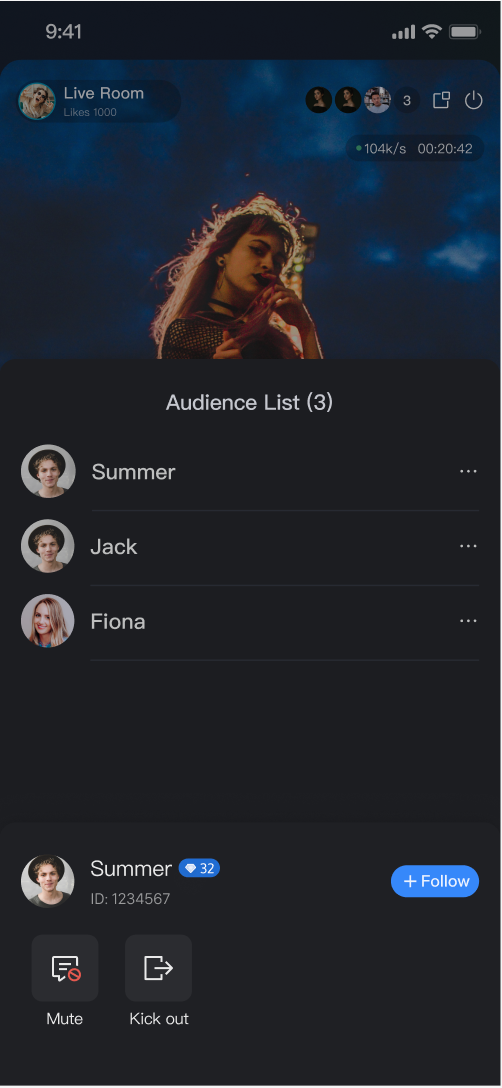
Live Room Management: Displays the online user list and provides moderation controls such as muting or removing users from the live room.
Pre-Live Preview | Seat Management | Audience Interaction | Live Room Management |
 |  |  |  |
Quick Integration
Step 1: Integrate the Component
Follow the Preparations guide to integrate
TUILiveKit.Once completed, your project will successfully introduce TUILiveKit dependency.Step 2: Add Host Page
TUIVoiceRoomWidget provides a complete UI and business logic for the host side of the voice chat room. This component does not support floating window mode. If you require floating window functionality, see Add Floating Window (Host Page). Simply configure the entry point for calling
TUIVoiceRoomWidget (based on your business logic), then use one of the following methods to navigate to the host page or embed it in your Widget tree:import 'package:tencent_live_uikit/tencent_live_uikit.dart';// Navigate to the Anchor webpageNavigator.push(context, MaterialPageRoute(builder: (BuildContext context) {final roomId = "test_voice_room_id";final params = RoomParams();params.maxSeatCount = 10;params.seatMode = TUISeatMode.applyToTake;return TUIVoiceRoomWidget(roomId: roomId, behavior: RoomBehavior.prepareCreate, params: params);}));
// --- Choose one of the following integration methods based on your Widget tree structure ---// Example parametersfinal roomId = "test_voice_room_id";final params = RoomParams();params.maxSeatCount = 10;params.seatMode = TUISeatMode.applyToTake;// [Option 1] As the only child Widget (single subtree)// Suitable for containers like Container, Padding that typically contain only one child WidgetContainer(child:TUIVoiceRoomWidget(roomId: roomId, behavior: RoomBehavior.prepareCreate, params: params) // Integrate Anchor page here)// [Option 2] As one of multiple child Widgets (multi-subtree)// Suitable for layouts like Column, Row, Stack that can contain multiple child WidgetsStack(children: [YourOtherWidget(), // Your other child WidgetTUIVoiceRoomWidget(roomId: roomId, behavior: RoomBehavior.prepareCreate, params: params), // Integrate Anchor page hereYourOtherWidget(), // Your other child Widget])
The code above shows how to add the host page. After launching, you can see the pre-stream preview as shown in the Feature Overview section.
TUIVoiceRoomWidget Parameter Reference
Parameter Name | Type | Description | |
roomId | | String | Globally unique live streaming room ID. |
behavior | | RoomBehavior | Enter Room behavior: autoCreate: Automatically create a live streaming room and enter the room.prepareCreate: Enter the pre-live preview page first, then create and enter the live room after the user clicks Start Live.join: Audience members enter the room. |
params | | RoomParams | Anchor Live streaming Parameter. See RoomParams below. |
RoomParams Reference
Parameter Name | Type | Description |
maxSeatCount | int | Maximum number of seats in the live room. |
seatMode | TUISeatMode | Audience seat mode: applyToTake: Audience must apply and be approved by the host to take a seat.freeToTake: Audience can take a seat freely without host approval. |
Step 3: (Optional) Add Floating Window
TUIVoiceRoomOverlay provides a host page with floating window support. During live streaming, you can switch to in-app floating window mode. TUIVoiceRoomOverlay is built using Flutter’s official Overlay API. To integrate:1. Navigate to Floating Window
At the entry point where the host starts streaming (based on your business logic), use the following code to navigate to the host page:
import 'package:tencent_live_uikit/tencent_live_uikit.dart';// Navigate to the Anchor webpageNavigator.push(context, MaterialPageRoute(builder: (BuildContext context) {final roomId = "test_voice_room_id";final params = RoomParams();params.maxSeatCount = 10;params.seatMode = TUISeatMode.applyToTake;returnTUIVoiceRoomOverlay(roomId: roomId, behavior: RoomBehavior.prepareCreate, params: params);}));
Note:
1.
TUIVoiceRoomOverlay does not support embedding as a child widget into container widgets (such as Container, Stack). It can only be used as a standalone page redirect. Because it internally uses Overlay, LiveKit needs to control the entire Overlay webpage to switch the floating window mode.2. Voice chat scenarios do not support out-of-application floating window mode.
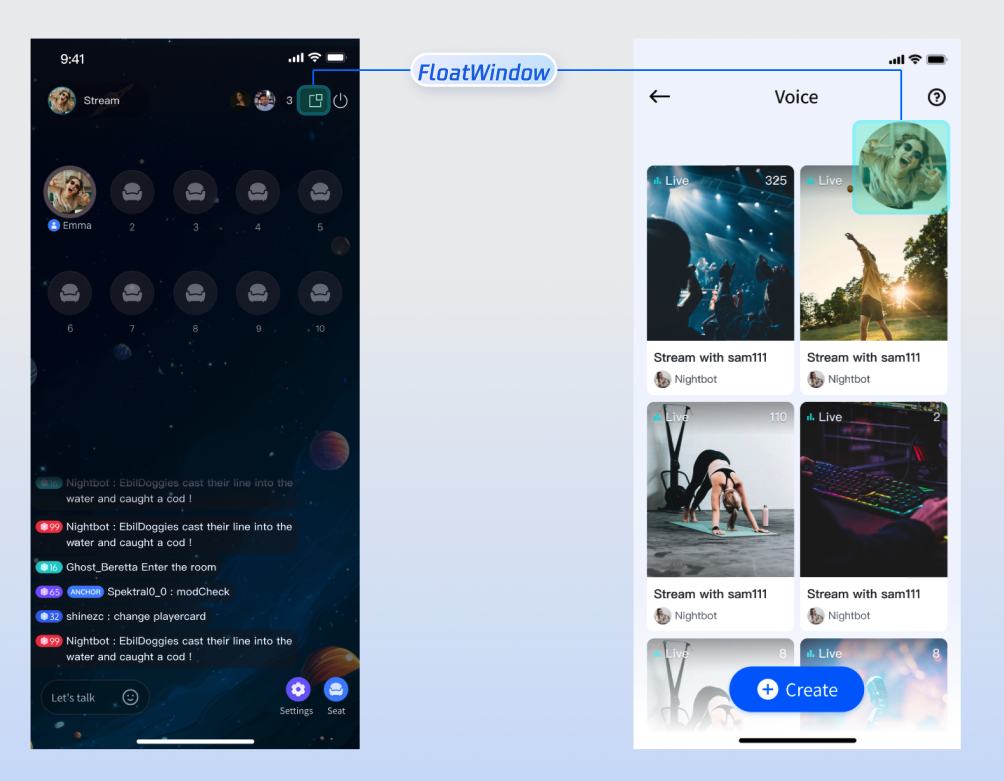
Floating Window Mode Effect
Click the floating window button at the top right of the anchor page to enter floating window mode, as shown below:
Custom UI Layout
TUILiveKit supports flexible customization of the host setup and live pages, allowing you to adjust the layout and hide/show functional modules based on your business requirements.
Text Customization (ARB)
TUILiveKit uses ARB files and the Flutter standard internationalization (i18n) solution to manage the UI text display. You can directly edit the ARB files in the
livekit/lib/common/language/i10n/ directory to modify the text: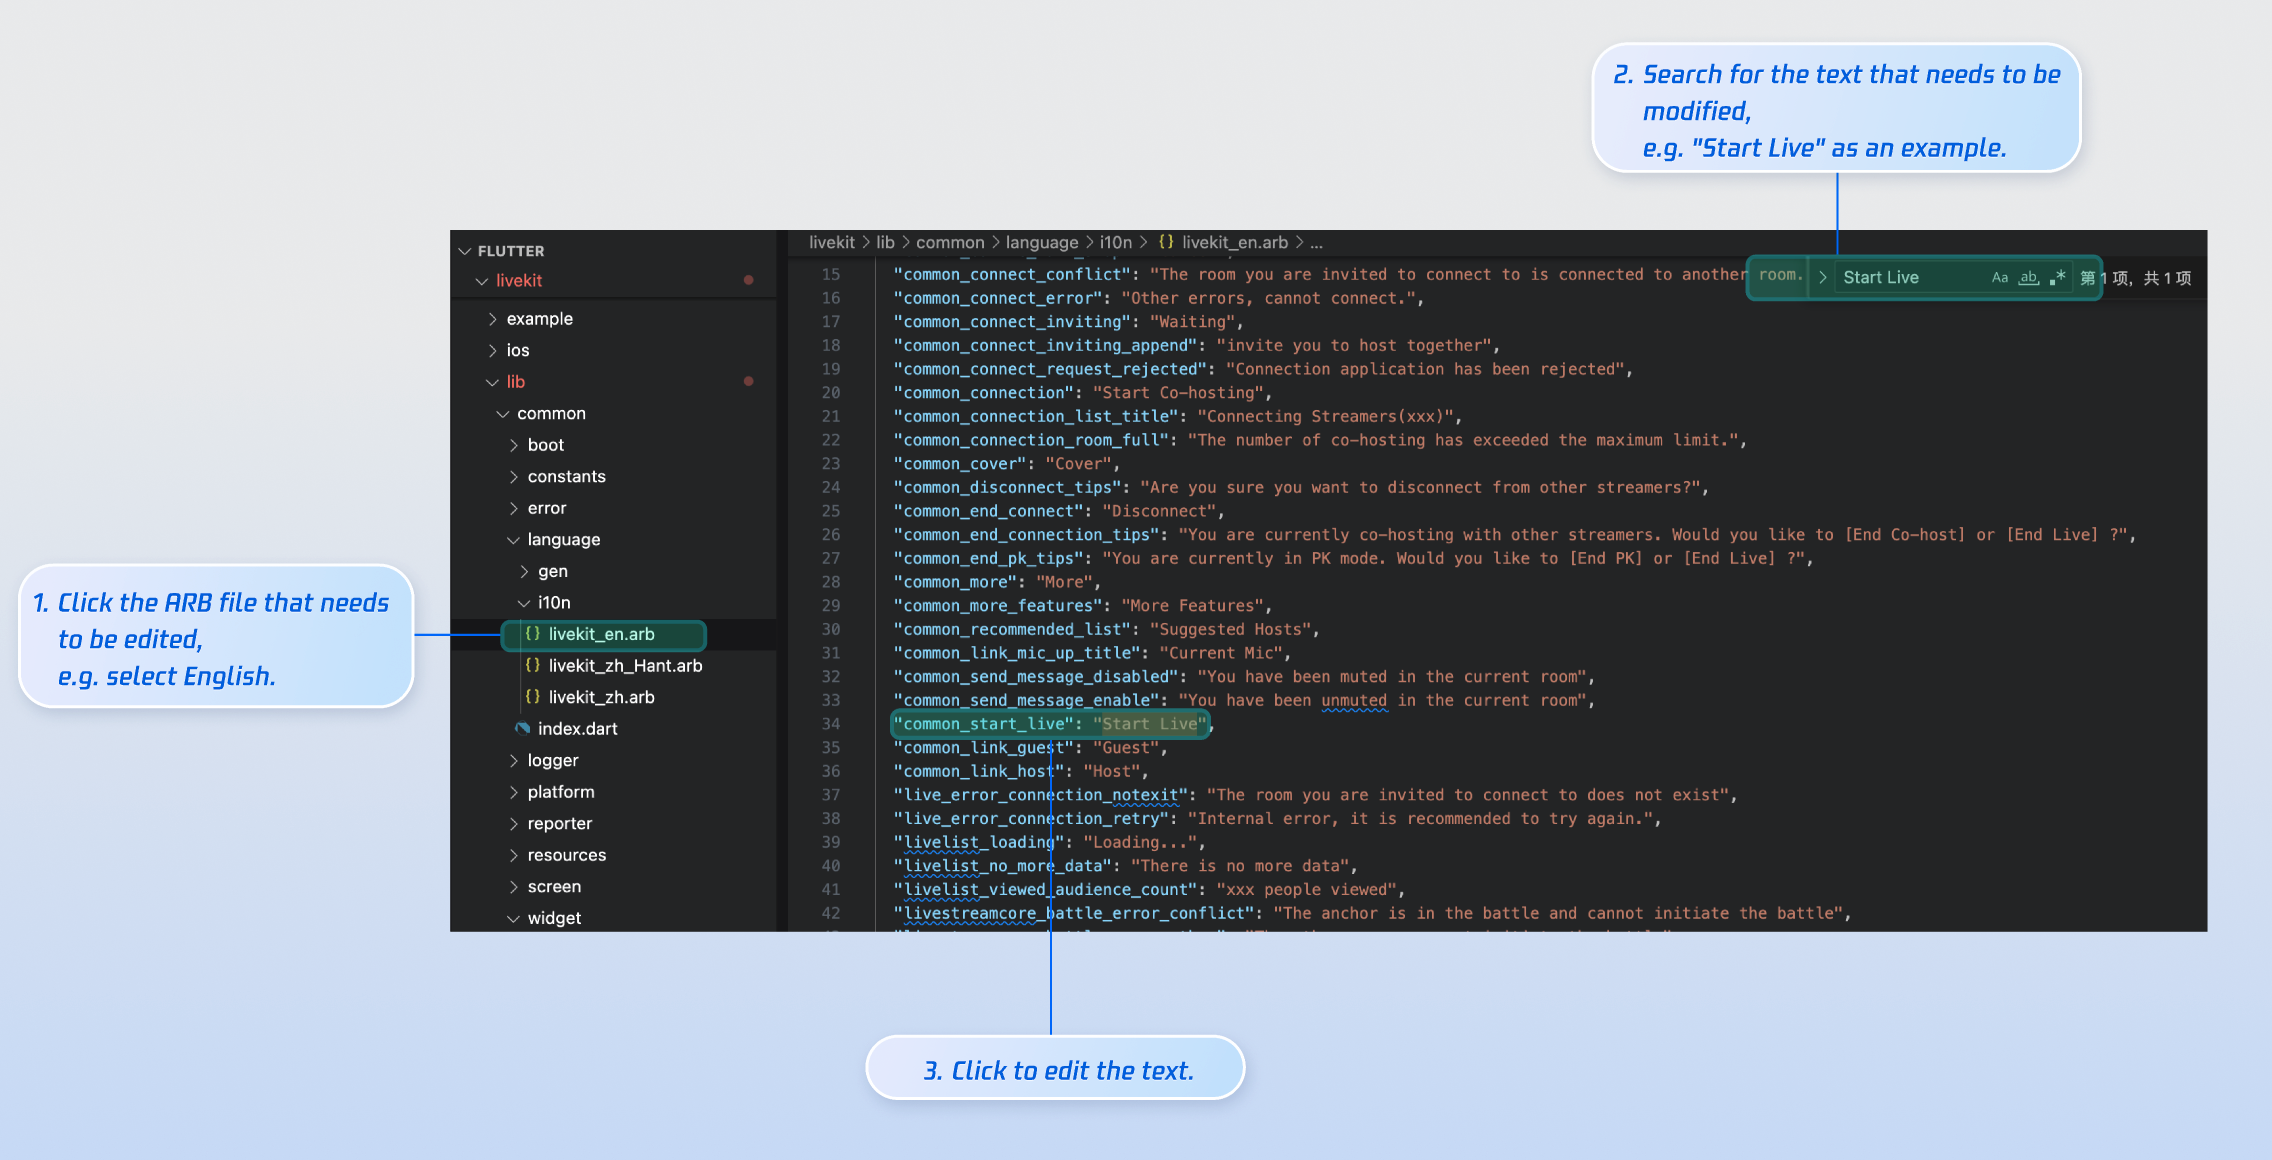
livekit_en.arb: English Text.livekit_zh.arb: Simplified Chinese Text.livekit_zh_Hant.arb: Traditional Chinese Text.After editing, run
flutter gen-l10n in your terminal to regenerate the localization code. Once complete, the files in livekit/lib/common/language/gen/ will be updated.Icon Customization
TUILiveKit’s UI image assets are stored in the
livekit/assets/images/ directory. To update icons, simply replace the PNG files in this folder.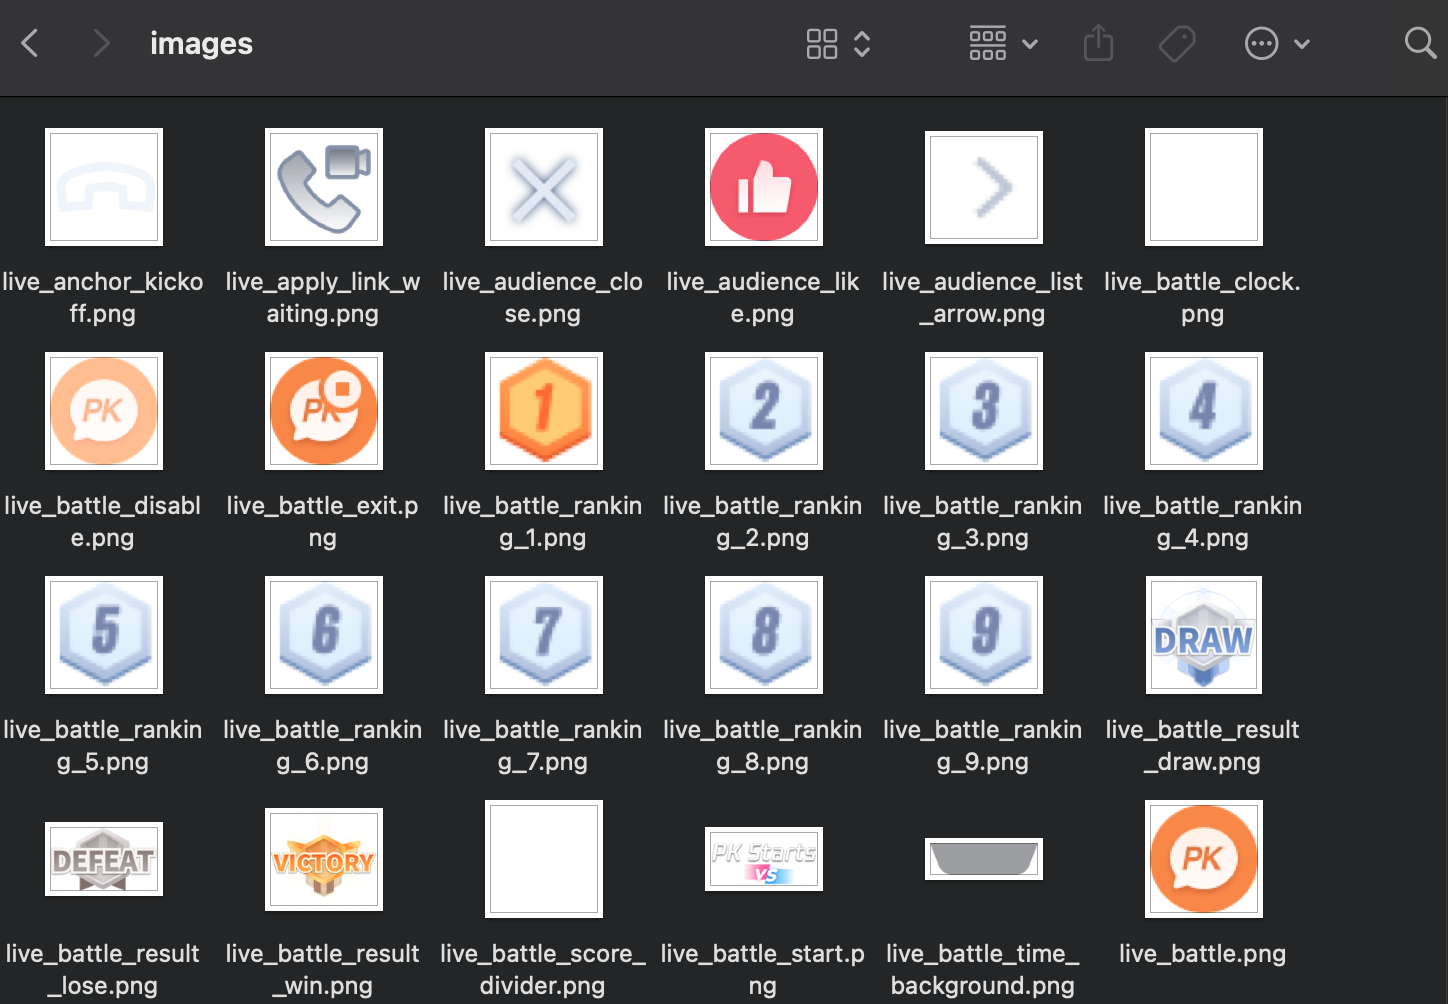
Rebuild and run your app to see the updated icons.
Next Steps
You have now successfully integrated host live streaming. Next, implement features such as audience viewing, live stream list and gift system. See the table below for details:
Feature | Description | Integration Guide |
Audience Viewing | Enables users to join as audience members, listen to the host, take seats, and view live chat (bullet comments). | |
Live Stream List | Displays a list of live rooms and their details. | |
Gift System | Support custom gift asset configuration, billing system integration, and gift-sending in PK scenarios. |

