Tencent Cloud에서 제공하는 오디오/비디오 서비스를 사용하기 전에 콘솔로 이동하여 애플리케이션에 대한 오디오/비디오 서비스를 활성화해야 합니다. 구체적인 절차는 서비스 활성화(TUILiveKit)를 참조하십시오.
단계 2: TUILiveKit 컴포넌트 가져오기
CocoaPods를 사용하여 컴포넌트를 가져옵니다. 문제가 발생하면 먼저 환경 준비를 참조하십시오. 컴포넌트 가져오기 절차는 다음과 같습니다:
1. Podfile 파일에 pod 'TUILiveKit' 의존성을 추가하세요. 문제가 발생하면 Example 프로젝트를 참조하세요.
target 'xxxx'do
...
...
pod 'TUILiveKit'
end
Podfile 파일이 없는 경우, 먼저 단말 cd를 통해 xxxx.xcodeproj 디렉토리로 이동한 다음, 다음 명령어를 통해 생성하십시오:
pod init
2. 단말에서 먼저 cd를 통해 Podfile 디렉토리로 이동한 다음, 다음 명령어를 실행하여 컴포넌트를 설치하십시오.
pod install
TUILiveKit 최신 버전을 설치할 수 없는 경우, Podfile.lock 및 Pods를 삭제한 후 다음 명령어를 실행하여 로컬 CocoaPods 저장소 목록을 업데이트하십시오.
pod repo update
그 후 다음 명령어를 실행하여 컴포넌트 라이브러리의 Pod 버전을 업데이트하십시오.
pod update
3. 먼저 컴파일 및 실행하여 문제가 발생하는지 확인하십시오. 문제 발생 시 자주 묻는 질문을 참조하십시오. 여전히 문제가 해결되지 않으면, Example 프로젝트를 실행해 보십시오. 통합 및 사용 중 문제가 발생하면, 피드백을 주시면 감사합니다.
단계 3: 프로젝트 구성
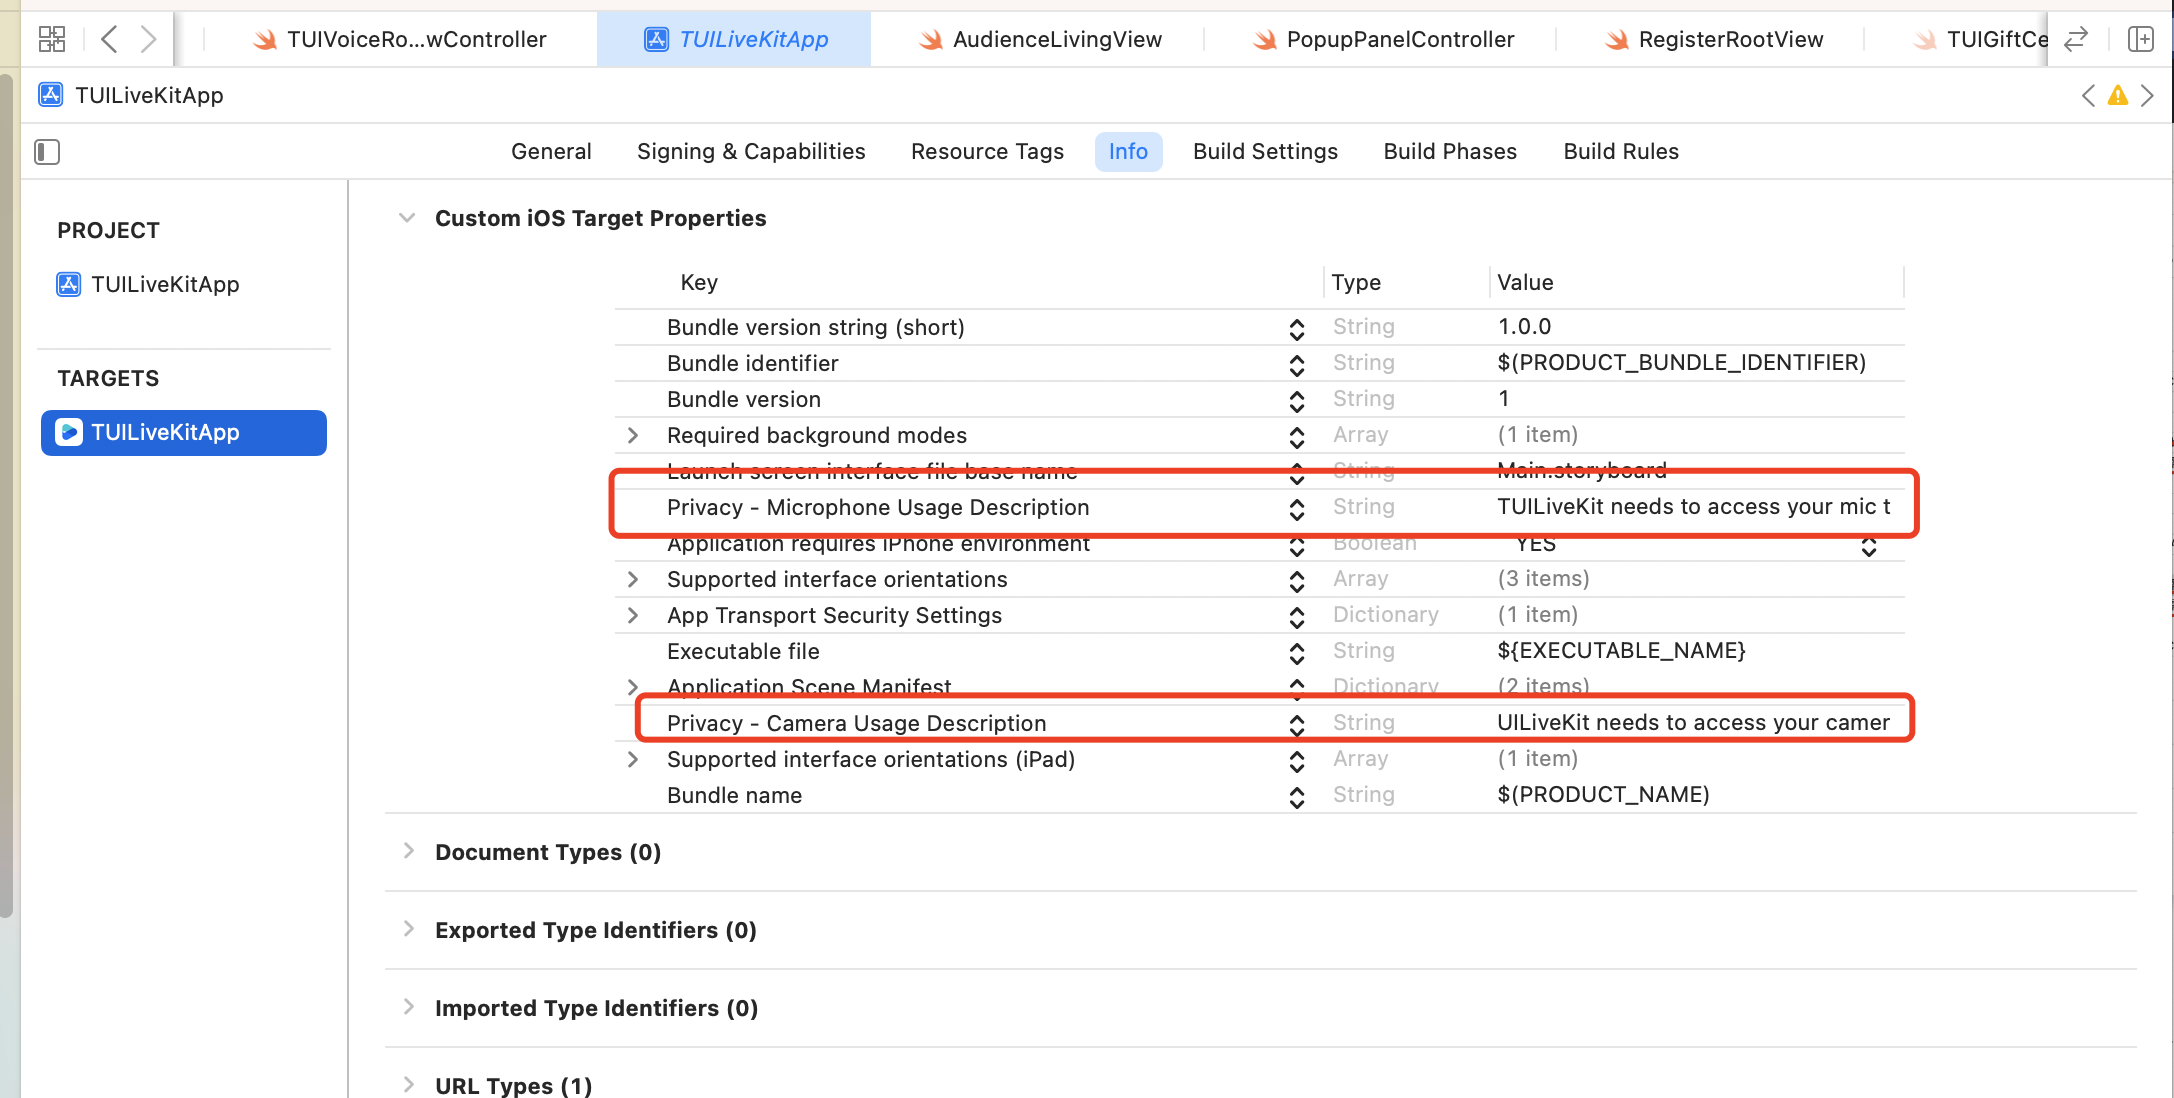
오디오/비디오 기능을 사용하려면 마이크와 카메라 사용 권한이 필요합니다. App의 Info에 다음 두 항목을 추가하여 각각 마이크와 카메라 권한 요청 시 시스템 팝업 대화상자의 메시지를 설정하십시오.
<key>NSCameraUsageDescription</key>
<string>TUILiveKit이 카메라 권한을 필요로 합니다. 허용하면 녹화된 영상에 화면이 표시됩니다.</string>
<key>NSMicrophoneUsageDescription</key>
<string>TUILiveKit이 마이크 권한을 필요로 합니다. 허용하면 녹화된 영상에 소리가 포함됩니다.</string>
단계 4: 로그인
프로젝트에 다음 코드를 추가하세요. 이 코드는 TUICore에서 관련 인터페이스를 호출하여 TUI 컴포넌트의 로그인을 완료하는 역할을 합니다. 이 단계는 매우 중요하며, 로그인에 성공해야만 TUILiveKit에서 제공하는 다양한 기능을 정상적으로 사용할 수 있습니다. 따라서 관련 매개변수가 올바르게 구성되었는지 차분하게 확인해 주세요:
매개변수 설명
여기서는 login 함수에 필요한 몇 가지 주요 매개변수에 대해 자세히 설명합니다:
SDKAppID: 서비스 활성화에서 이미 획득한 내용으로 여기서는 자세히 설명하지 않습니다.
UserID: 현재 사용자의 ID, 문자열 형식으로 영문자(a-z 및 A-Z), 숫자(0-9), 하이픈(-) 및 밑줄(_)만 포함할 수 있습니다.
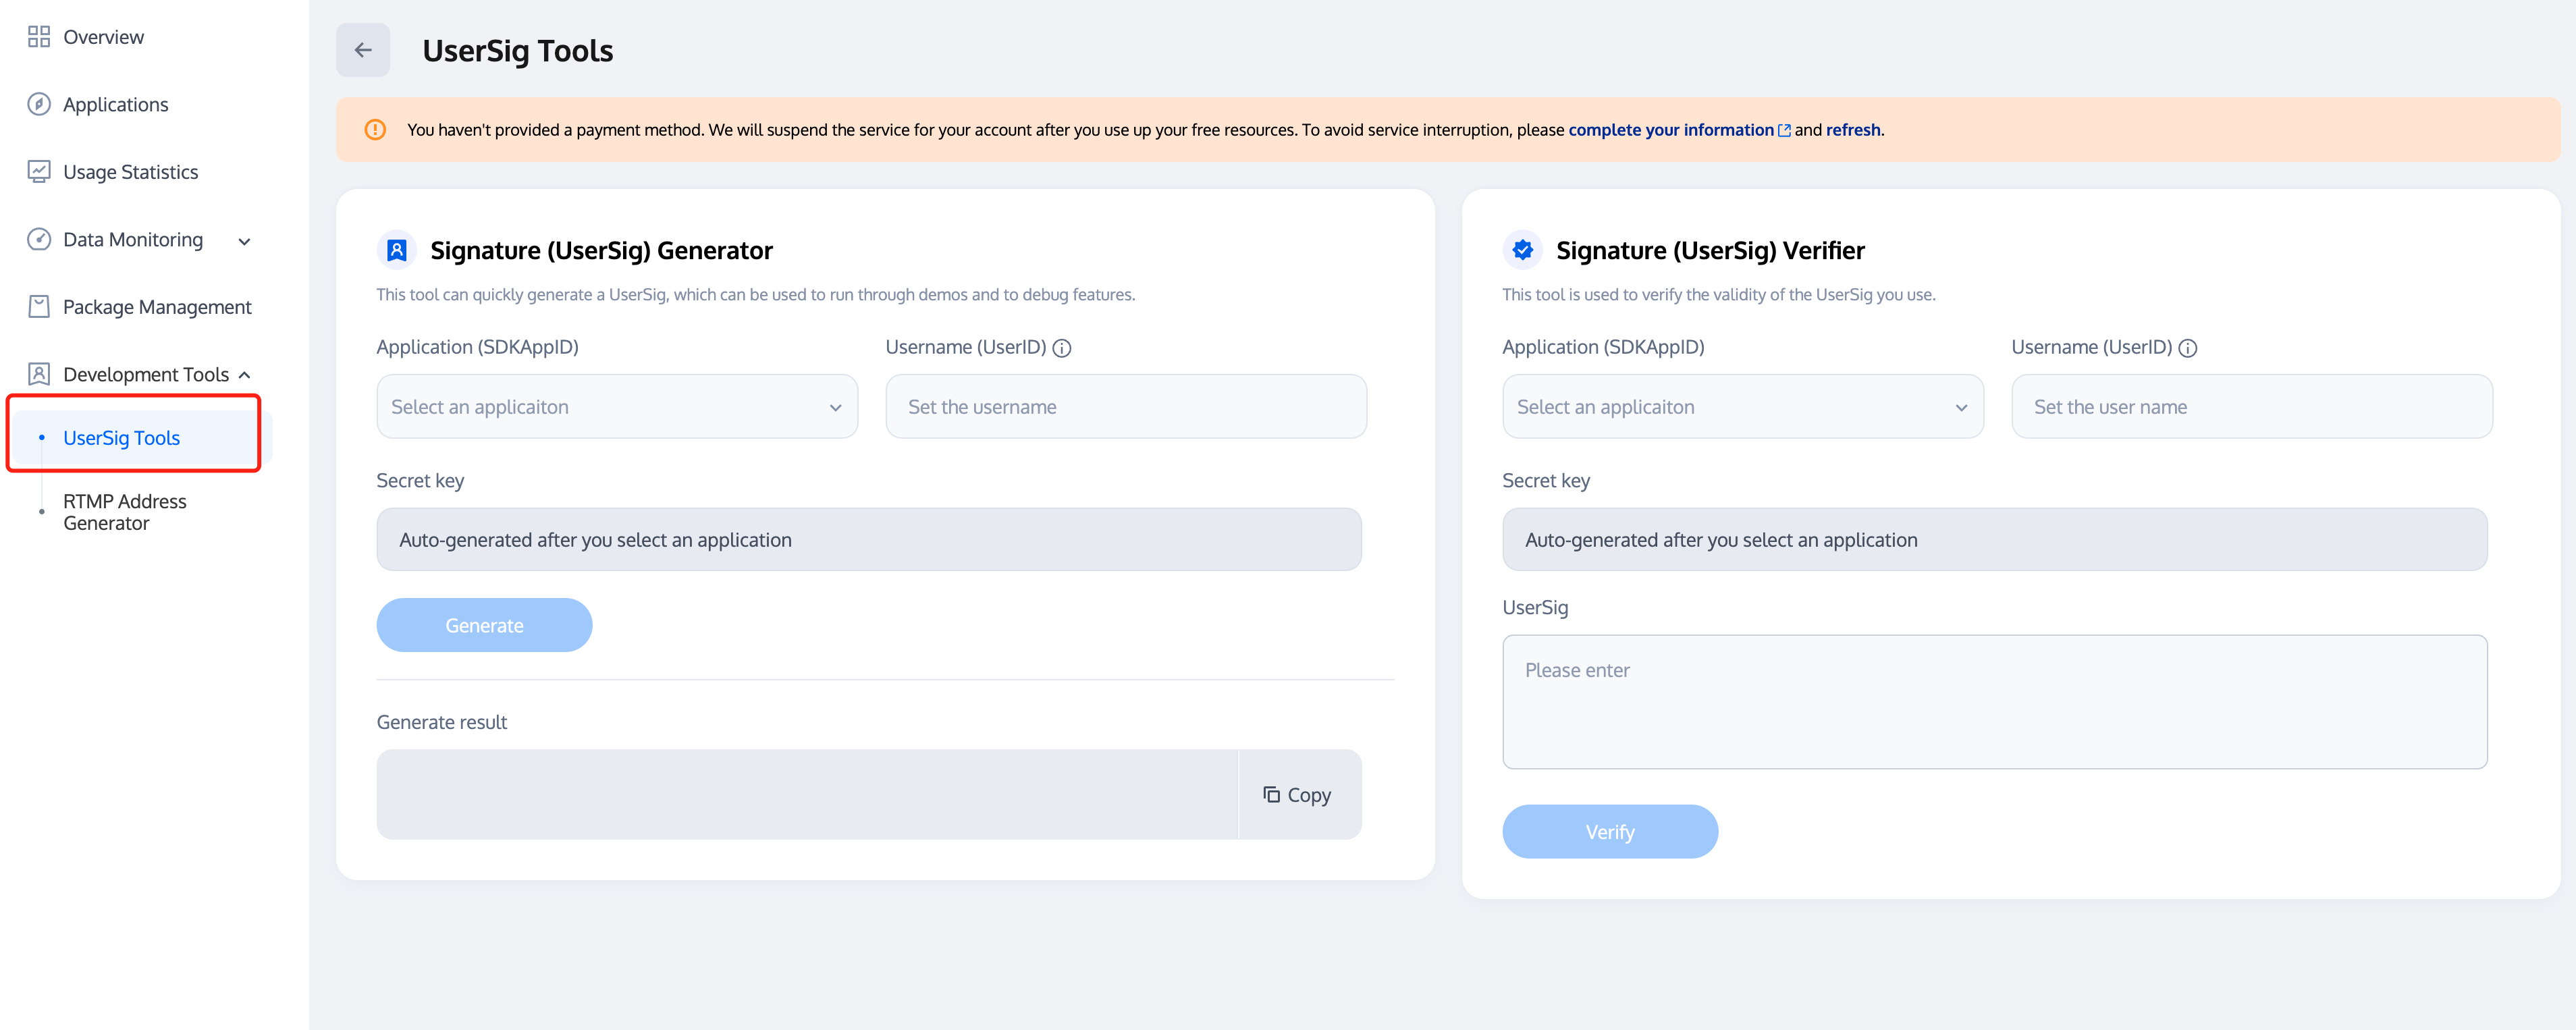
UserSig: 서비스 활성화에서 획득한 SDKSecretKey를 사용하여 SDKAppID, UserID 등의 정보를 암호화하여 UserSig를 얻을 수 있습니다. 이것은 Tencent Cloud가 현재 사용자의 TRTC 서비스 이용 가능 여부를 확인하기 위한 인증용 티켓입니다. 콘솔 왼쪽 프로젝트 메뉴의 UserSig 툴을 통해 임시로 사용할 수 있는 UserSig를 생성할 수 있습니다.
userSig가 암호키(SecretKey)로 잘못 구성되었습니다. userSig는 SecretKey를 사용하여 SDKAppID, userID 및 만료 시간 등의 정보를 암호화하여 얻은 것으로, SecretKey를 직접 userSig로 구성하는 것이 아닙니다.
userSig가 "1", "123", "111" 등 간단한 문자열로 설정되었습니다. TRTC는 동일한 UserID의 다중 로그인을 지원하지 않으므로, 여러 사람이 협업할 때 이와 같은 userID는 동료에 의해 쉽게 사용되어 로그인 실패를 유발할 수 있습니다. 따라서 디버깅 시 인식이 용이한 userID를 설정하는 것을 권장합니다.
Github의 예제 코드에서 genTestUserSig 함수를 사용해 로컬에서 userSig를 계산하는 것은 현재의 통합 과정을 빠르게 진행하기 위한 것입니다. 하지만 이 방법은 SecretKey를 앱의 코드에 노출시키게 되어 향후 업그레이드 및 SecretKey 보호에 불리합니다. 따라서 userSig 계산 로직을 서버 측에 배치하고, App이 매번 TUILiveKit 컴포넌트를 사용할 때마다 서버에 실시간으로 계산된 userSig를 요청할 것을 강력히 권장합니다.
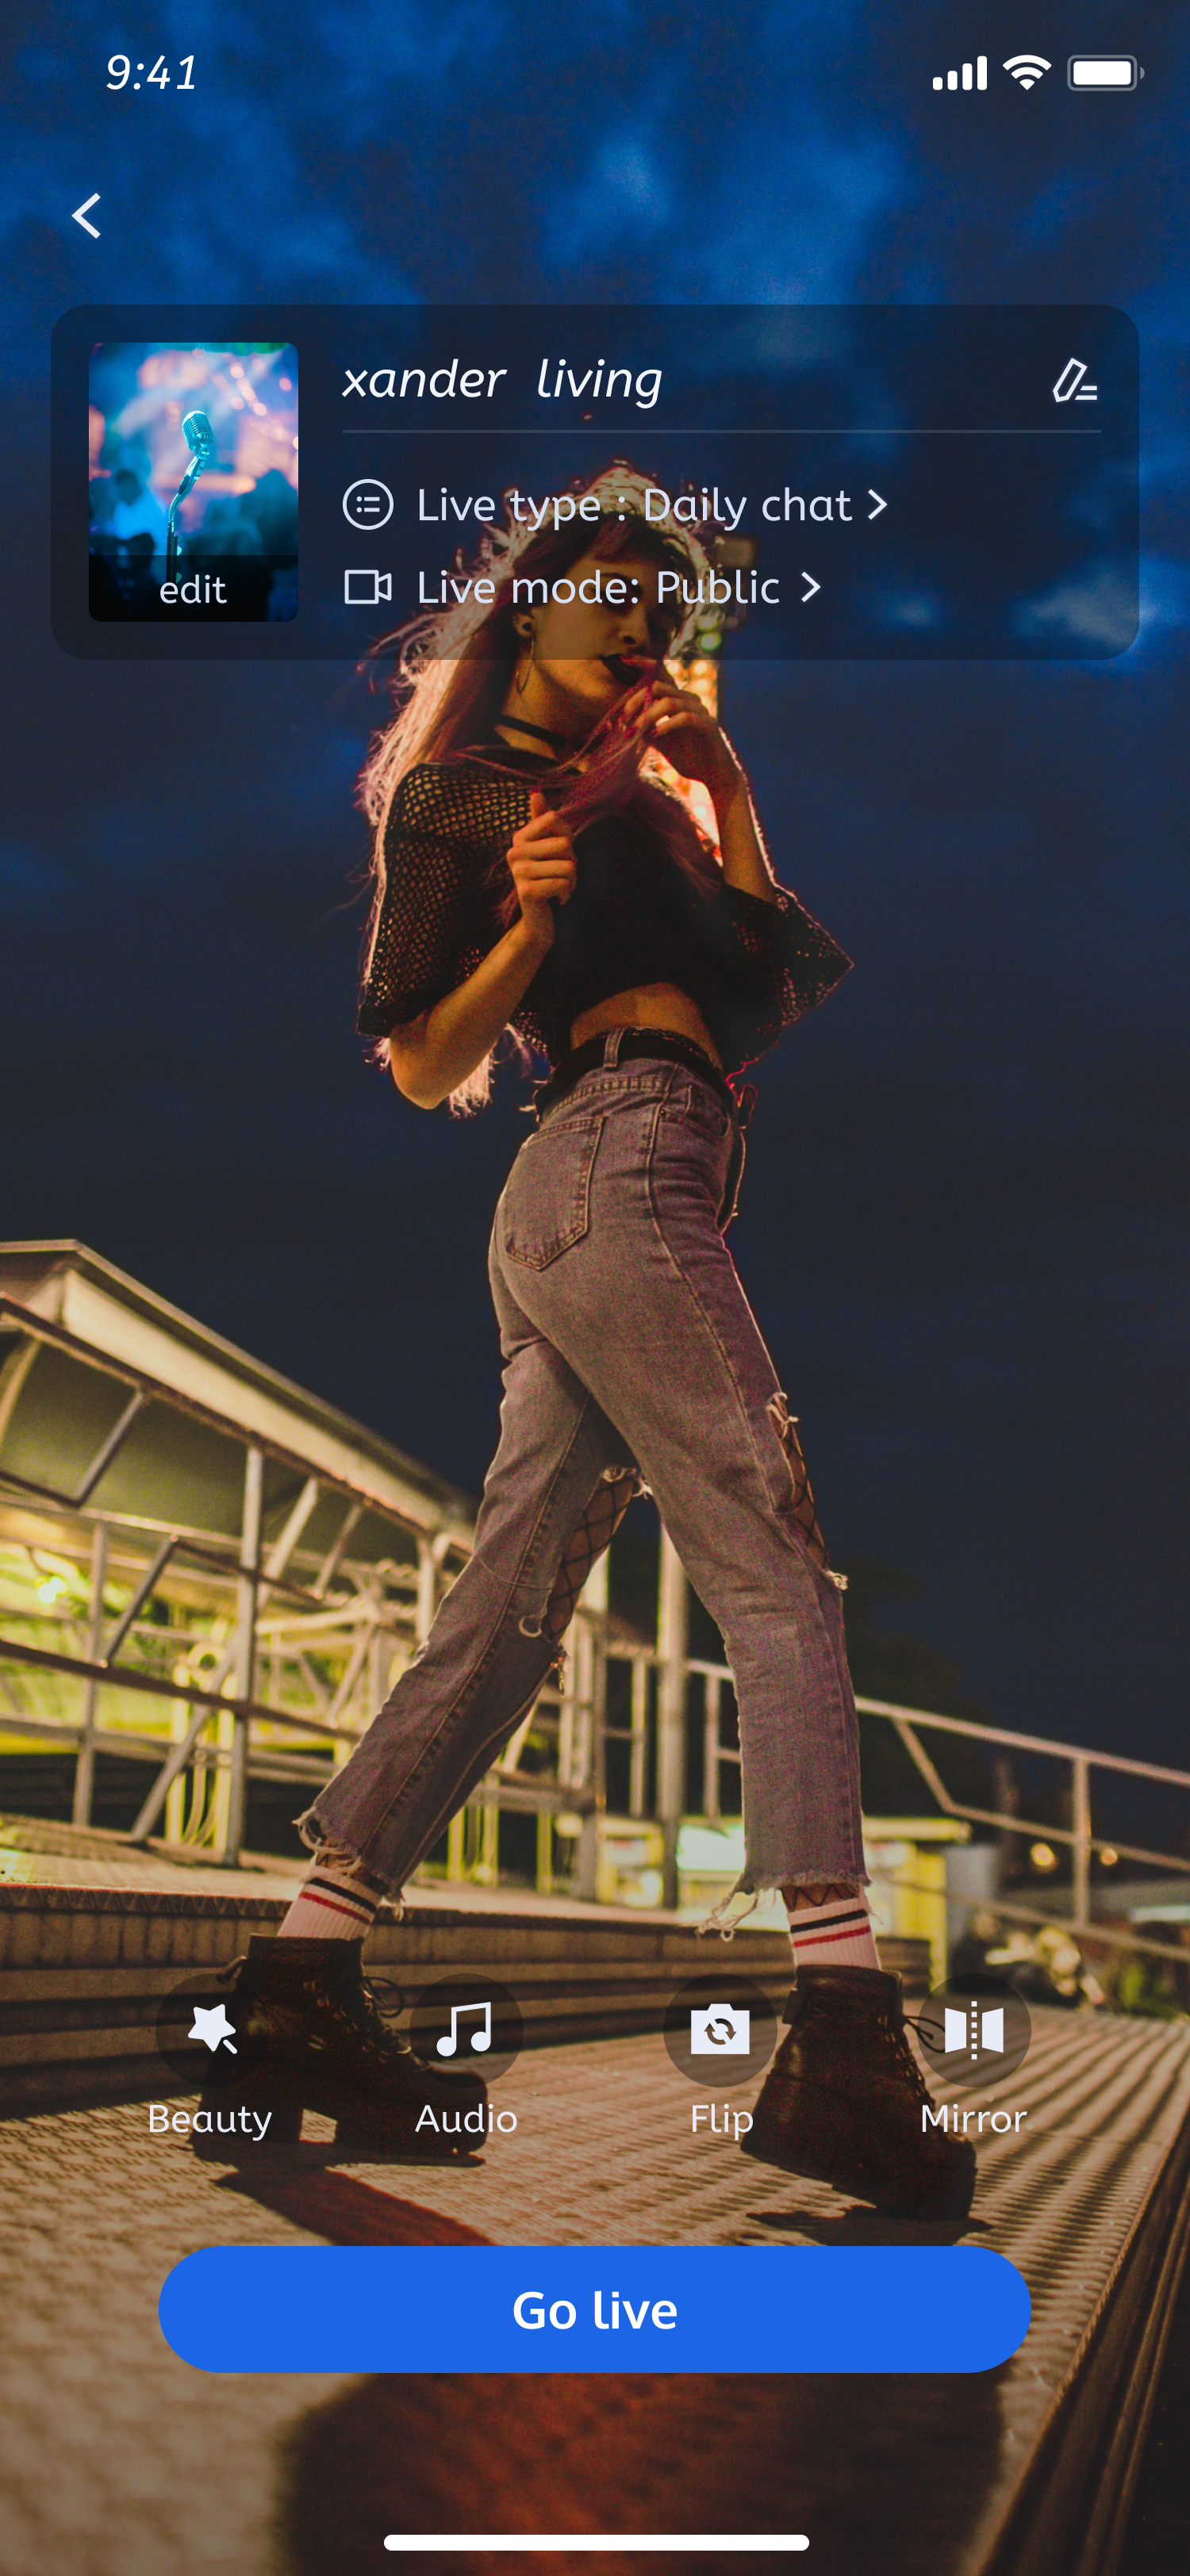
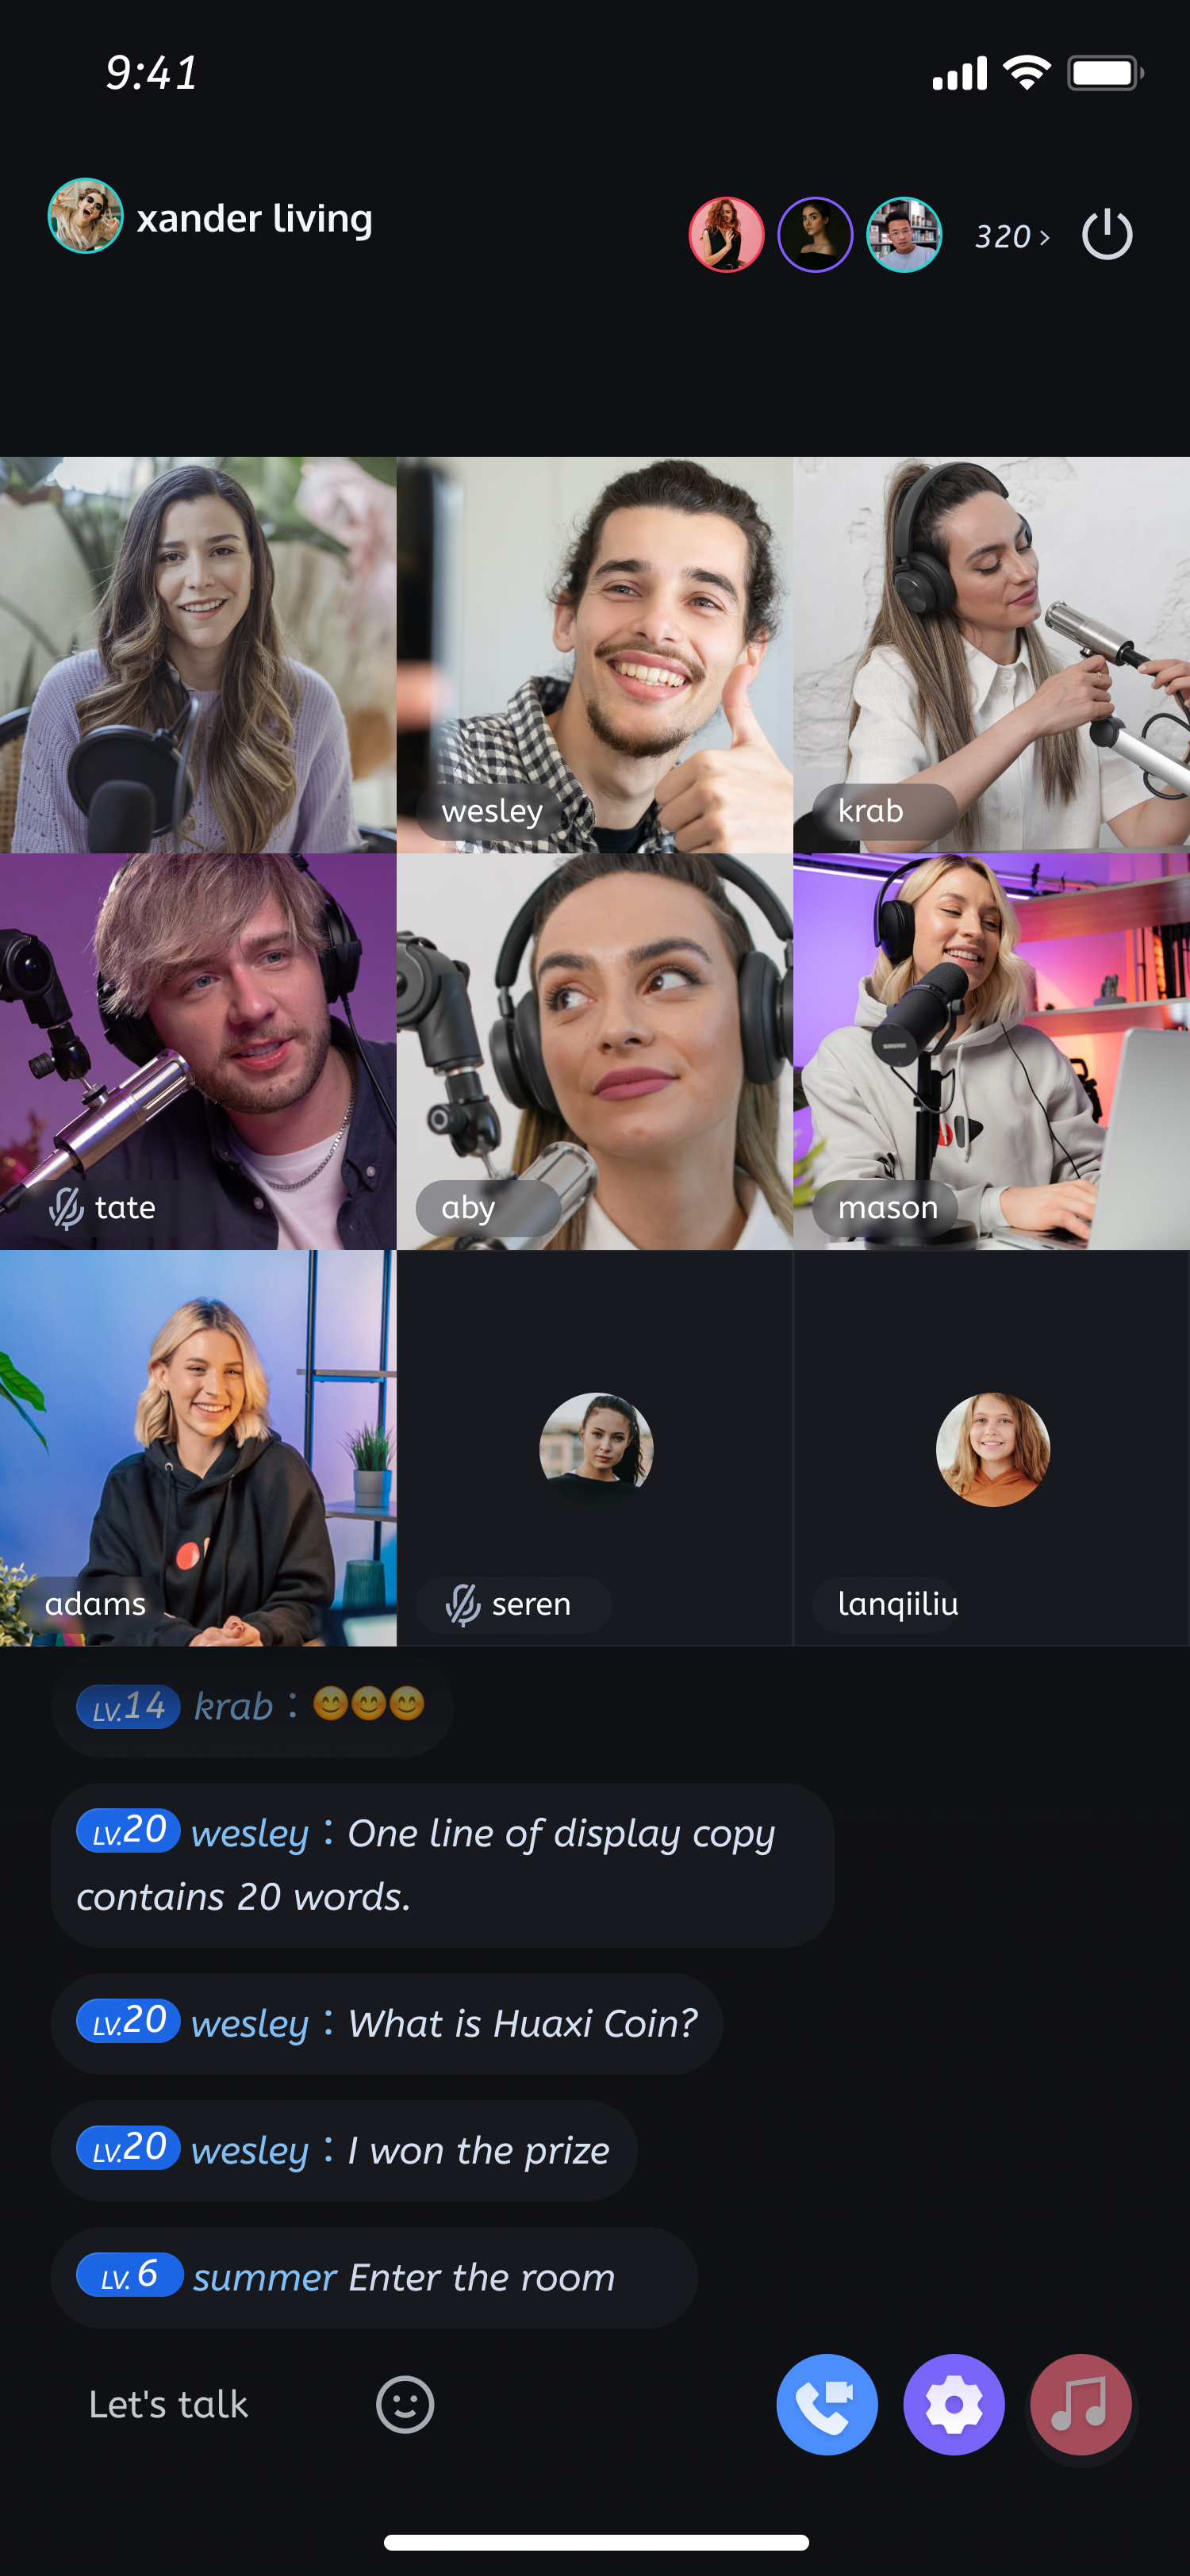
단계 5: 라이브 방송 시작
로그인 메서드 호출이 성공적으로 반환된 후, VideoLiveKit의 startLive 메서드를 호출하여 룸 ID를 지정하고 라이브 방송 페이지를 엽니다.