Vue (Fully compatible with both Vue2 & Vue3. While incorporating below, please select the Vue version guide that matches your needs)
TypeScript (Should your project be based on JavaScript, please proceed to JS project integrate to set up a progressive support for TypeScript)
Sass (sass-loader ≤ 10.1.1)
node(node.js ≥ 16.0.0)
npm (use a version that matches the Node version in use)
Step 1. Create a project
Support creating a project structure using webpack or vite, configured with Vue3 / Vue2 + TypeScript + sass. Below are a few examples of how to construct your project:
vue-cli
vite
Please make sure you have @vue/cli version 5.0.0 or above . The following sample code can be used to upgrade your @vue/cli version to v5.0.8.
Establish a project using Vue CLI, with configuration set to Vue2/Vue3 + TypeScript + Sass/SCSS.If Vue CLI is not yet installed, or the version is below 5.0.0, you can use the following method for installation via Terminal or CMD:
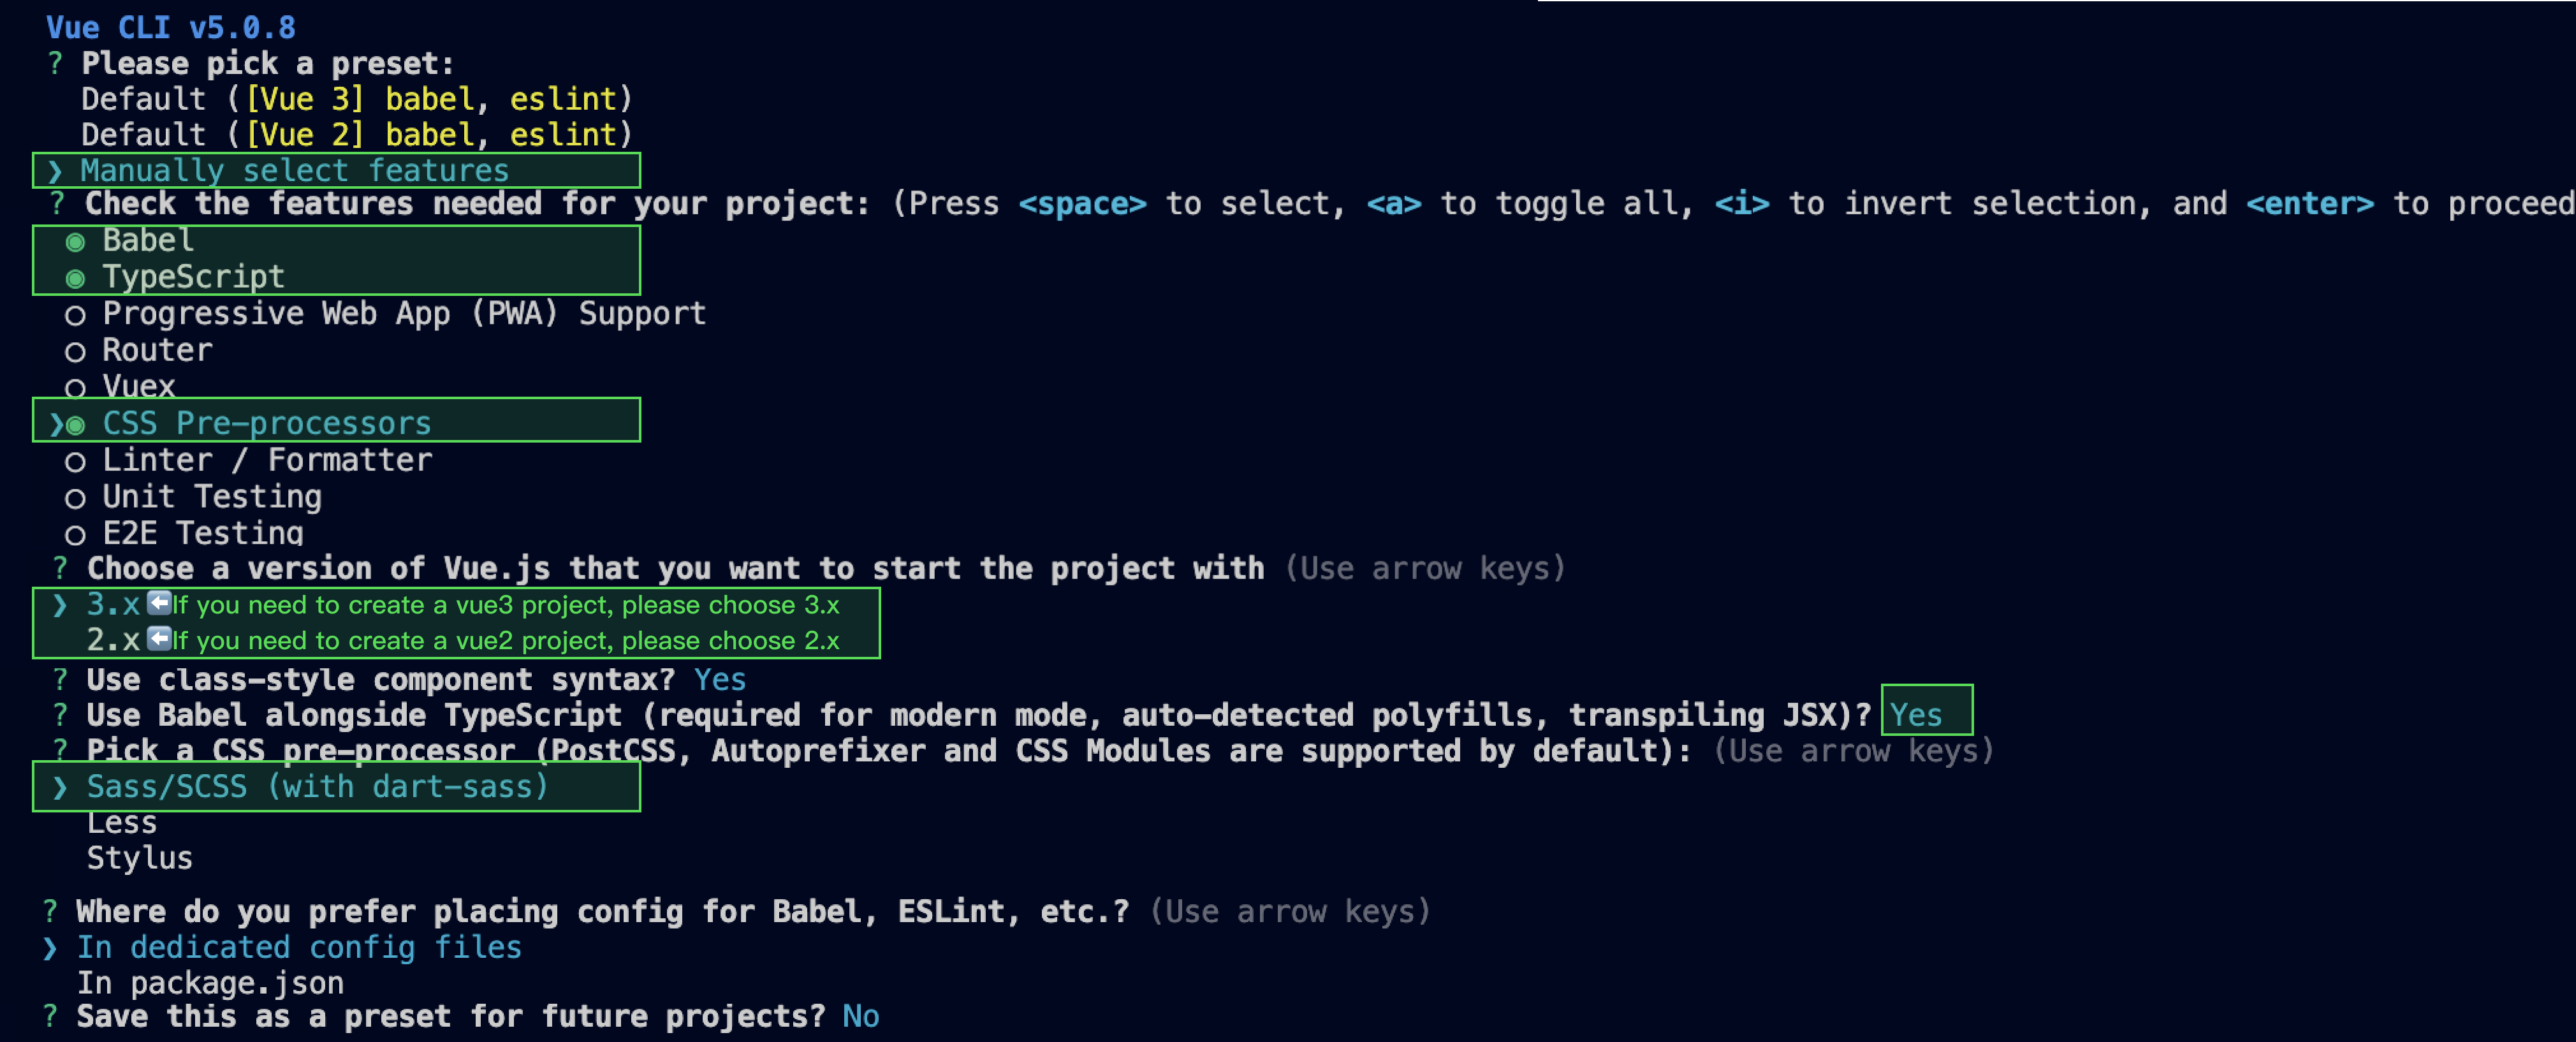
Create a project through vue-cli and select the configuration items depicted below.
vue create chat-example
Please make sure to select according to the following configuration:
After creation, switch to the directory where the project is located:
cd chat-example
If you are a vue2 project, please make the following corresponding environment configurations based on the Vue version you are using.
IIf you are a vue3 project, please ignore.
vue2.7
vue2.6 and below
npm i vue@2.7.9 vue-template-compiler@2.7.9
npm i @vue/composition-api unplugin-vue2-script-setup vue@2.6.14 vue-template-compiler@2.6.14
Vite requires Node.js versions 18+, 20+. Pay attention to upgrade your Node version when your package manager issues a warning, for more details refer to Vite official website.
Create a project using Vite, configure Vue + TypeScript according to the options in the picture below.
npm create vite@latest
Then, switch to the project directory, and install the project dependencies:
cd chat-example
npminstall
Install the sass environment dependency required for TUIKit:
npm i -D sass sass-loader
Step 2. Download the UI component
Download the TUIKit component through npm. To facilitate your subsequent expansion, it is recommended that you copy the TUIKit component to the src directory of your project:
On the page where you want to display it, simply import the TUIKit component to use it.
For example, implementing the following code on the App.vue page allows for a quick setup of the chat interface (the following example code supports both Web and H5):
The example code below uses the setup syntax. If your project does not use the setup syntax, please register components according to the standard methods of Vue3/Vue2.
parallel:false,// disable thread-loader, which is not compactible with this plugin
configureWebpack:{
plugins:[
ScriptSetup({
/* options */
}),
],
},
chainWebpack(config){
// disable type check and let `vue-tsc` handles it
config.plugins.delete("fork-ts-checker");
},
};
4. At the end of the src/TUIKit/adapter-vue.ts file, replace the export source:
// Initial notation
export*from"vue";
// Replace with
export*from"@vue/composition-api";
Step 4: Obtain SDKAppID, userID, and userSig
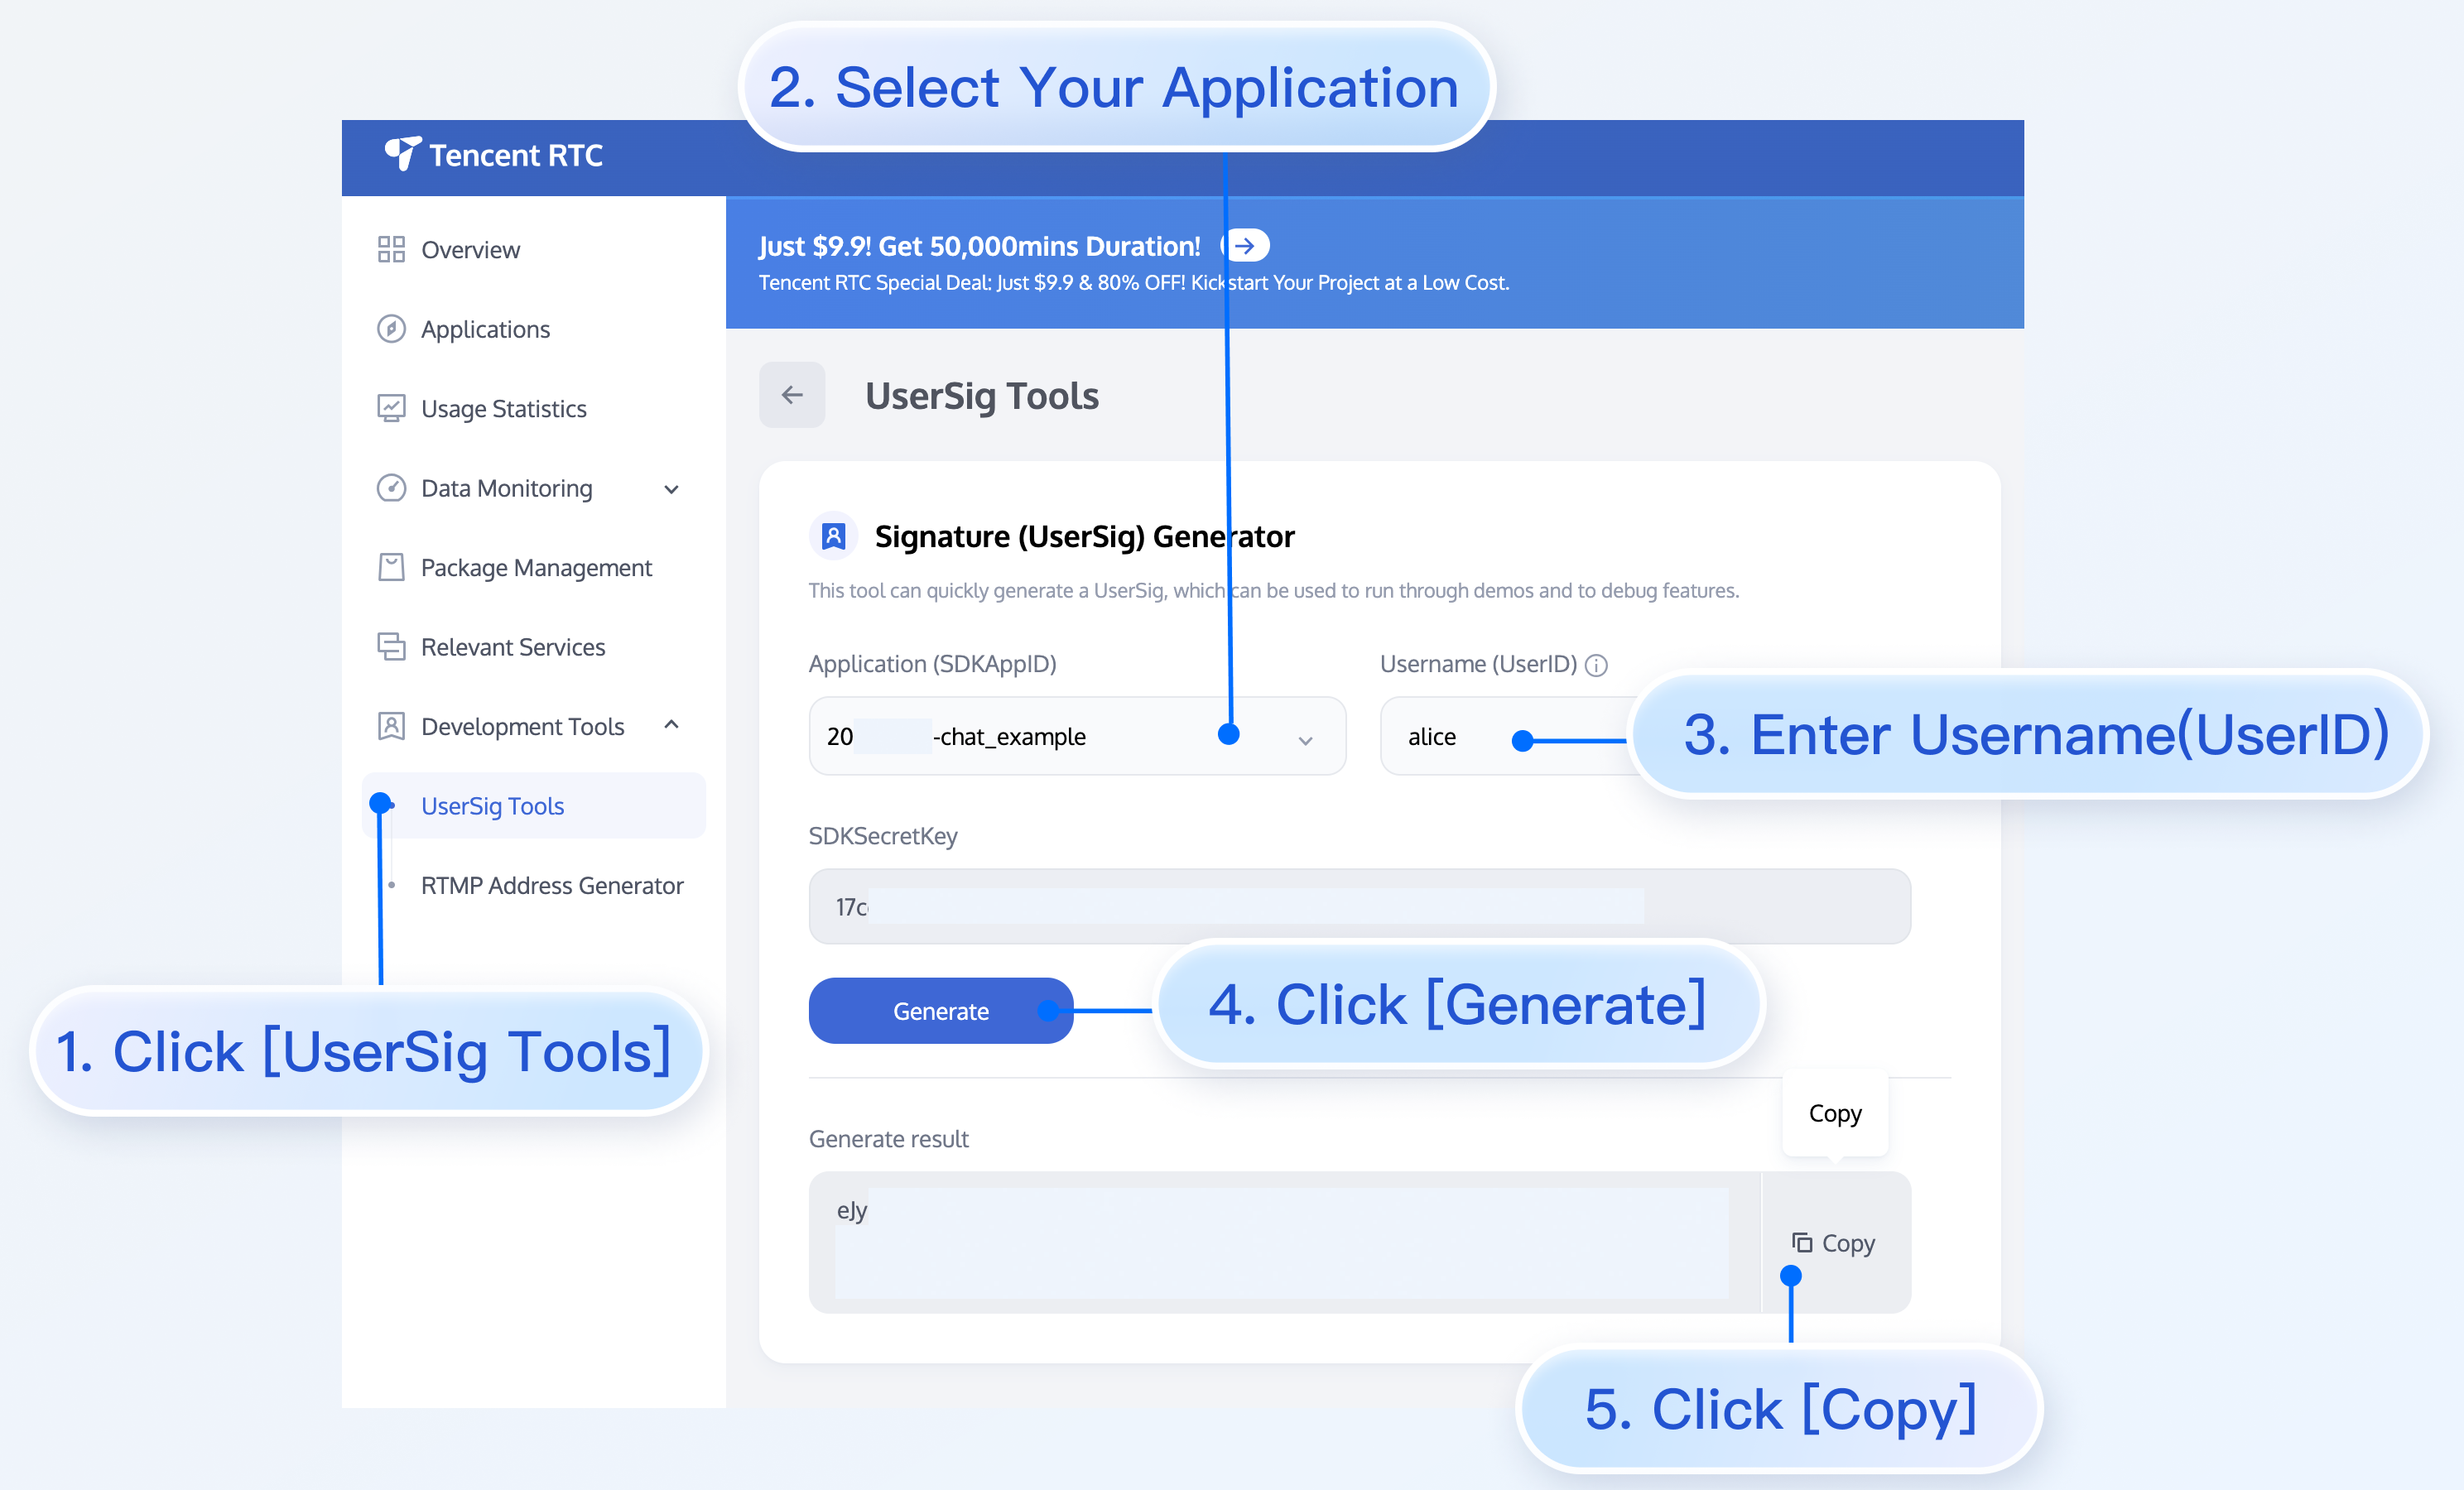
Set the relevant parameters SDKAppID, userID, and corresponding userSig in <TUIKit>:
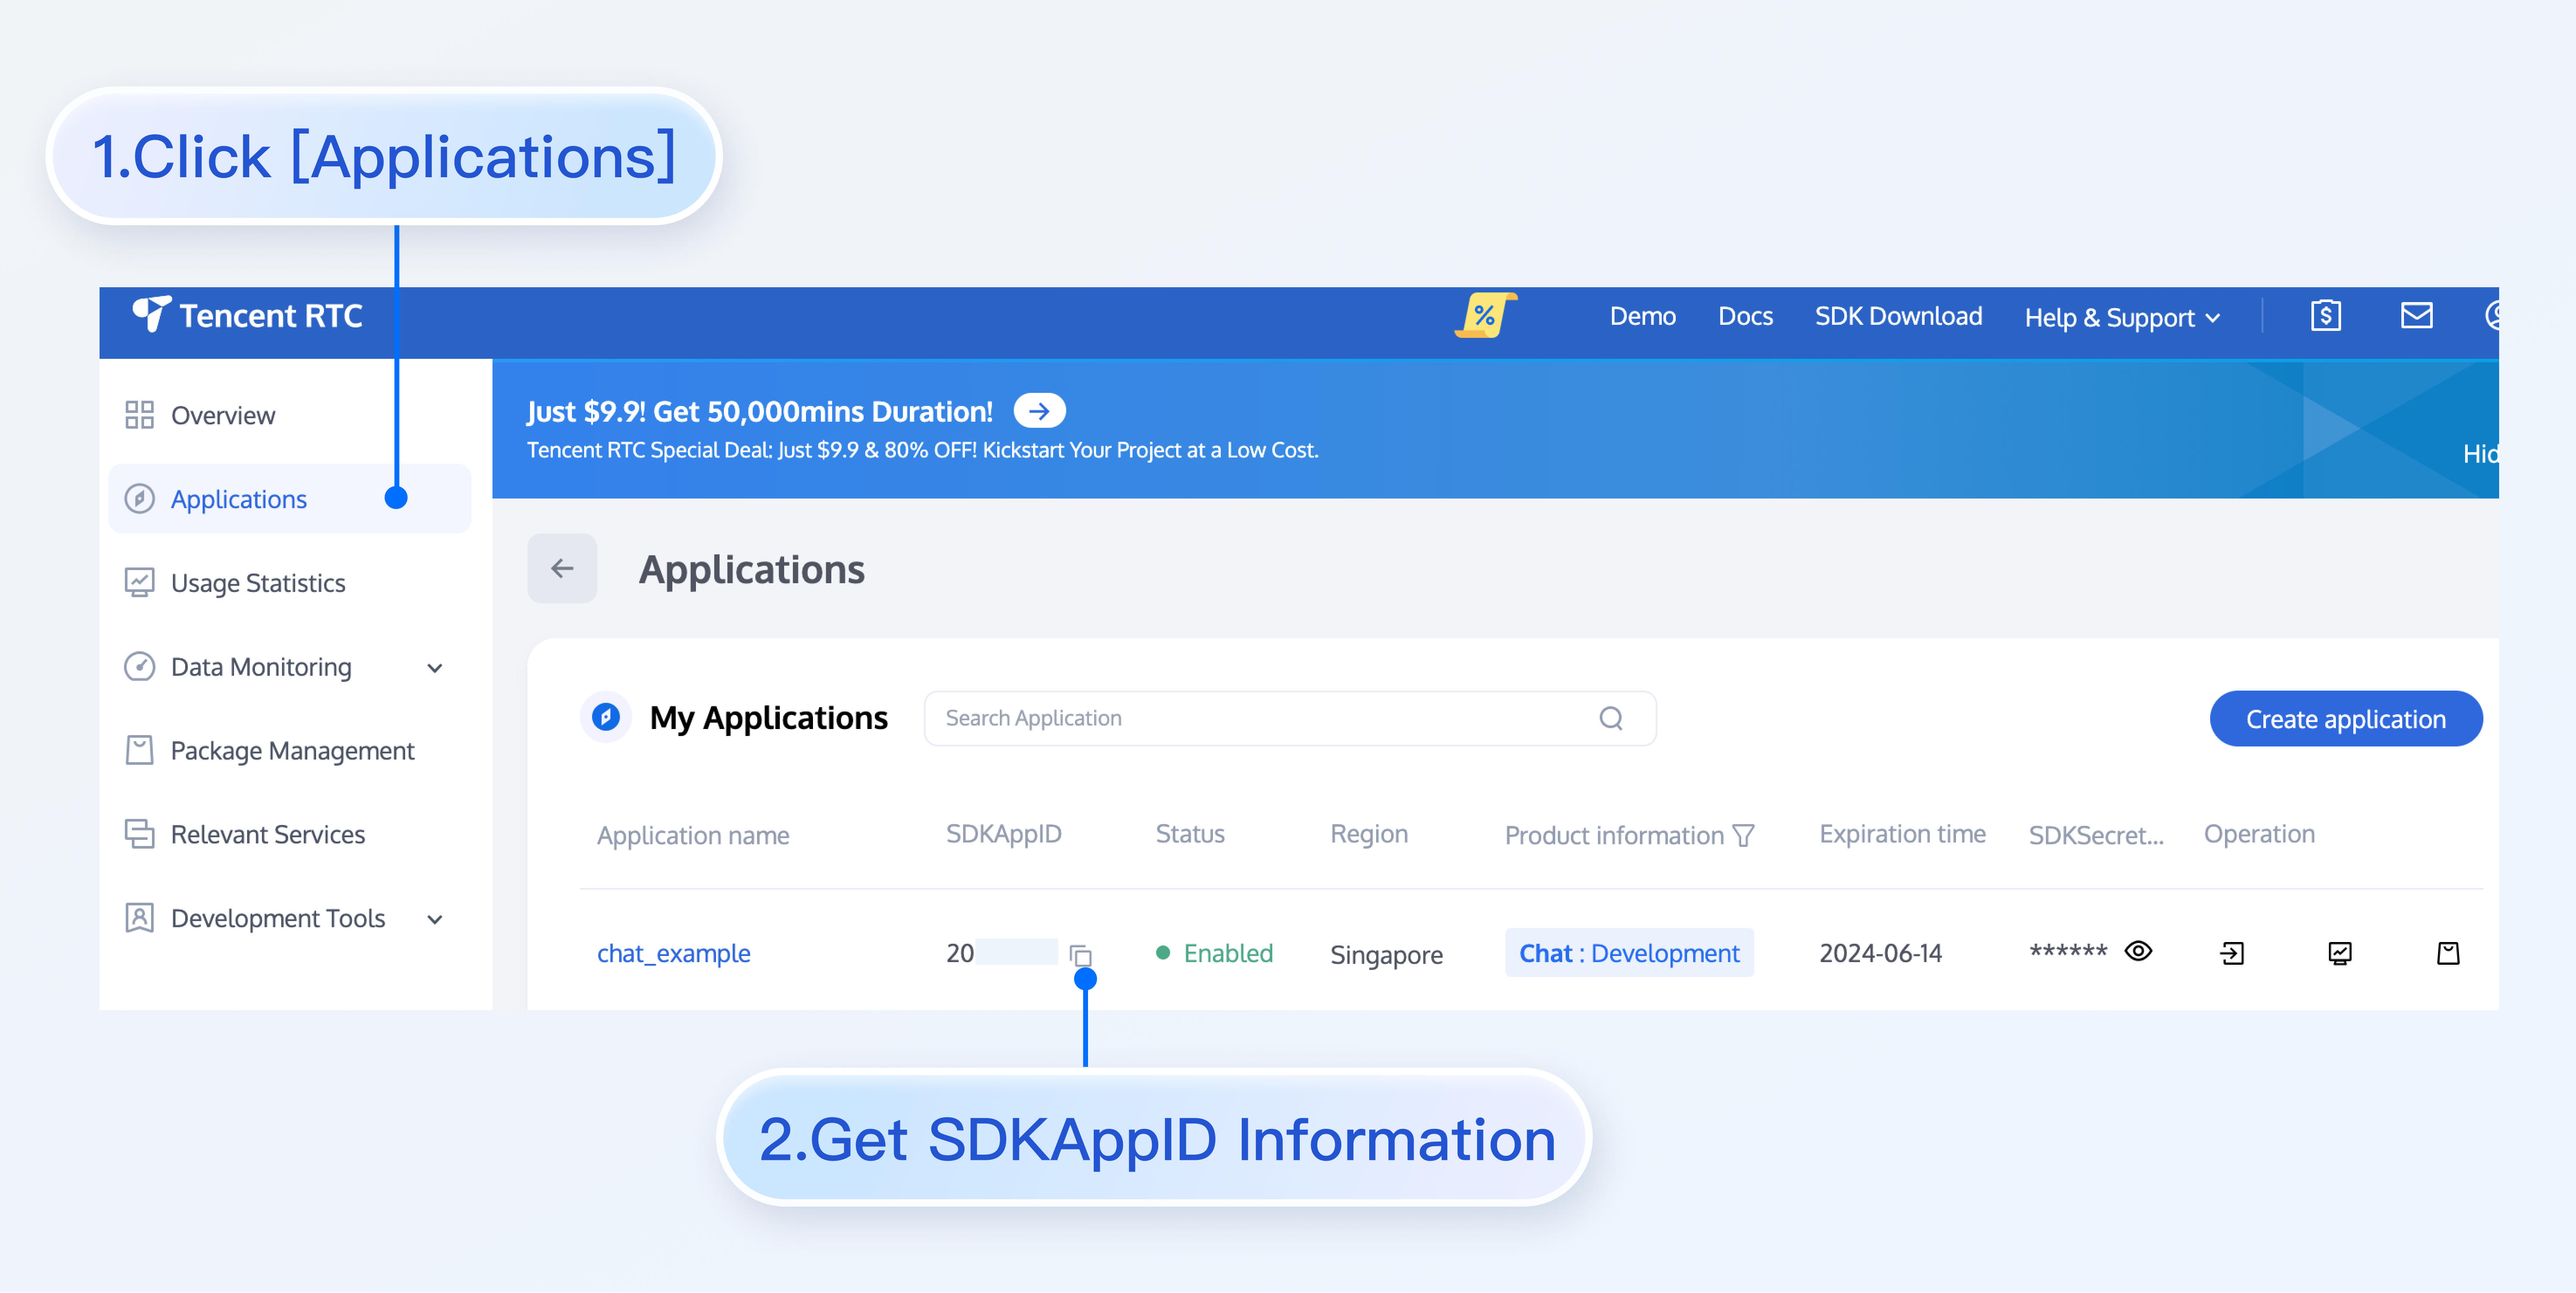
SDKAppID can be obtained through the Chat Console in Applications:
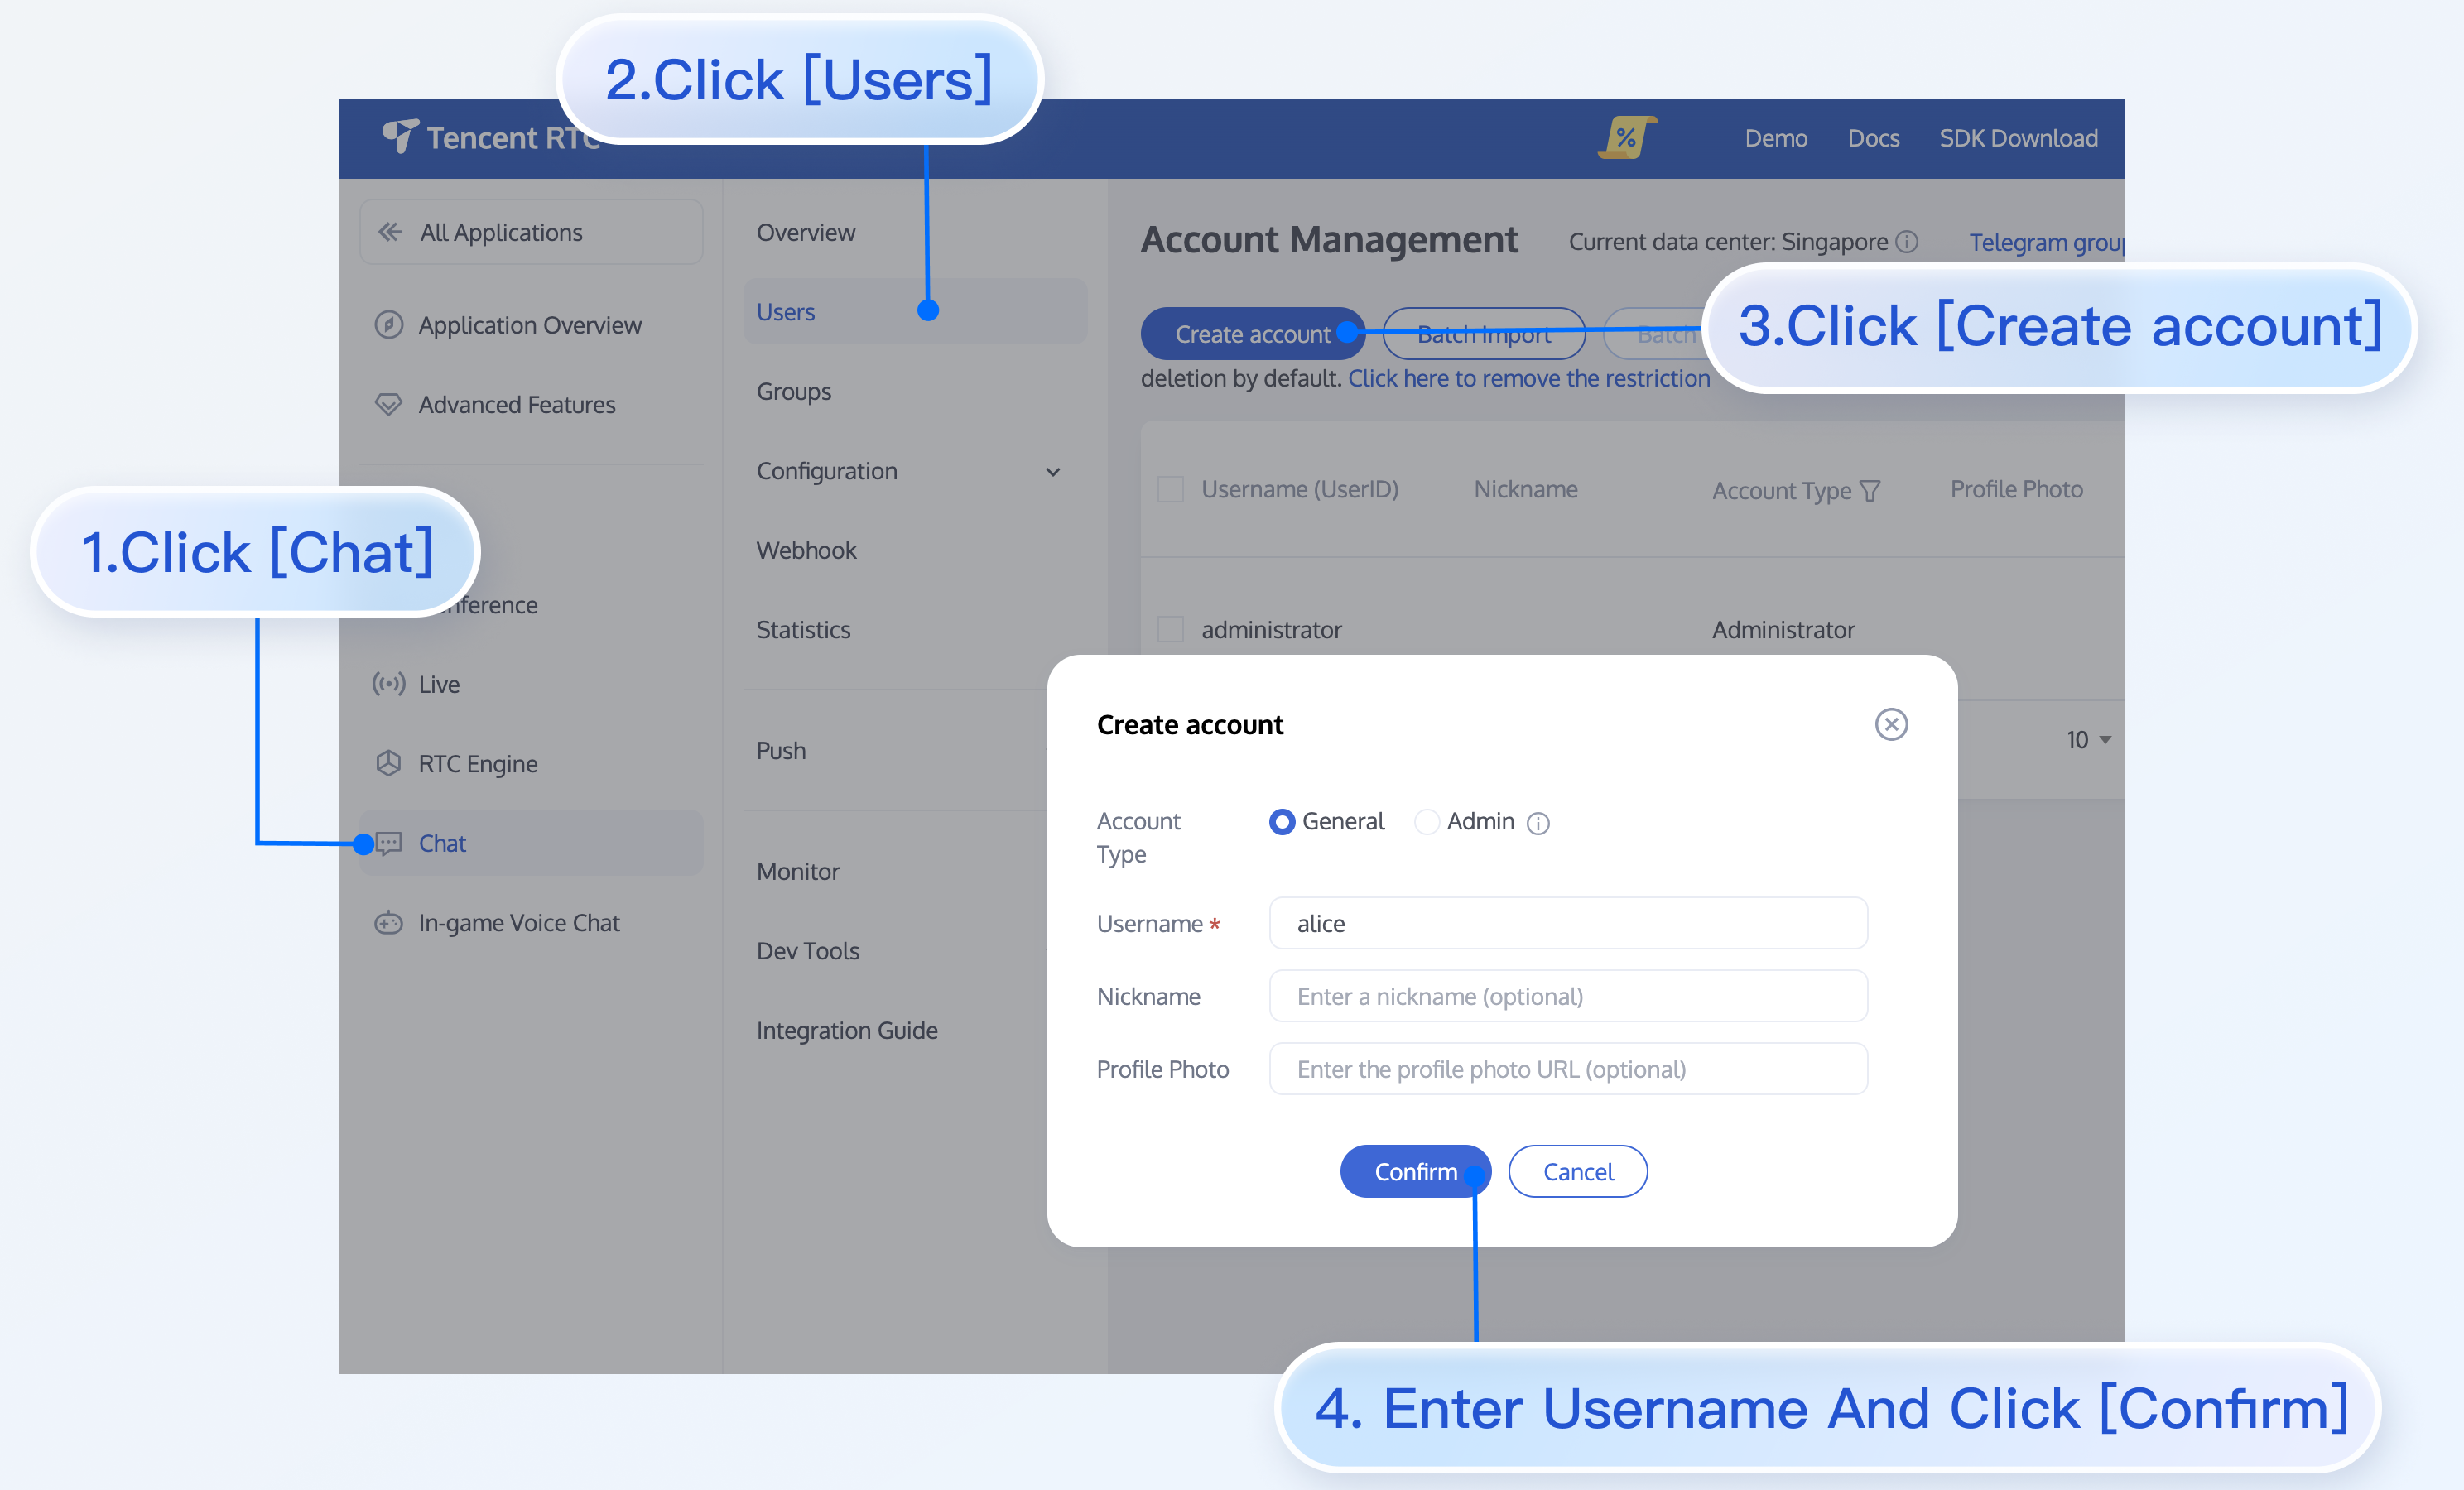
userID
1.1 Click to enter the Application you created above. You will see the Chat product entrance in the left sidebar. Click to enter.
1.2 After entering the Chat Product subpage, click on Users to go to the User Management Page.
1.3 Click Create account, a form for creating account information will pop up. If you are just a regular member, we recommend you choose the General type.
1.4 To enhance your experience with message sending and receiving features, we recommend creating two userIDs.
Since vue-cli enables Webpack Global Overlay Error Message Prompt by default, for a better experience, it is recommended to disable the global overlay error prompt.
webpack4
webpack3
module.exports =defineConfig({
devServer:{
client:{
overlay:false,
},
},
});
module.exports ={
devServer:{
overlay:false,
},
};
npm run serve
npm run dev
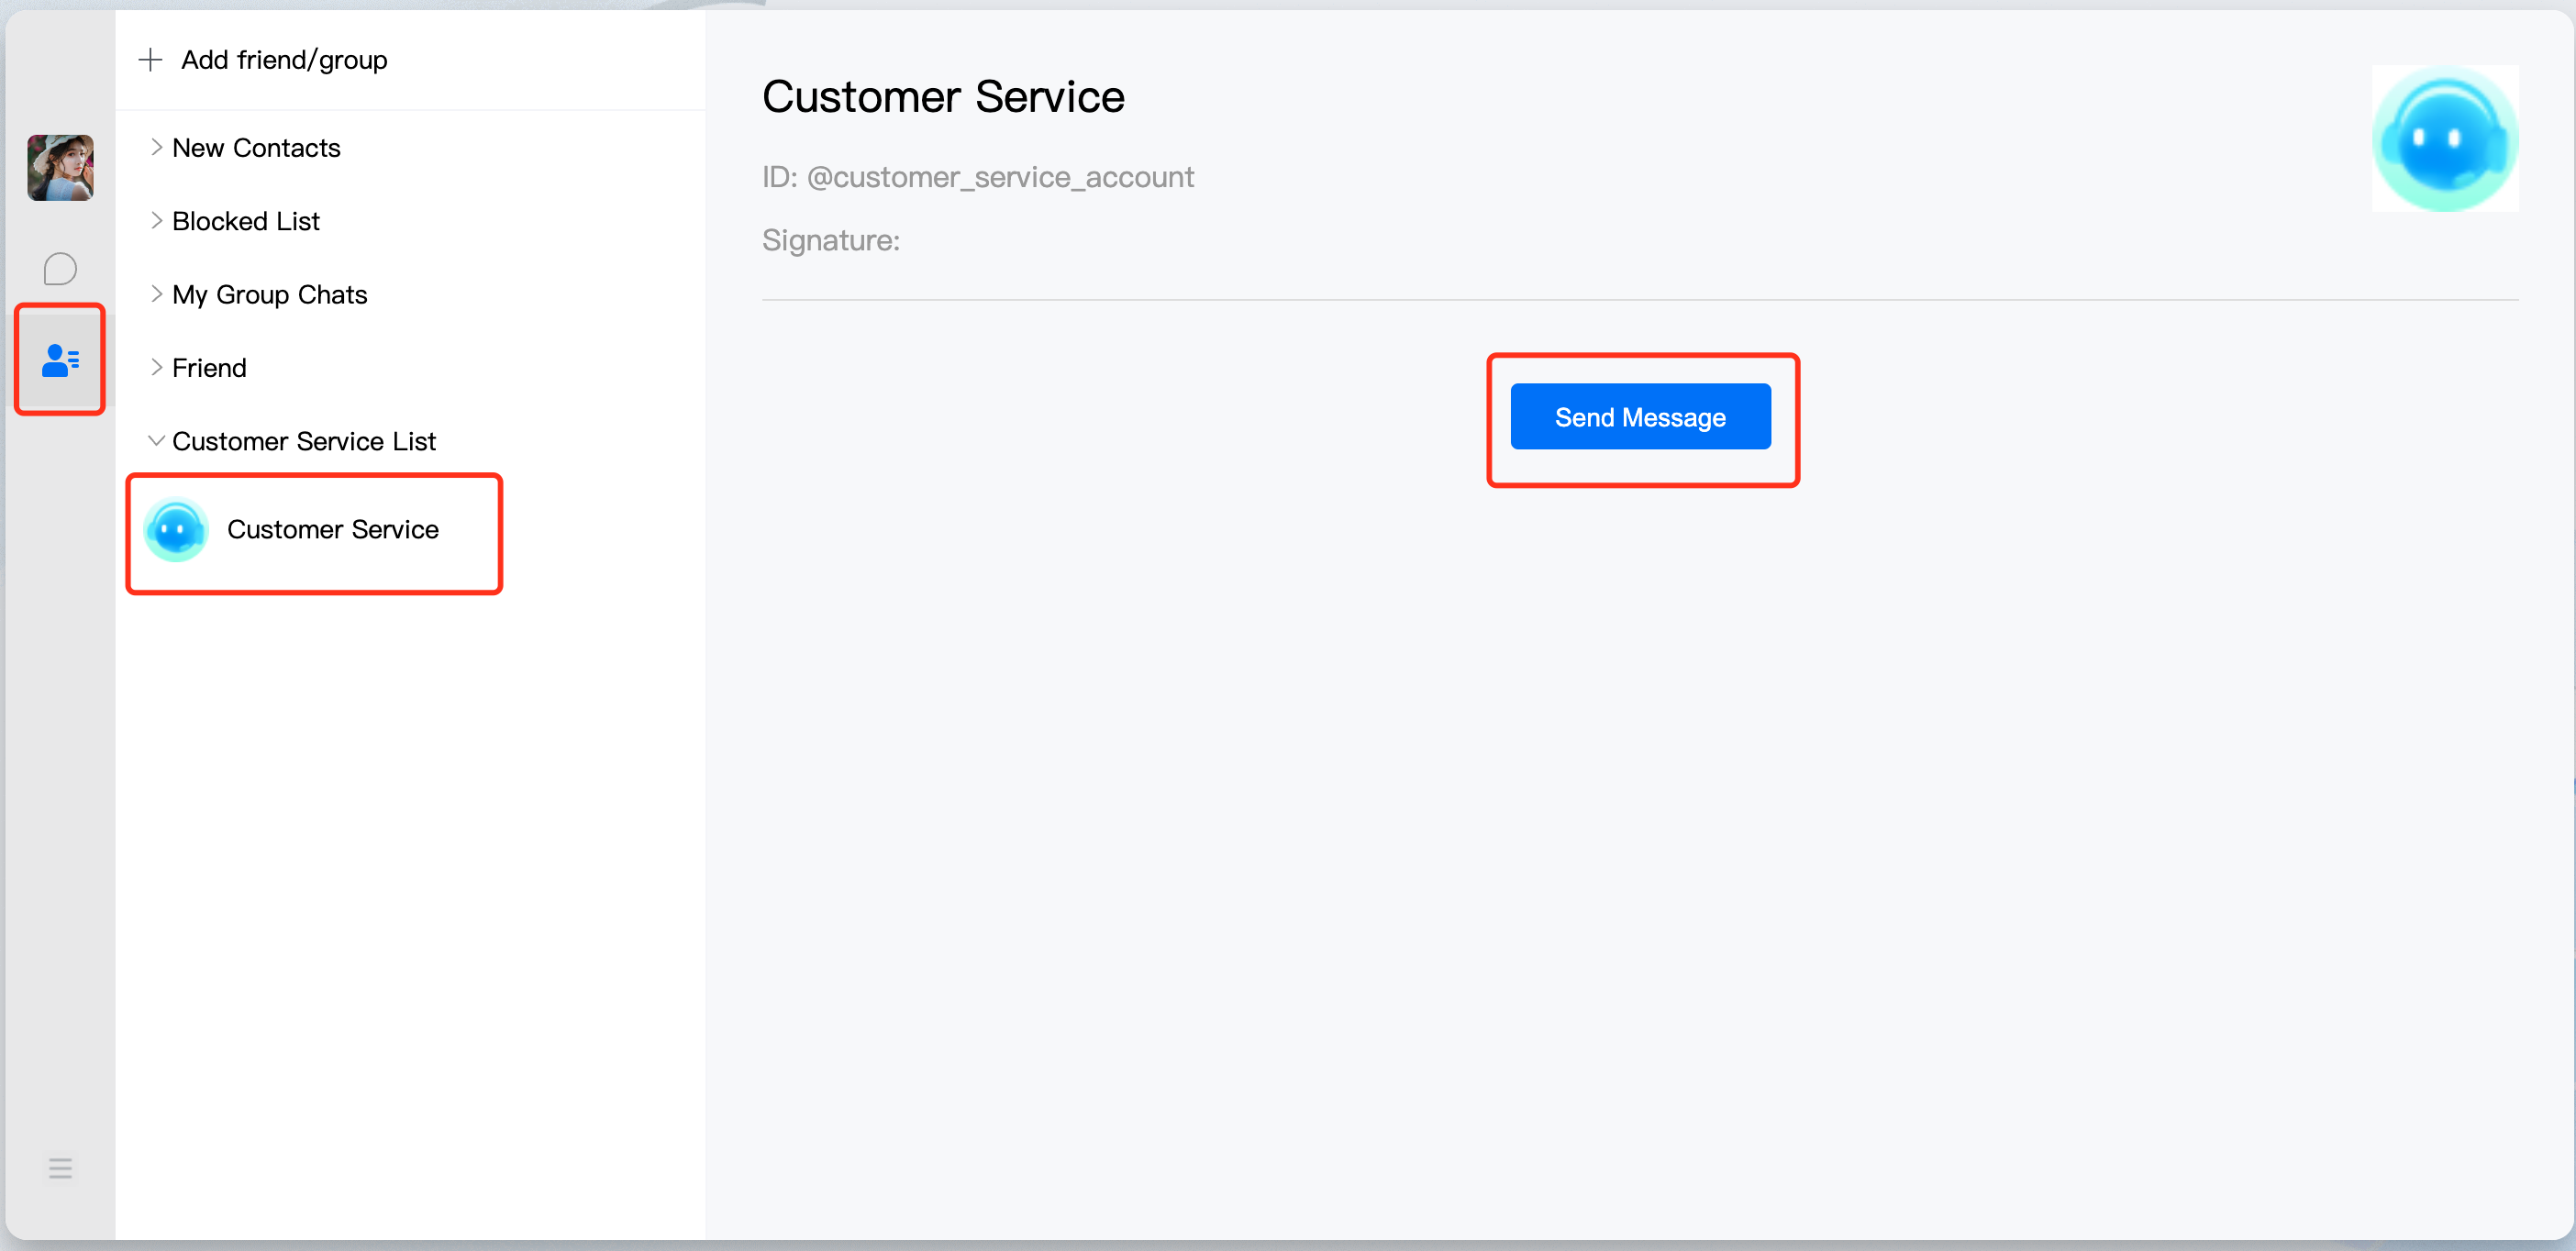
Step 6:Initiate Your First Customer Service Inquiry
Initiate your first customer service inquiry through the TUIContact.
Integrate Customer Service Chat Independently
To display the customer service chat, simply import the TUIChat component on the desired page.
For example, by implementing the following code in the App.vue page, you can quickly set up a chat page and initiate a conversation:
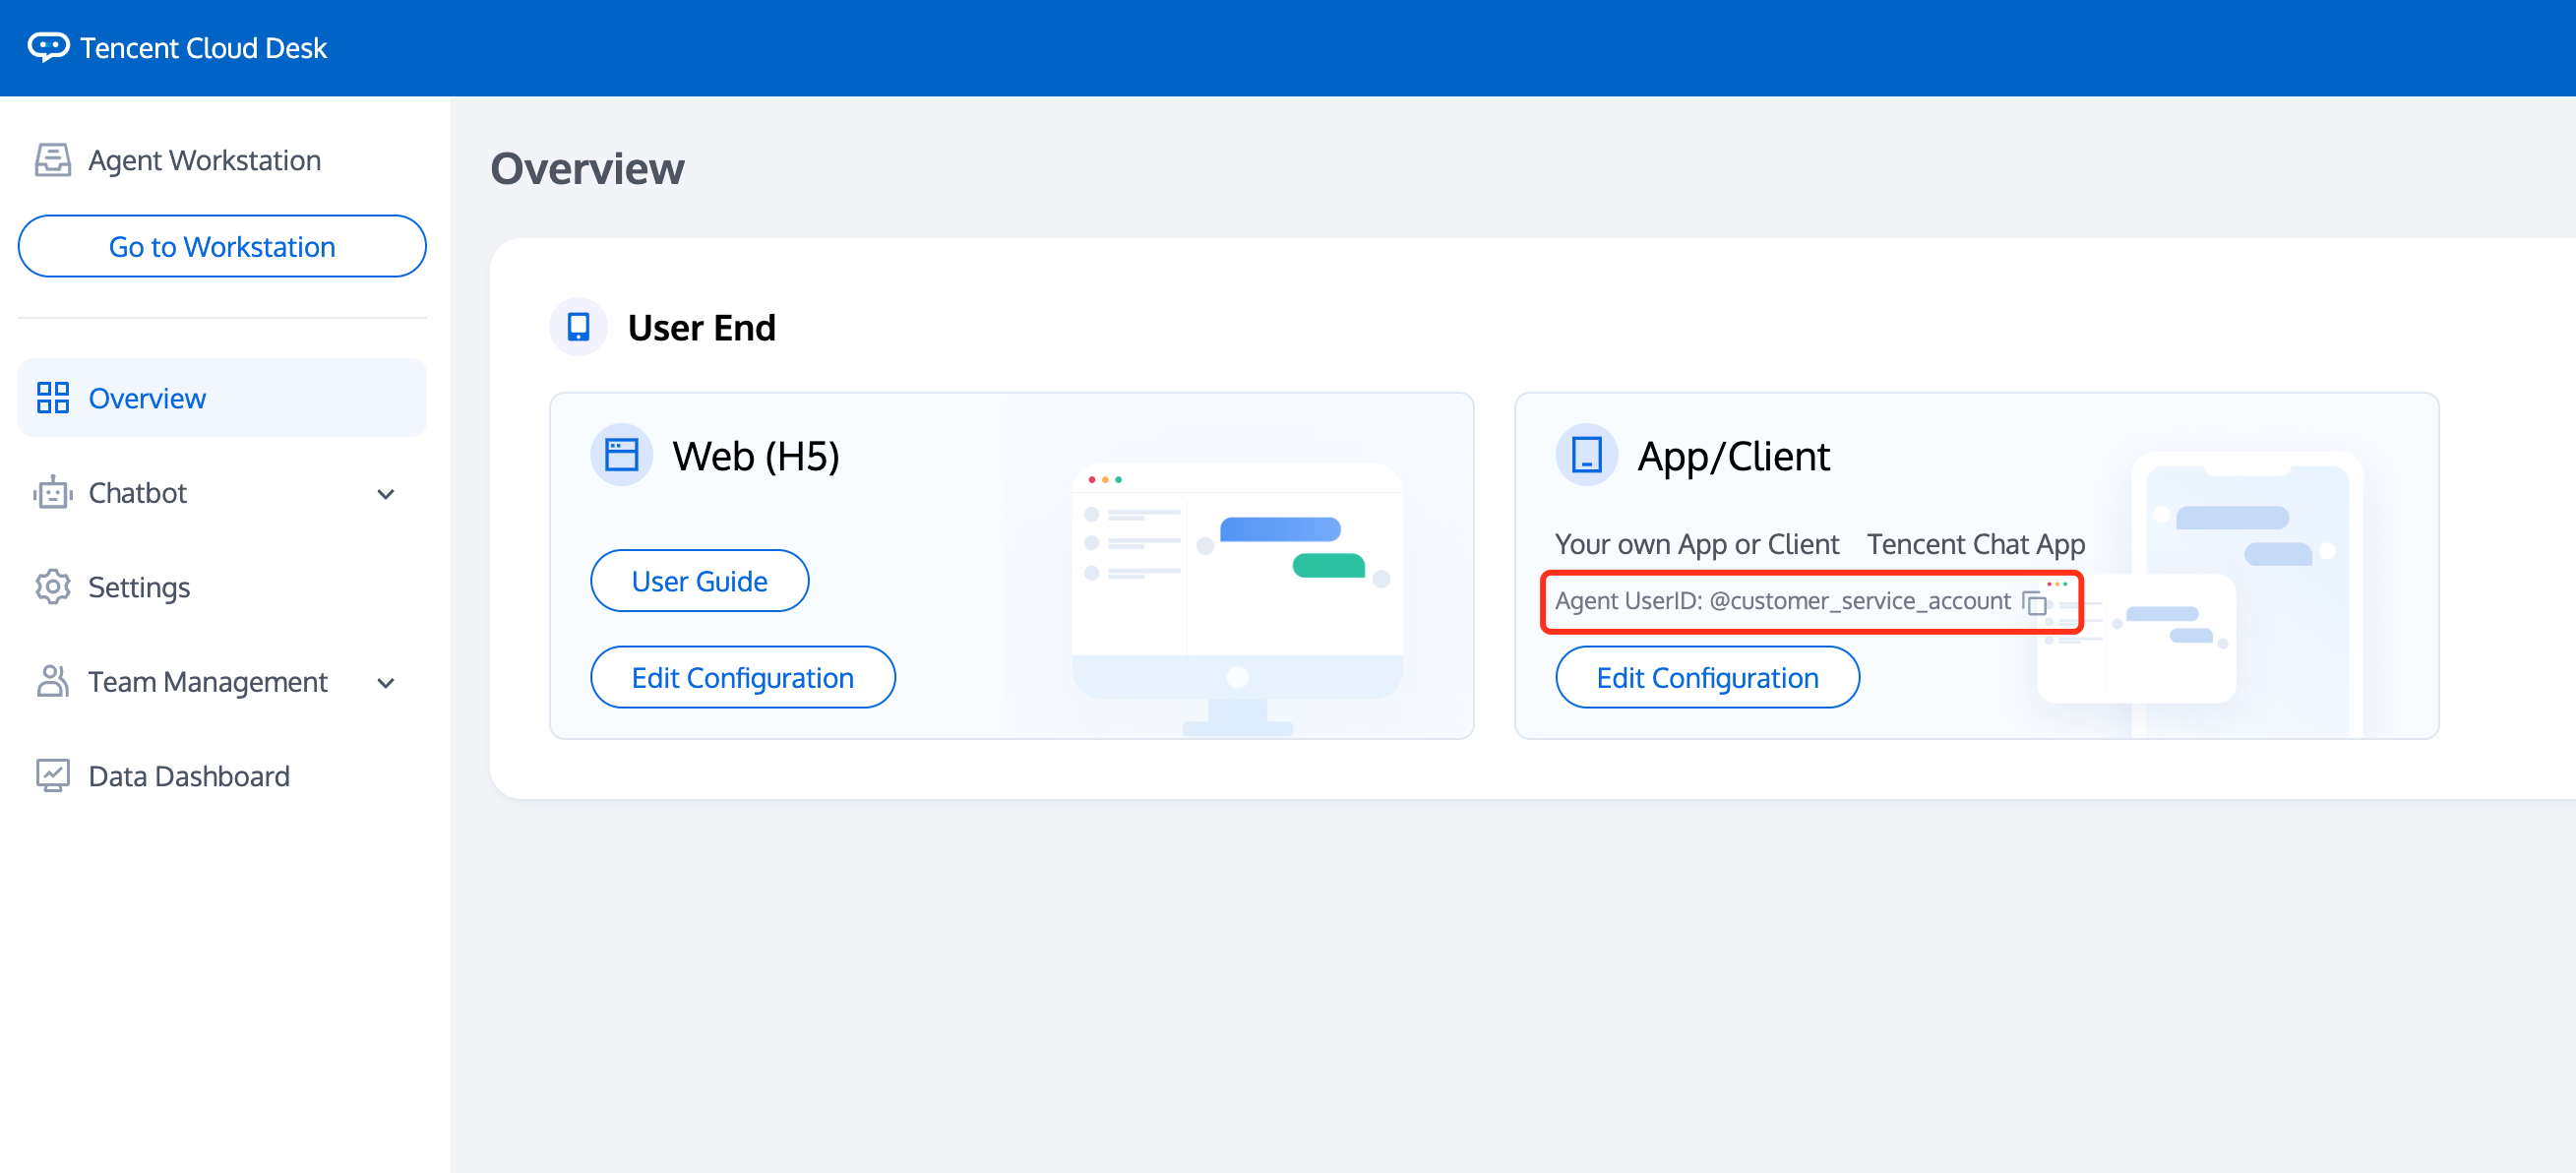
The userID required to generate the conversationID is the customer service ID.