
Integration
Feature Overview
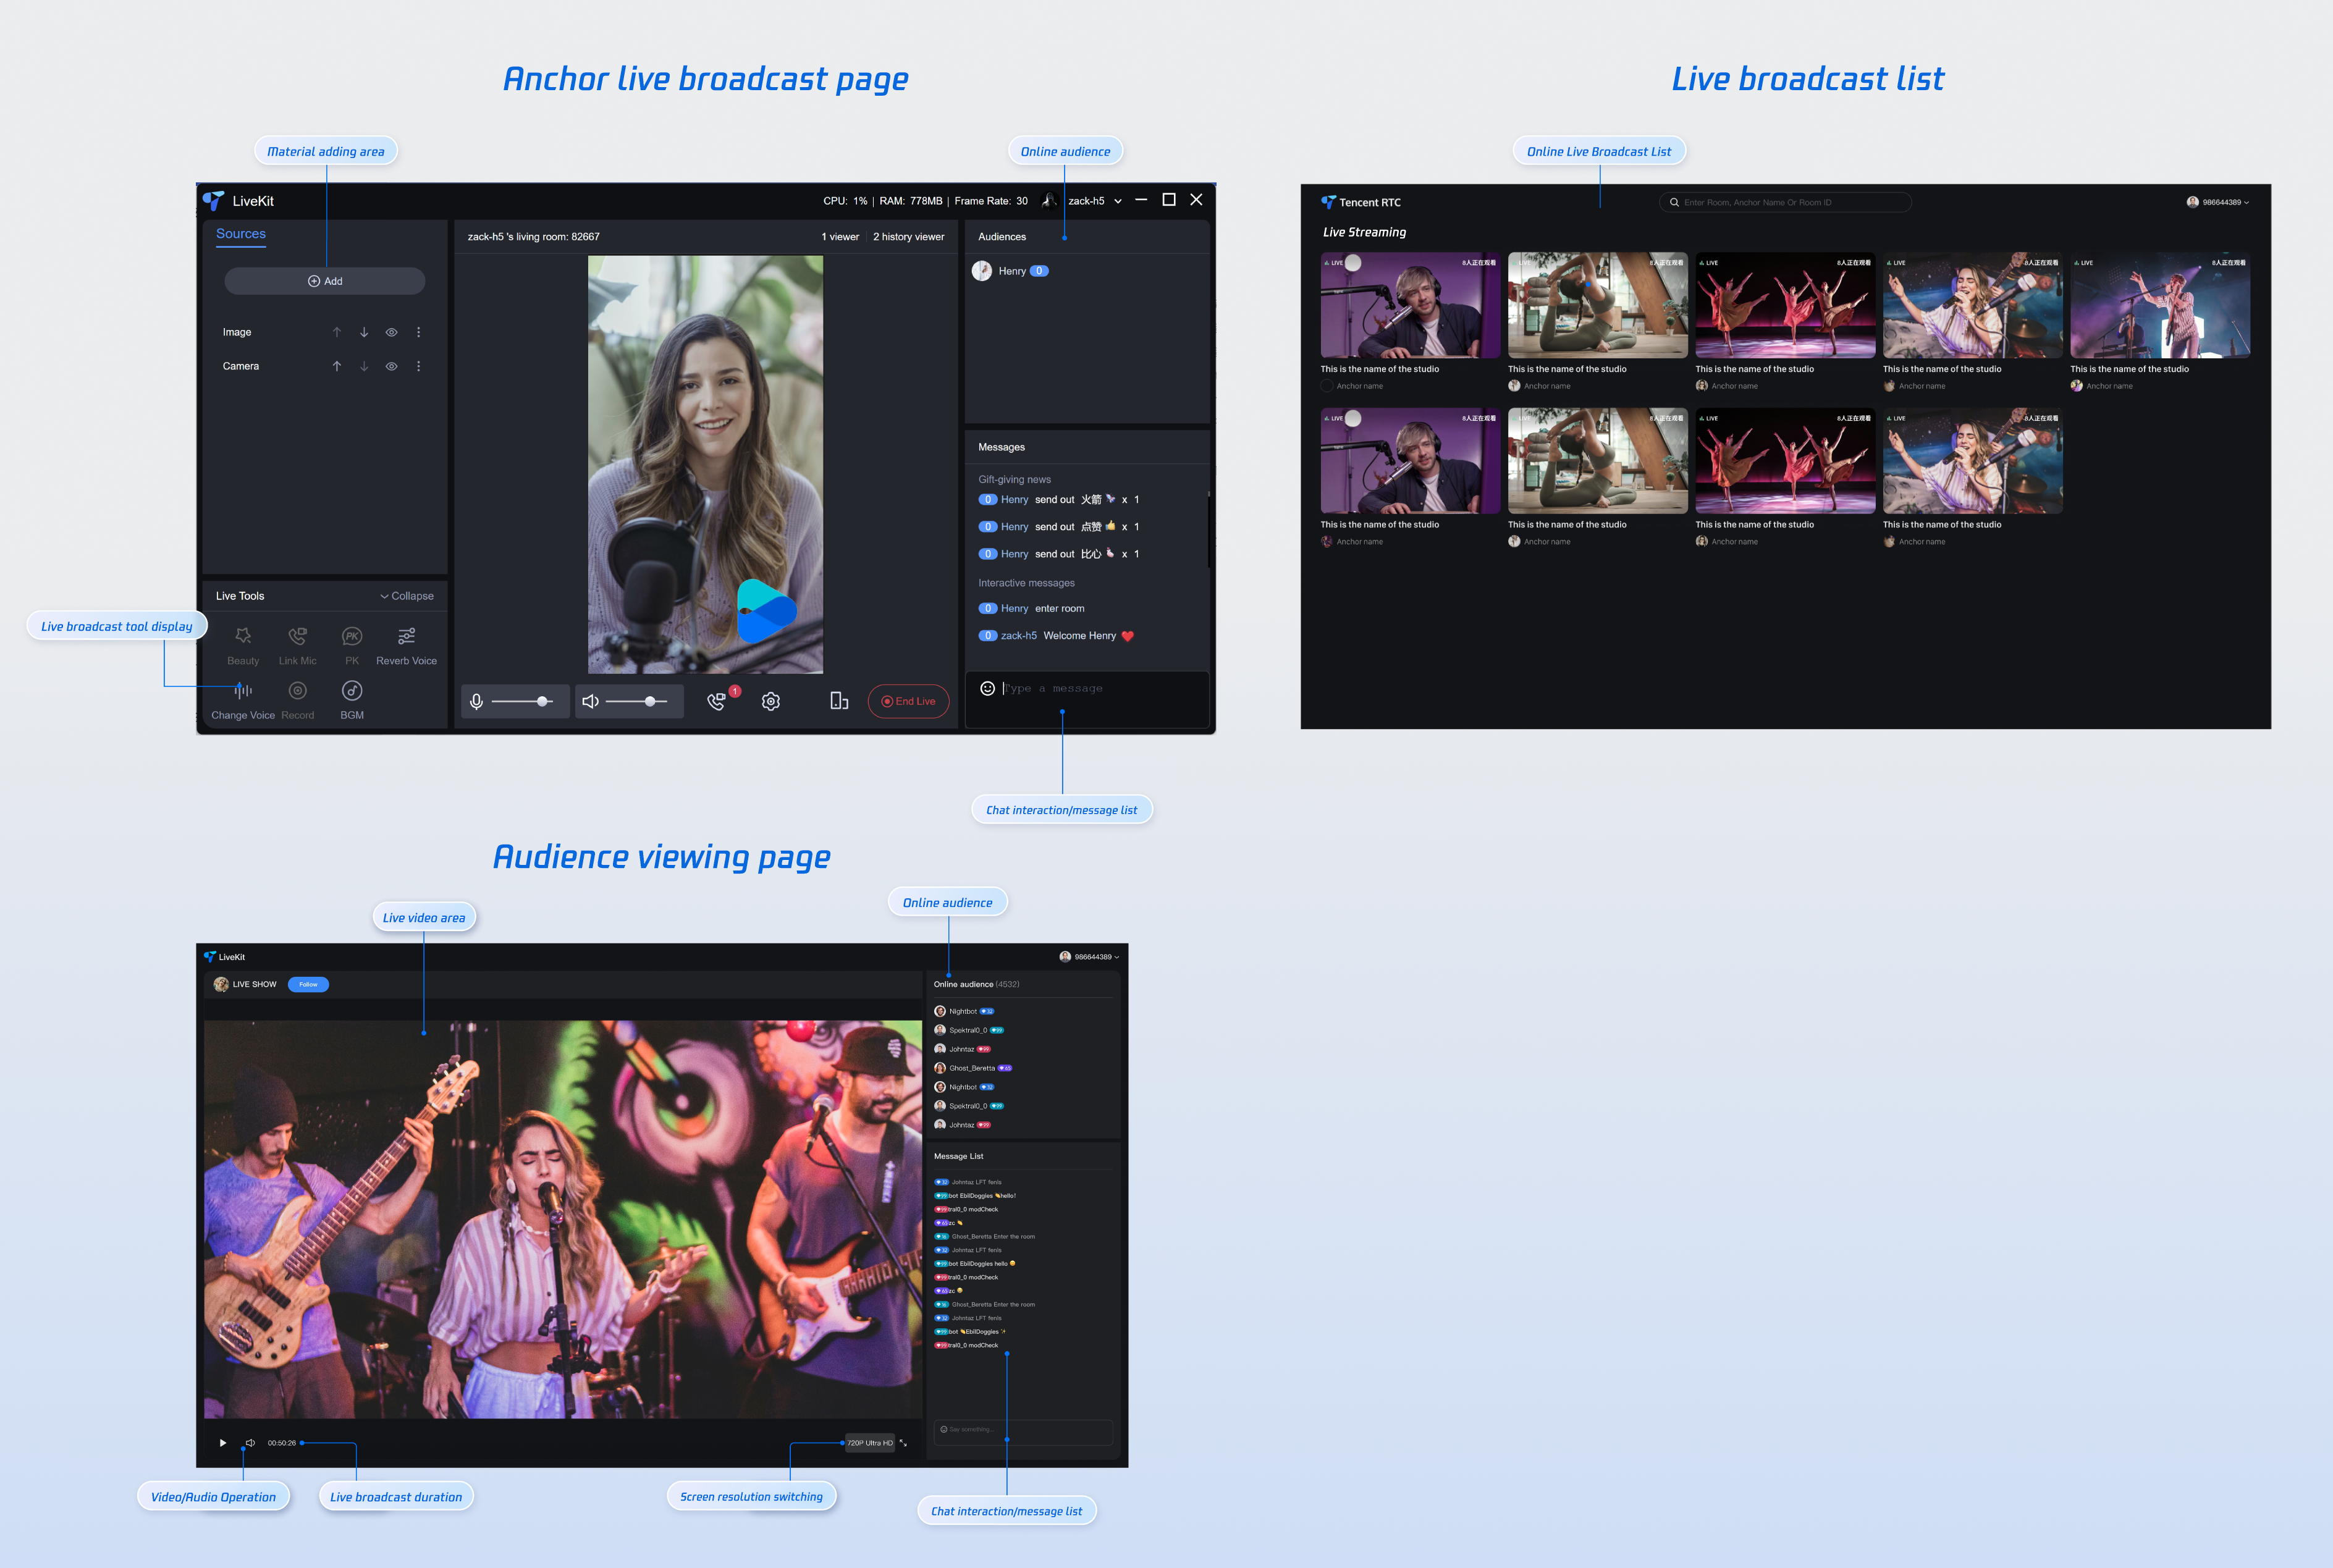
TUILiveKit is a comprehensive live streaming component. Once integrated, it allows you to quickly implement the following functional modules:
Preparations
Service Activation
Before using TUILiveKit, you need to Activate Services in the Tencent Cloud console and receive a trial version or activate a paid version.
Environmental requirements
Vue 3 + Composition API: Leverage the latest Vue 3 features to build high-performance, maintainable applications.
TypeScript: Improve code quality and development efficiency through static type checking.
SCSS Module: Implement modular style management to effectively avoid style conflicts.
Code Integration
Step 1: Install Dependencies
You can install dependencies using any of the following methods:
npm install tuikit-atomicx-vue3 @tencentcloud/uikit-base-component-vue3 --save
pnpm install tuikit-atomicx-vue3 @tencentcloud/uikit-base-component-vue3
yarn install tuikit-atomicx-vue3 @tencentcloud/uikit-base-component-vue3
Step 2: Complete login
import { useLoginState } from 'tuikit-atomicx-vue3';const { login } = useLoginState();async function initLogin() {try {await login({sdkAppId: 0, // SDKAppId, refer to step 1 to obtainuserId: '', // UserID, refer to step 1 to obtainuserSig: '', // userSig, refer to step 1 to obtain});} catch (error) {console.error('Login Error:', error);}}
Login API Parameter Description
Parameter | Type | Description |
SDKAppID | Int | |
UserID | String | Unique identifier for the current user. It can only contain letters (a-z, A-Z), numbers (0-9), hyphens (-), and underscores (_). |
userSig | String | A ticket for TRTC authentication: Development Environment: Use GenerateTestUserSig.genTestSig locally or the UserSig Generation Tool to generate temporary credentials.Production: Generate UserSig server-side to prevent key exposure. See Server-Side UserSig Generation. |
Step 3: Functional Experience
Congratulations! You've successfully integrated the live video component and logged in. Next, you can start broadcasting, have viewers watch, or implement other live streaming features. For details, see the table below.
Function | Description | Experience Link |
Host Streaming | The live streamer's entire live streaming process is supported, including pre-streaming preparation and post-streaming interactions. | |
Audience Viewing | Viewers can enter the live streamer's room to watch the live stream, connect to the microphone, view live stream room information, view online viewers, and display comments. | |
Live Streaming Kit | A comprehensive set of out-of-the-box live streaming interfaces and features are provided, including video source control, microphone connection, audience interaction, live streaming in both landscape and portrait modes, and viewer management. | |
Live Streaming List | The live stream list interface and features include a live stream list and room information display. |
FAQ
If you need to deploy the project's packaged dist file, you must use an HTTPS domain name in the production environment.
Note:
Protocol Requirements for Production:
Due to browser security policy restrictions, using WebRTC capabilities has strict requirements for page access protocols. Please refer to the following table for application development and deployment.
Environment | Protocol | Receive Stream | Send Stream | Screen Sharing | Notes |
Production | HTTPS | ✓ | ✓ | ✓ | Recommended |
Production | HTTP | ✓ | ✗ | ✗ | - |
Local Development | http://localhost | ✓ | ✓ | ✓ | Recommended |
Local Development | http://127.0.0.1 | ✓ | ✓ | ✓ | - |
Local Development | http://[Local IP] | ✓ | ✗ | ✗ | - |
Local Development | file:// | ✓ | ✓ | ✓ | - |

