
Run Sample Demo
This article provides a detailed guide on how to quickly run the TUILiveKit Demo. Following the instructions, you can run the demo in less than 10 minutes and experience a live online demo with a complete UI interface. You can also customize the page style, layout, and functionality according to your needs by following the free customization instructions on each page.
Step 1: Environment Preparation
Before running the demo, you need to refer tothe preparation guide to complete the required environment configuration and activate the corresponding services.
Step 2: Download the Demo
1. Download the TUILiveKit Demo from GitHub, or run the following command directly from the command line:
git clone https://github.com/Tencent-RTC/TUILiveKit.git
2. Install dependencies
cd TUILiveKit/Web/web-vite-vue3npm install
Step 3: Configure Demo
You need to refer to the preparation in step 1, open the
TUILiveKit/Web/web-vite-vue3/src/config/basic-info-config.js file in the Demo, and enter the SDKAppID and SDKSecretKey obtained when activating the service in the preparation: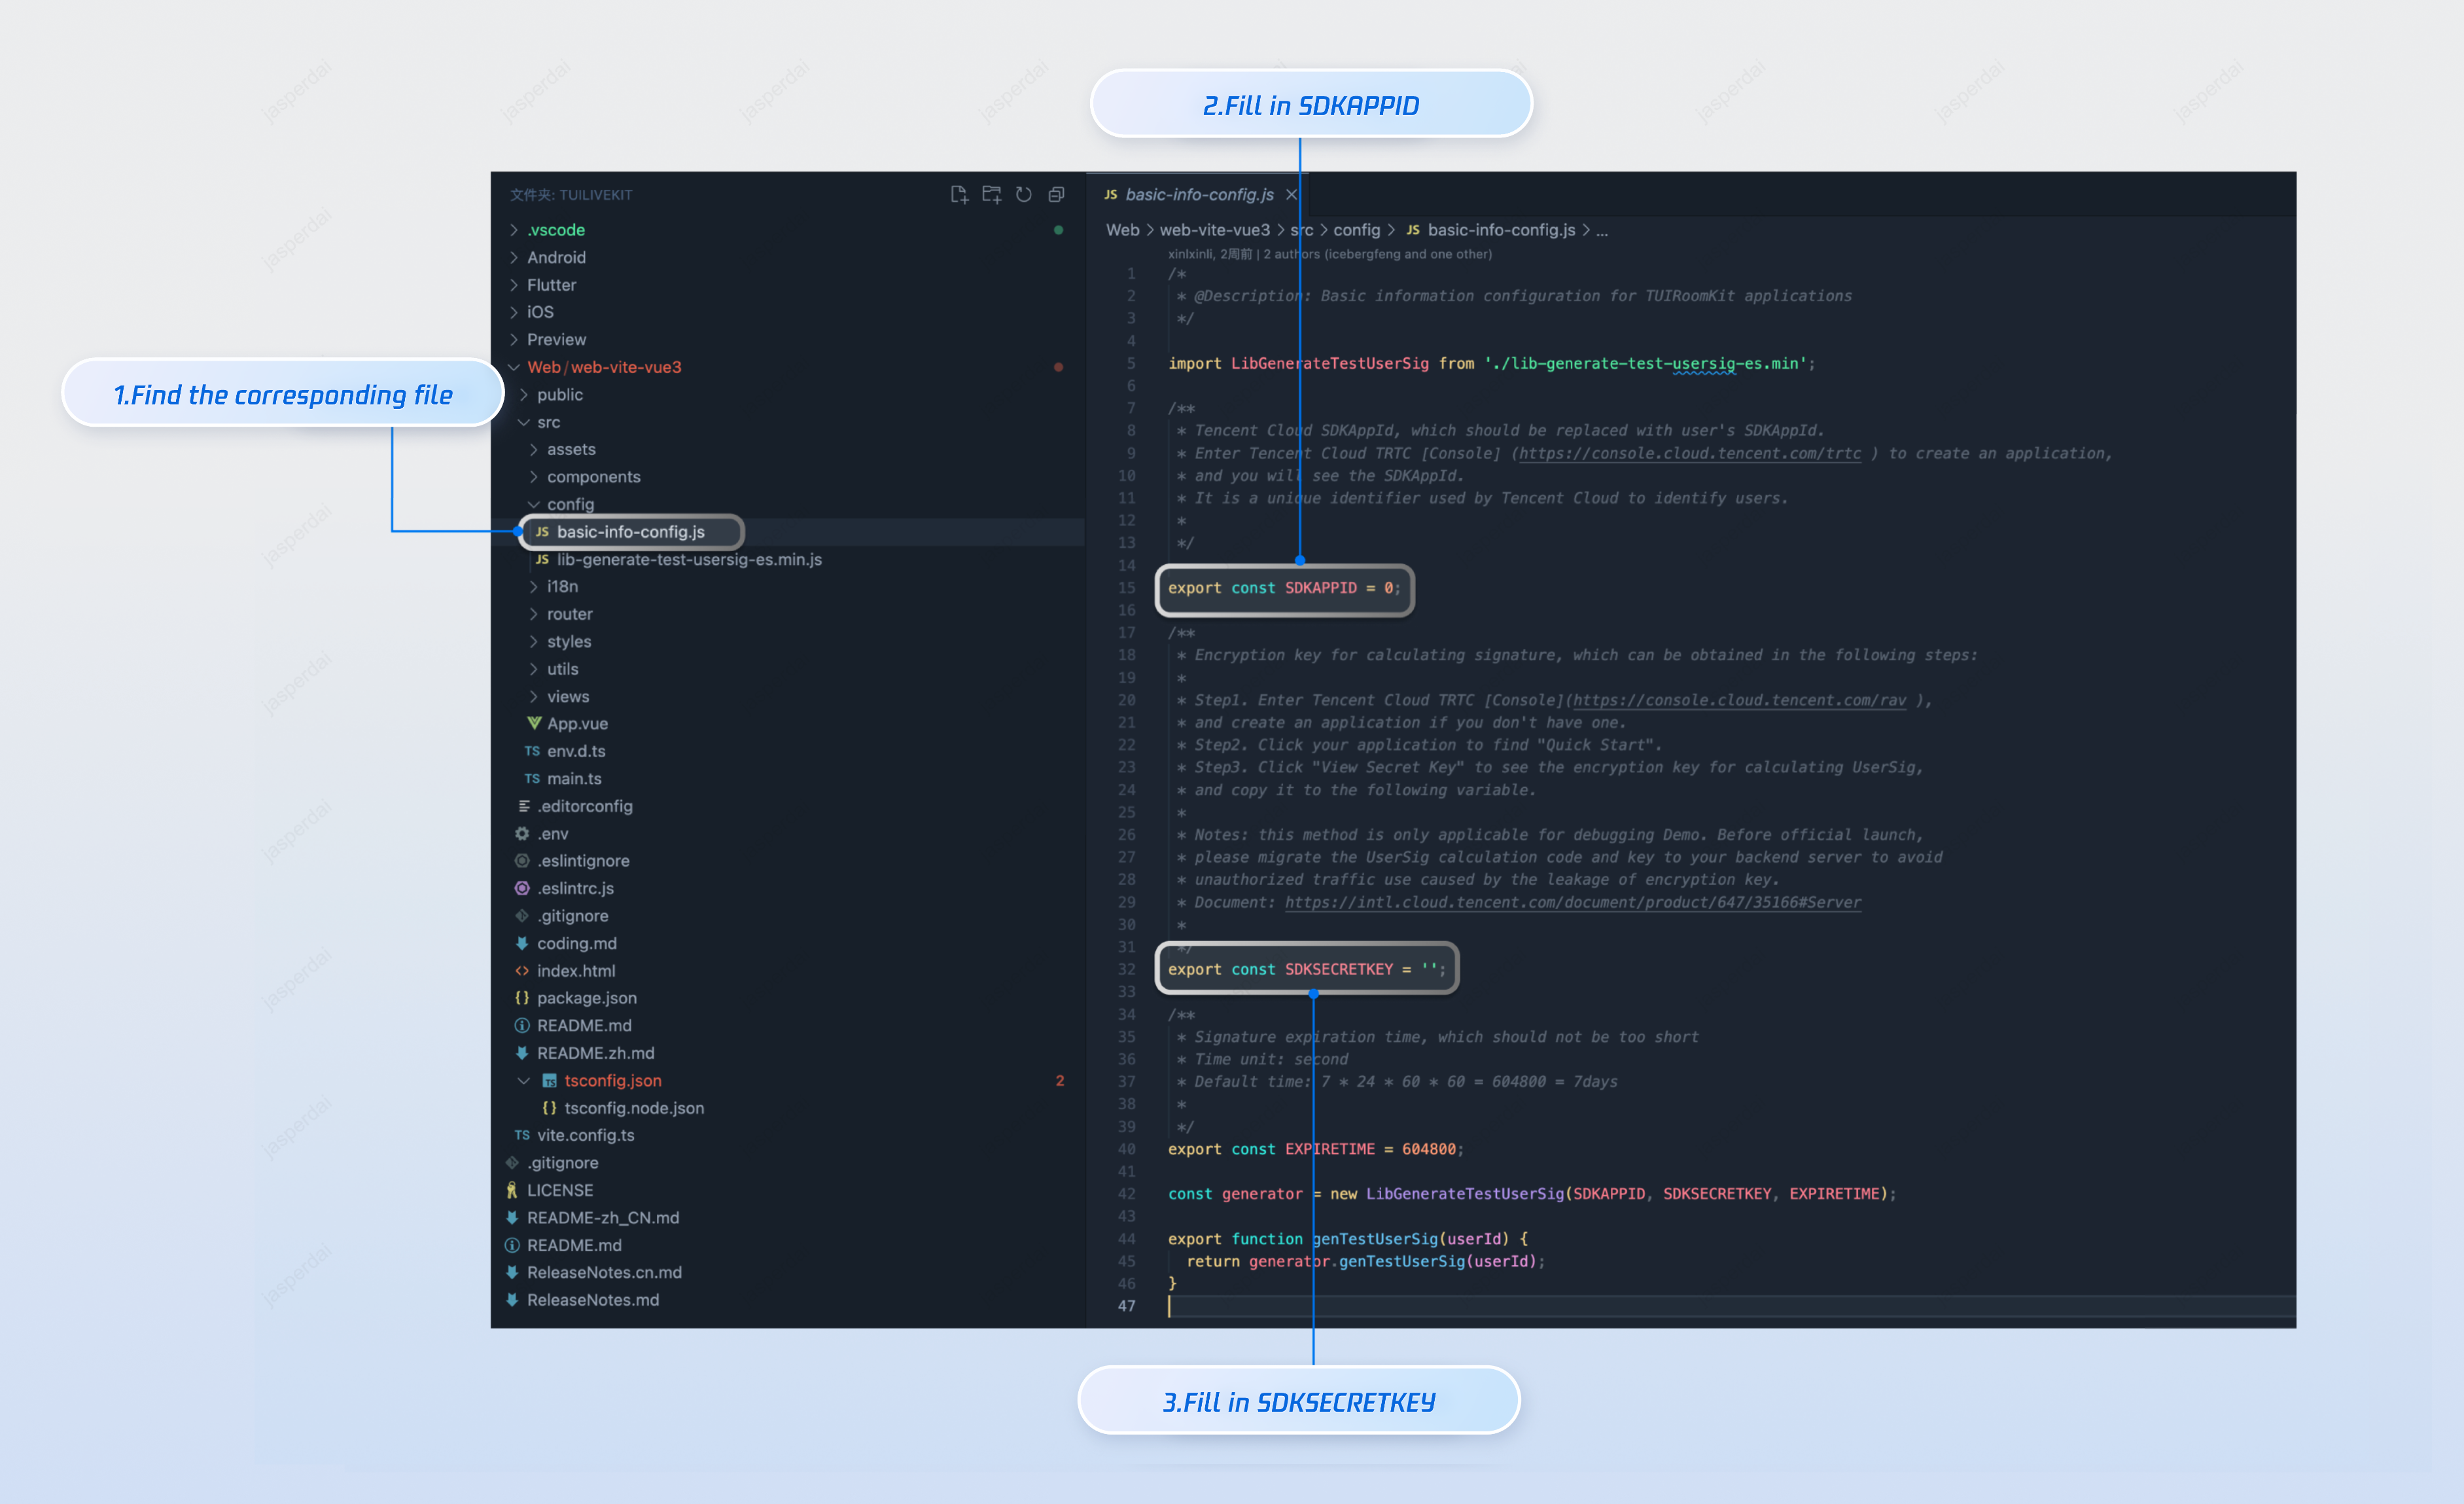
Step 4: Run the Demo
npm run dev
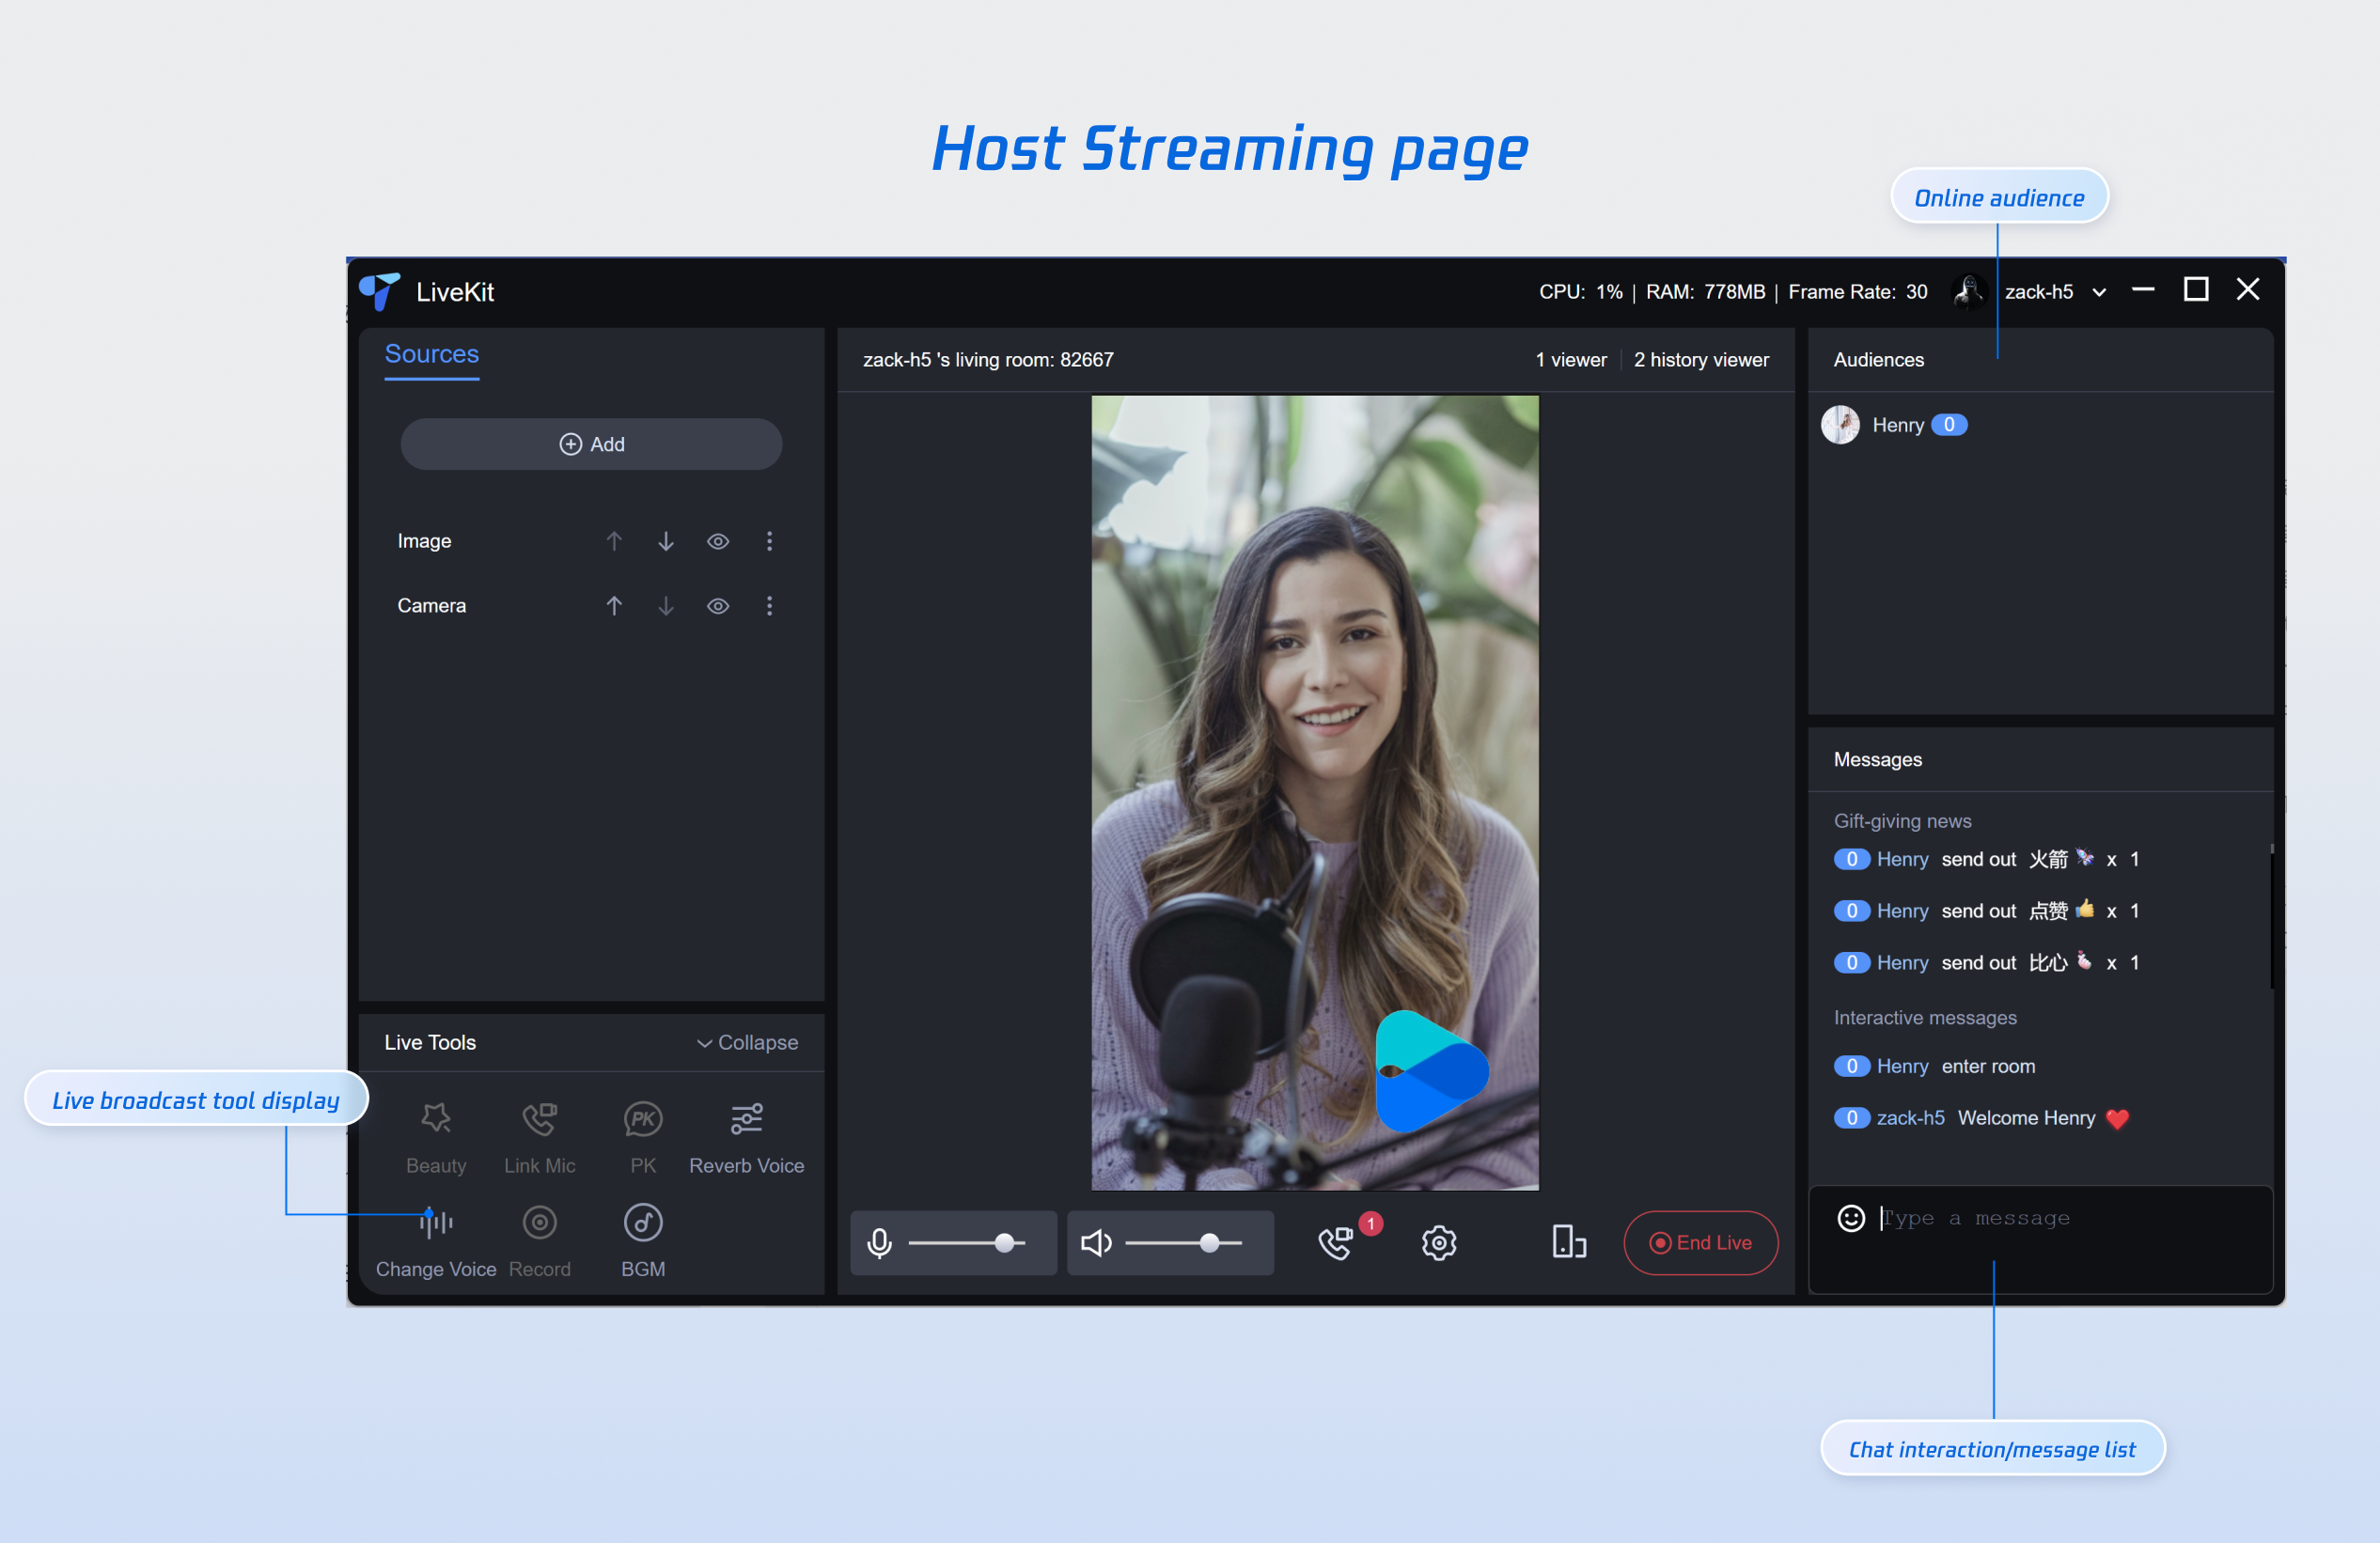
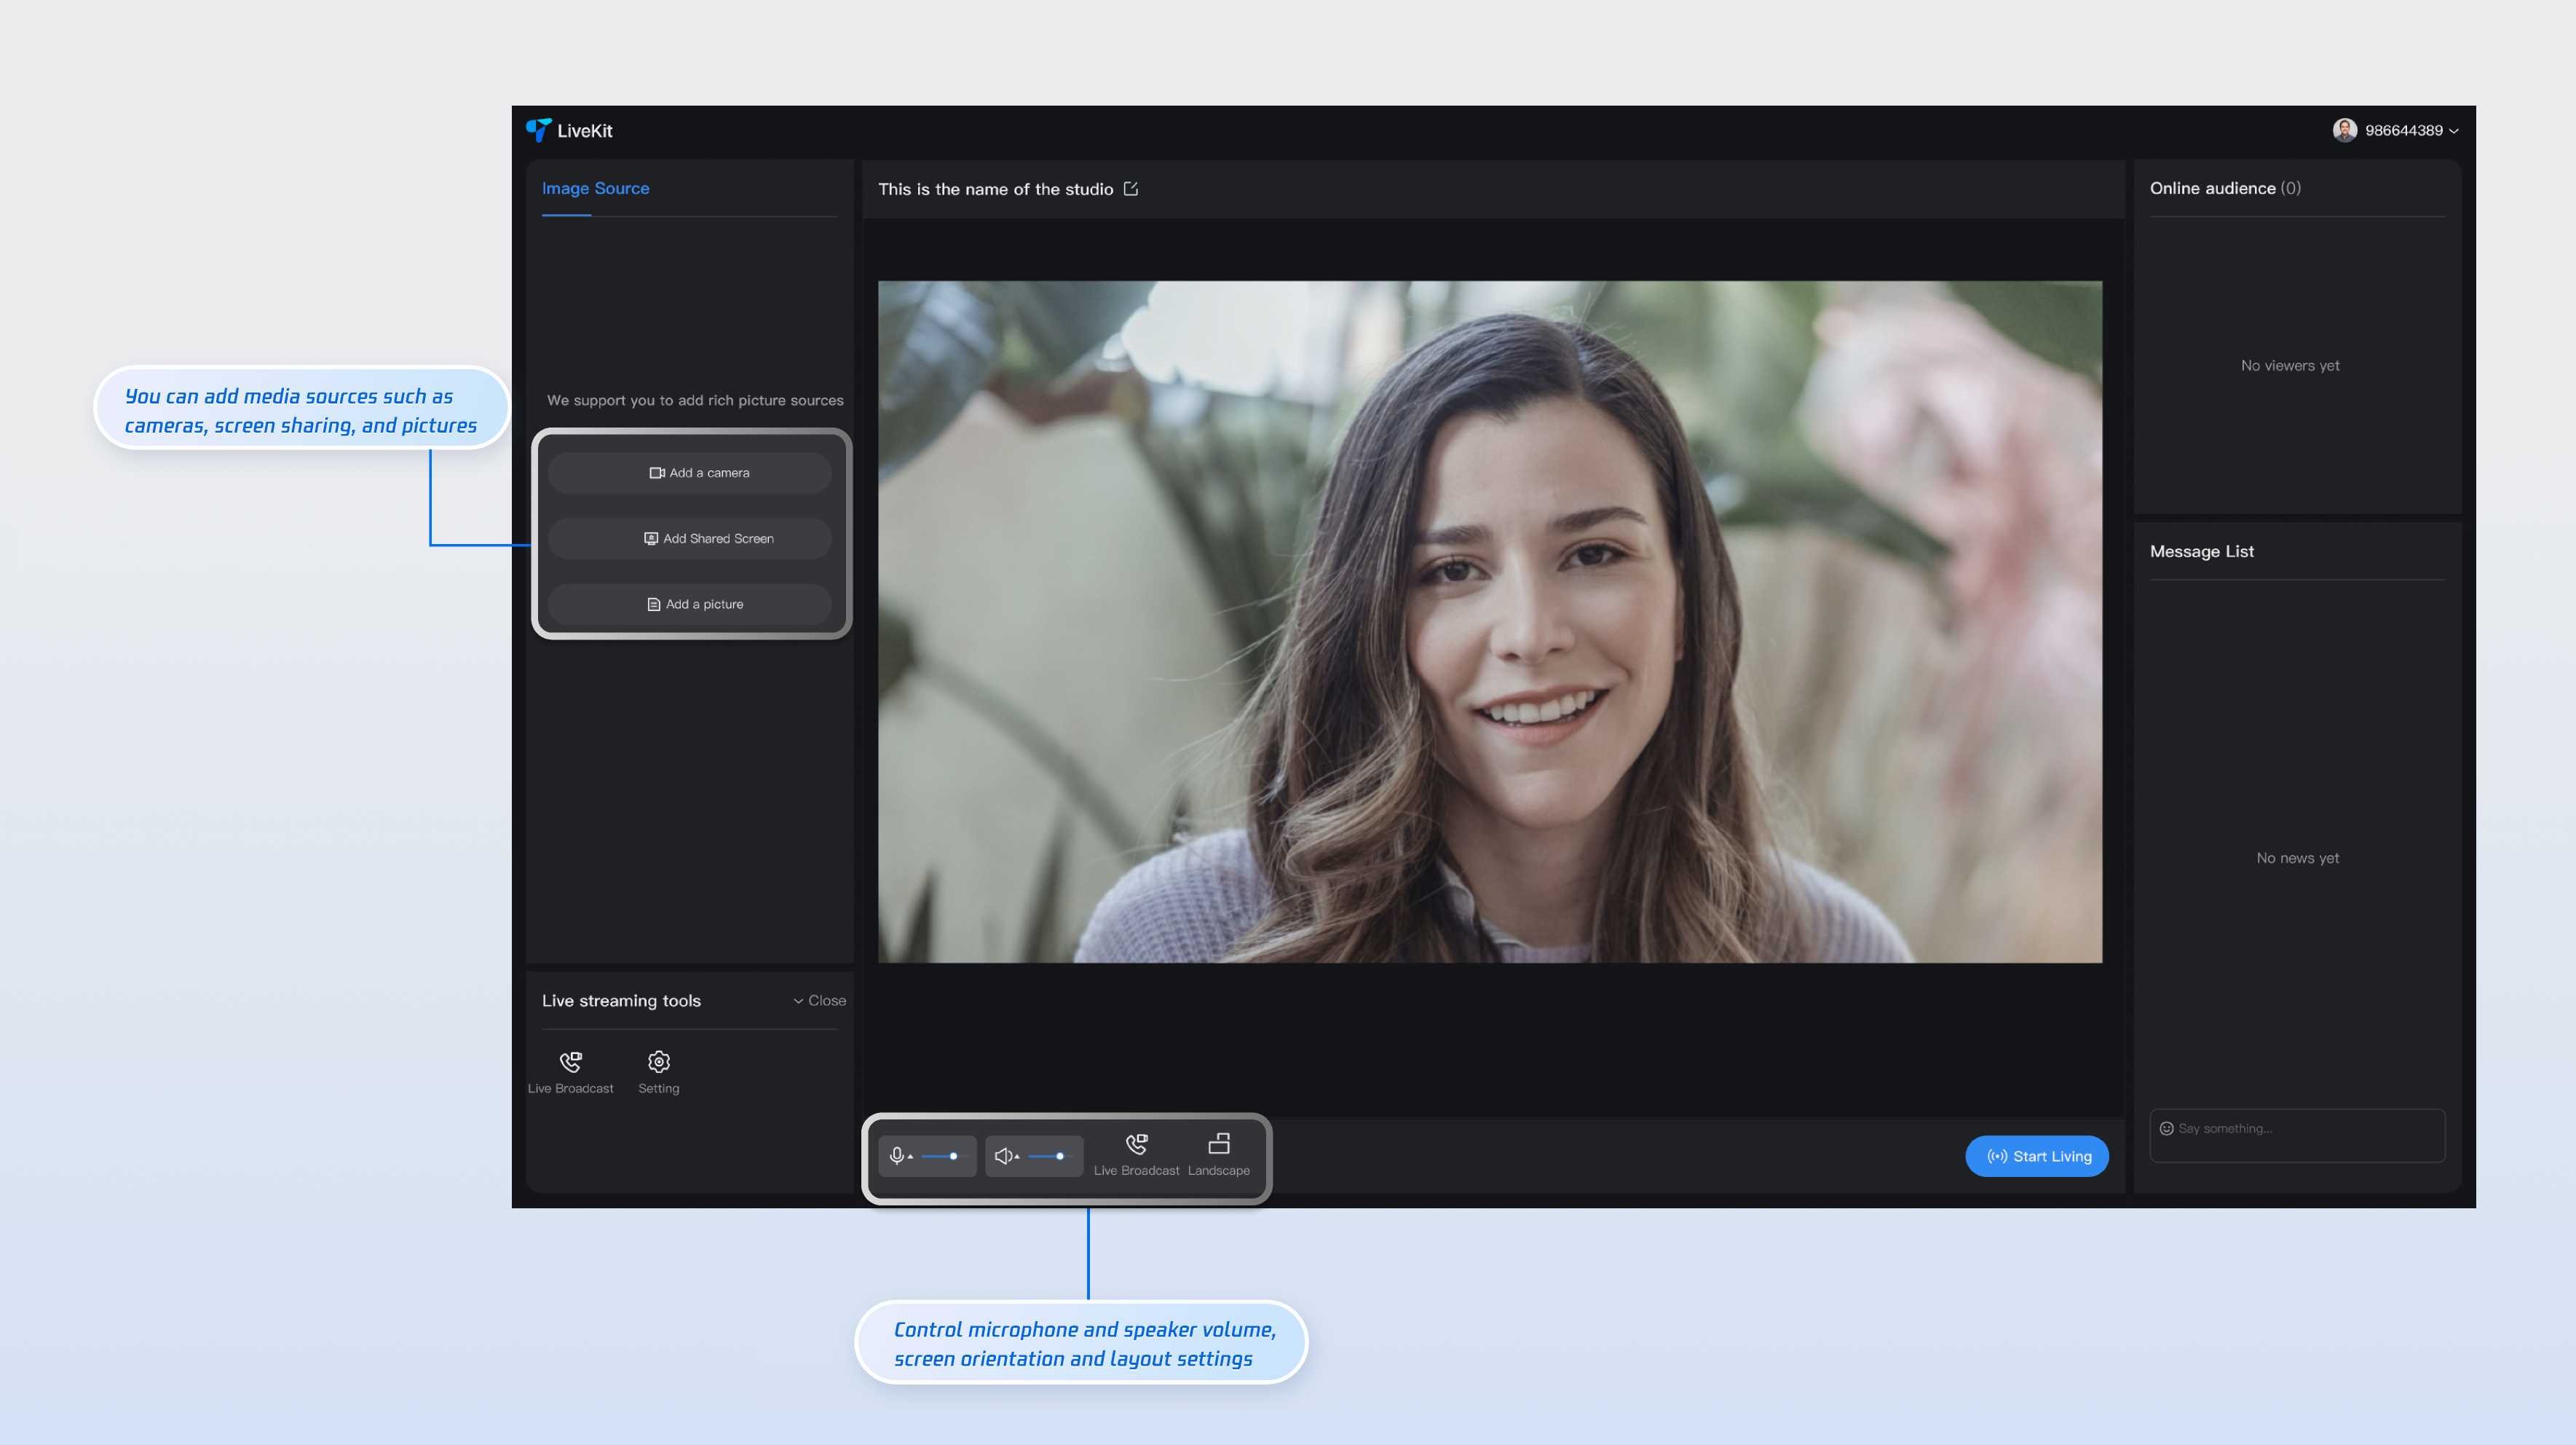
Step 5: Start the Live Stream
If you need to stream as a live streamer, you'll need to switch from the demo to the live streaming page. Simply change the URL in the navigation bar to http://localhost:5173/#/live-pusher to access the live streaming page. The live streaming page supports both landscape and portrait streaming. Additionally, you can add media sources to the page in the Add Sources area on the left. You can also click the Connect Viewer button below to accept or reject a viewer's request to connect.
Customization Guidelines
If you need to selectively integrate a page into an existing project, or need to customize the UI of a page, you can refer to the following links to the respective page documentation and follow the guidelines to customize the UI.
Page | Document Link |
Host Streaming | |
Audience Viewing | |
Live Streaming List |

