
방송 목록
Feature Overview
This document provides a comprehensive introduction to the Voice Chat Room Live List Page in
TUILiveKit. Use this guide to quickly integrate our pre-built live list page into your project, or to deeply customize the page’s style, layout, and features to fit your requirements.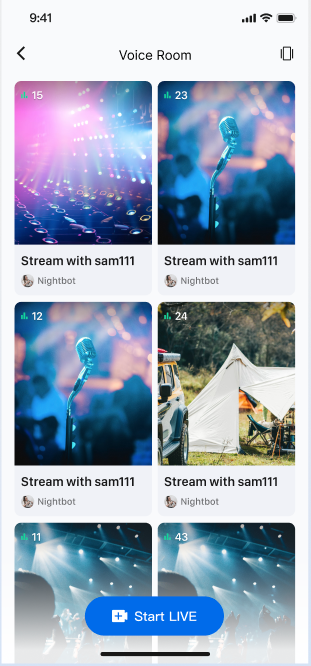
Quick Integration
Integrate the Component
Add the LiveListView
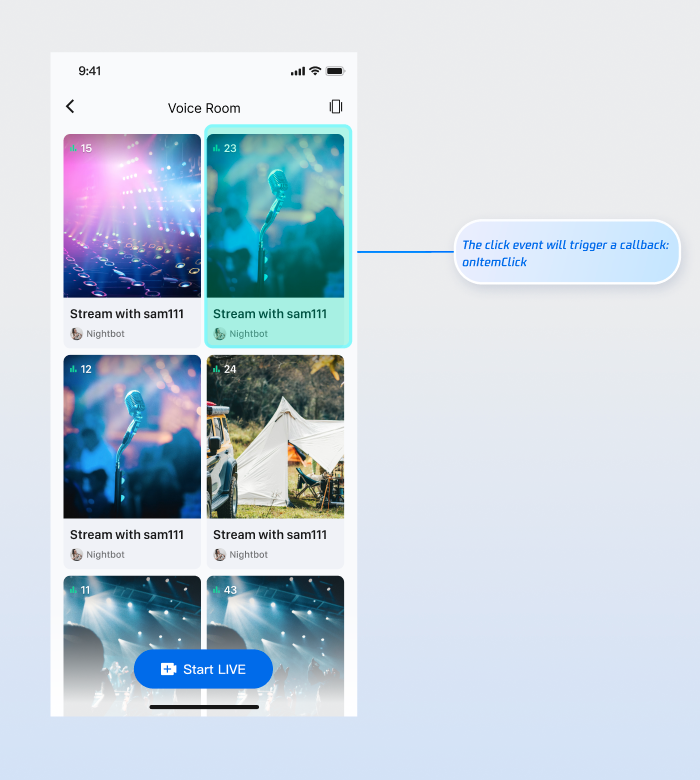
The voice chat room scenario currently supports only a two-column waterfall layout.
// Example: YourLiveListViewController represents your live list waterfall view controllerclass YourLiveListViewController: UIViewController {// 1. Declare liveListView as a member variableprivate let liveListView = LiveListView(style: .doubleColumn)public override func viewDidLoad() {super.viewDidLoad()// 2. Add liveListView to the viewview.addSubview(liveListView)liveListView.snp.makeConstraints { make inmake.edges.equalToSuperview()}// 3. Set the item click delegate for the listliveListView.itemClickDelegate = self}}
Implement Navigation from the Live List Page to the Audience Watch Page
The live list handles item click events using the
OnItemClickListener callback. Implement OnItemClickListener in your live list waterfall view to handle user clicks and navigate to the audience watch page in onItemClick. For details on implementing the audience watch page, see Audience Watching.Interaction Example:
Code Example:
extension YourLiveListViewController: OnItemClickDelegate {func onItemClick(liveInfo: LiveInfo, frame: CGRect) {// 1. Instantiate your audience watch view controllerlet audienceVC = YourAudienceViewController(roomId: liveInfo.roomId)audienceVC.modalPresentationStyle = .fullScreen// 2. Present the audience watch view controllerpresent(audienceVC, animated: false)}}
Customize UI
TUILiveKit provides flexible APIs for customizing the live list waterfall component. You can customize the data source and the appearance of list items to fit your business needs.Custom Data Source
If your backend provides a custom live list, implement the
LiveListDataSource interface to supply your own data instead of using the component’s default data.// Example: YourLiveListViewController represents your live list waterfall view controllerclass YourLiveListViewController: UIViewController {private let liveListView: LiveListView = LiveListView(style: .doubleColumn)public override func viewDidLoad() {super.viewDidLoad()view.addSubview(liveListView)liveListView.snp.makeConstraints { make inmake.edges.equalToSuperview()}liveListView.itemClickDelegate = self// 1. Set the custom data source delegateliveListView.dataSource = self}}// 2. Implement the custom data source delegate: LiveListDataSourceextension YourLiveListViewController: LiveListDataSource {public func fetchLiveList(cursor: String, onSuccess: @escaping LiveListBlock, onError: @escaping TUIErrorBlock) {// 3. Connect to your backend and return data to the UI component in the following formatvar liveInfoList: [LiveInfo] = []var liveInfo = LiveInfo()liveInfo.roomId = "live_123456"liveInfo.name = "live_123456"liveInfoList.append(liveInfo)let cursor = "aabbccdd"onSuccess(cursor, liveInfoList)}}
Custom View
By default, the waterfall list item displays the room cover. To customize the top UI elements of the list item (such as the host avatar, live title, etc.), implement the
LiveListViewAdapter interface.// Example: YourLiveListViewController represents your live list waterfall view controllerclass YourLiveListViewController: UIViewController {private let liveListView: LiveListView = LiveListView(style: .doubleColumn)public override func viewDidLoad() {super.viewDidLoad()view.addSubview(liveListView)liveListView.snp.makeConstraints { make inmake.edges.equalToSuperview()}liveListView.itemClickDelegate = selfliveListView.dataSource = self// 1. Set the custom widget adapterliveListView.adapter = self}}// 2. Implement the custom widget adapterextension YourLiveListViewController: LiveListViewAdapter {public func createLiveInfoView(info: LiveInfo) -> UIView {// Custom widget viewreturn YourCustomView(liveInfo: info)}public func updateLiveInfoView(view: UIView, info: LiveInfo) {if let infoView = view as? YourCustomView {// Update the data bound to the widget viewinfoView.updateView(liveInfo: info)}}}
Next Steps
You have now successfully integrated the Live Stream List feature. Next, implement additional features such as Host Live Streaming and Audience Viewing. See the table below for details:
Feature | Description | Integration Guide |
Host Live Streaming | Implements the complete process for a host to start a voice chat room live, including pre-live setup and in-session interactions. | |
Audience Viewing | Enables audience participation after joining the host’s voice chat room, including joining the mic, sending and receiving bullet comments, and more. |
FAQs
Why are no live streams displayed after integrating the live list feature?
If the page is blank, verify that you have completed the login. To test, use two devices: start a live stream on one device, and use the other device to open the live list page. The live list will display any active live rooms.
What should I do if I use a custom data source (LiveListDataSource) but the list does not display or refresh?
Ensure you have correctly implemented the
LiveListDataSource interface. Pay special attention to the following:1. Confirm that the
fetchLiveList method is being called.2. Always call
callback.onSuccess or callback.onFailure after fetching data, regardless of the result.3. Verify that your backend returns data in the correct format.

