
Web
This article introduces how to integrate the Web Push service into a web application to implement the push notification feature.
Prerequisites
Enabling a Service
Log in to the Chat Console > App Push > Access settings > Push Basic Information, enable Push service, and obtain
SDKAppID and AppKey, as shown below: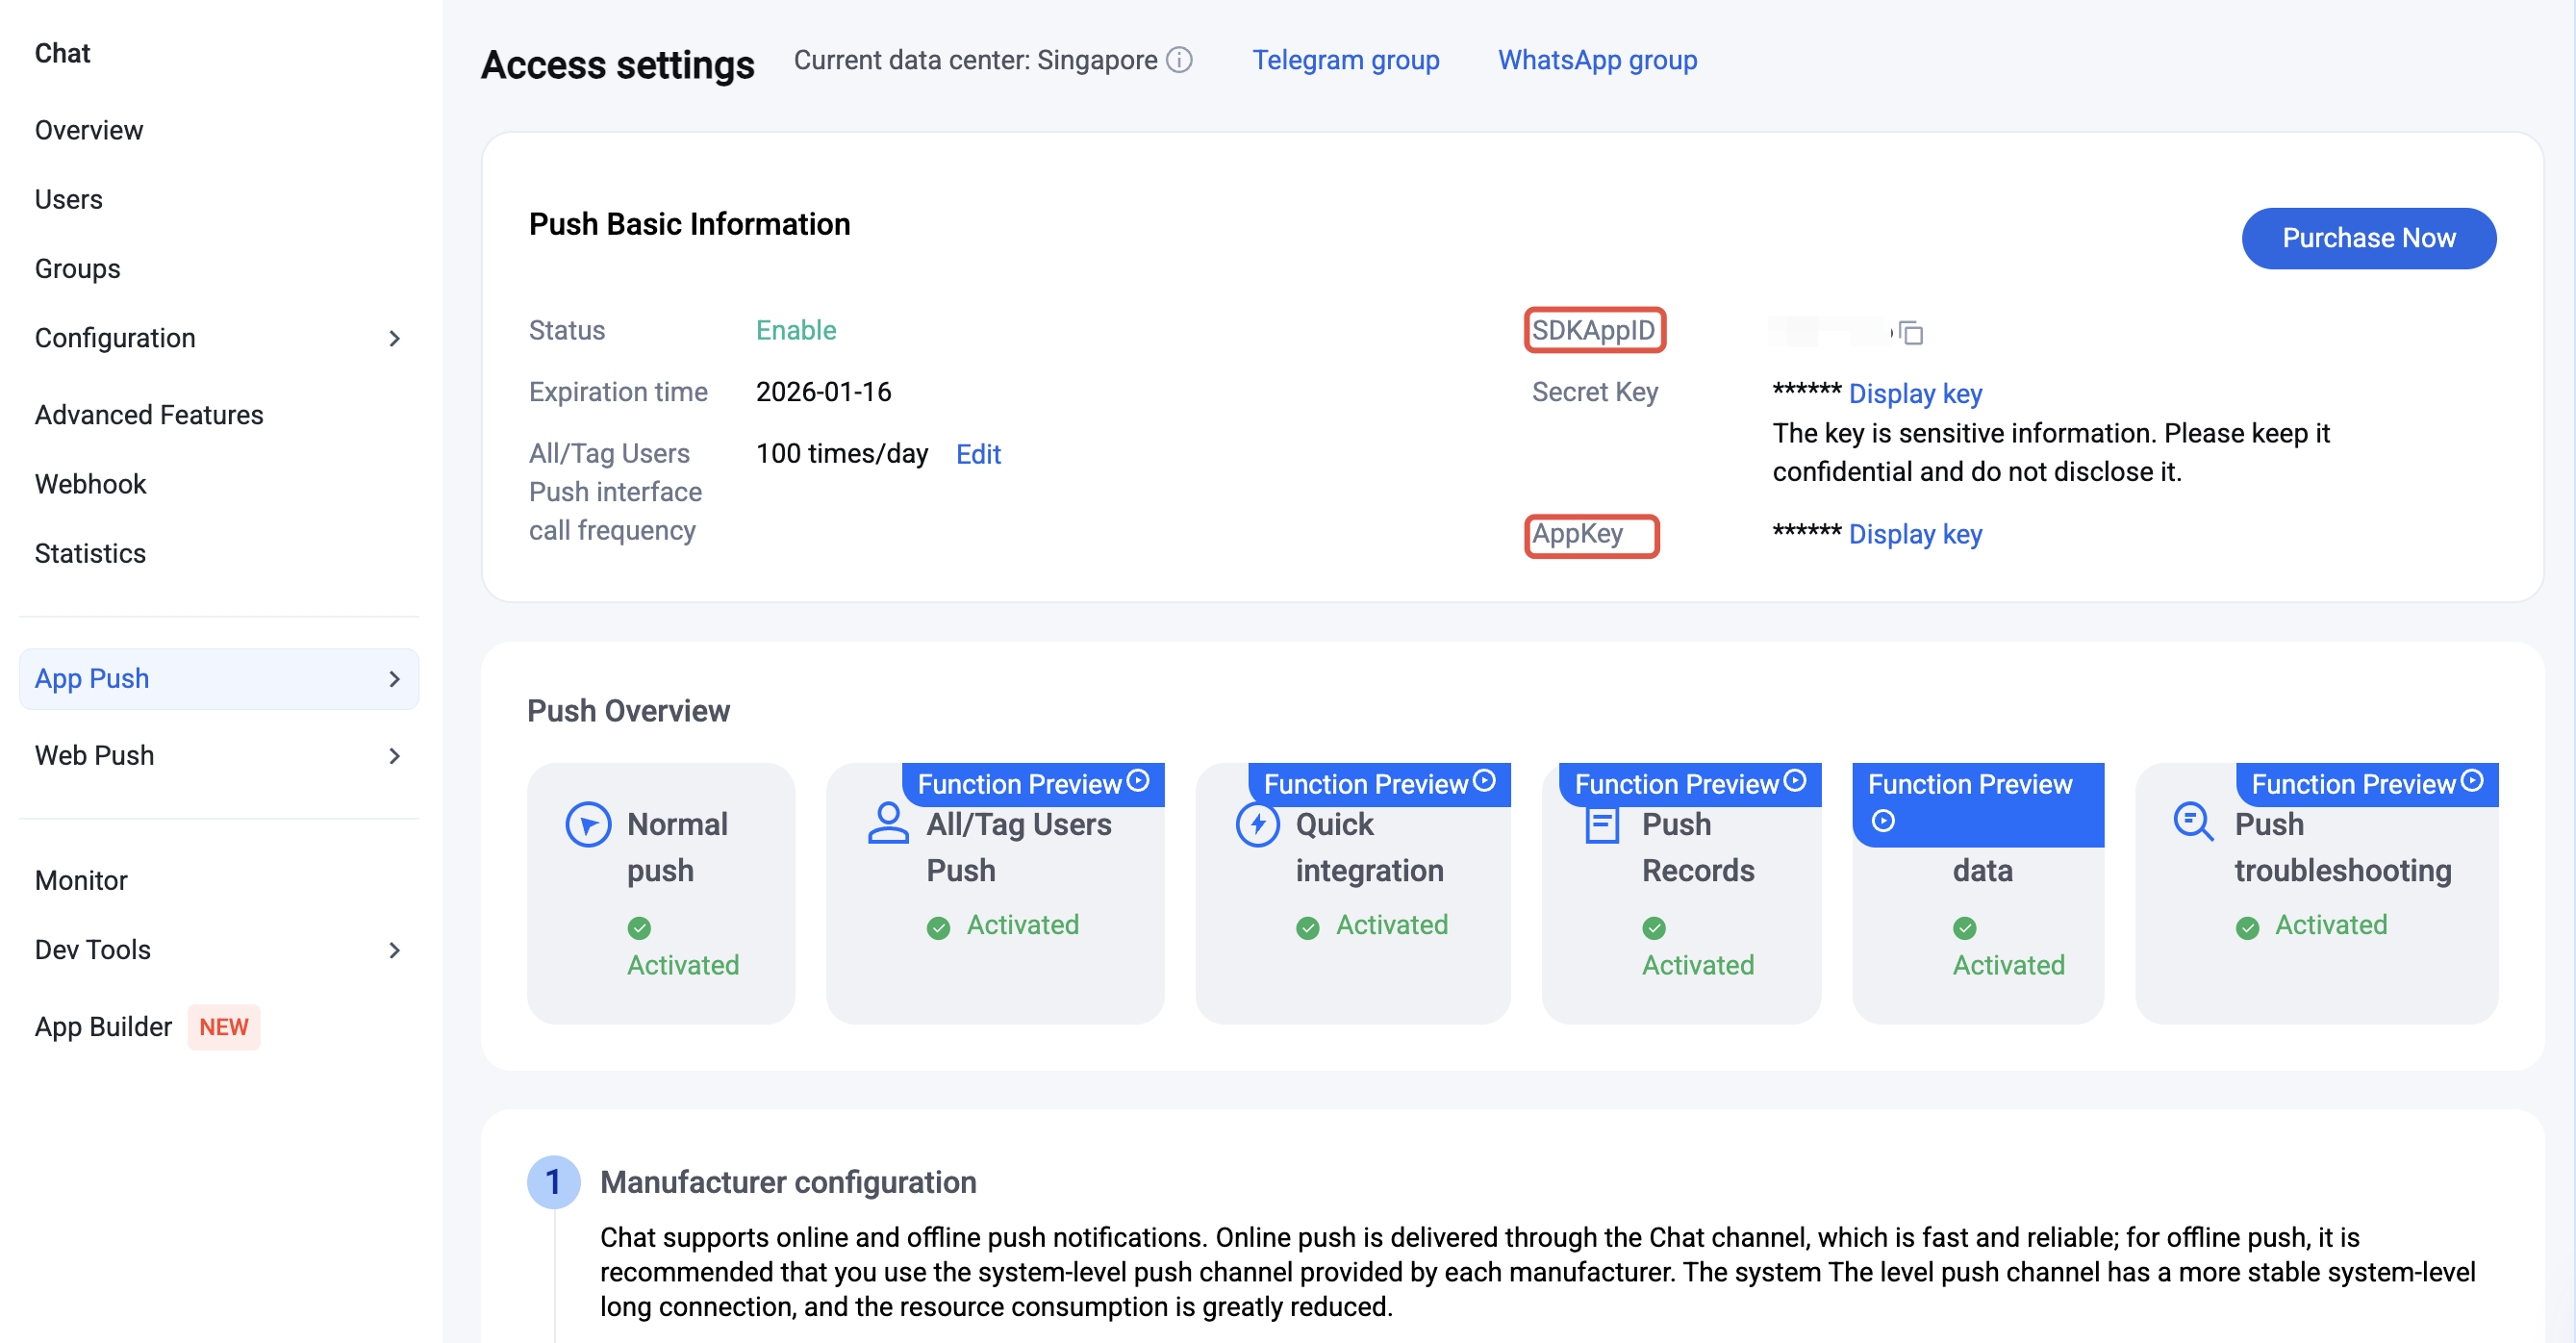
Environment Requirement
Runtime environment: Node.js v12 or higher.
Browser: Must support Service Worker and Push API. Mainstream requirements are Chrome 50+, Firefox 44+, Edge 17+.
Security protocol: You must use HTTPS in the production environment. HTTP (http://localhost) is usable for local development.
Browser Support
Note:
In special environments such as iframe, webview, and browser privacy mode, web push is unavailable.
For more compatibility cases, check Notification in the browser compatibility query tool.
browser type | Minimum browser version requirement |
Chrome | 50+ |
Edge | 17+ |
Firefox | 44+ |
Opera | 25+ |
Safari | 16+ |
Integration Step
Step 1: Integrating @Tencentcloud/Web-Push
npm install @tencentcloud/web-push --save
yarn add @tencentcloud/web-push
Step 2: Configure the Service Worker File
After integrating
@tencentcloud/web-push, copy the Service Worker (sw.js) to your project's root directory. After website deployment, ensure this file can be accessed through https://your-domain.com/sw.js. Otherwise, the browser will be unable to register the Service Worker.Note:
The sw.js file must be placed in the website's root directory to work properly due to browser security restrictions.
The sw.js file can only be registered successfully under HTTPS connection (or local development environment localhost). Ensure your live production environment website supports HTTPS.
Role of the public directory: In modern front-end projects (such as Vue, React, Next.js, etc.), the public directory is a unique directory whose content will not be compiled or renamed during build. Files placed in the public directory will be copied to the website's root directory as-is.
Note:
Place sw.js in the src or other directories, and it may be compiled or renamed (such as changed into sw.123abcde.js) by packaging tools (Webpack/Vite), thereby failing to register correctly.
If your project does not have a public directory (such as old-style HTML projects), place sw.js directly in the same directory as index.html to ensure it is located in the root directory after build output.
cp node_modules/@tencentcloud/web-push/dist/sw.js public/sw.js
copy node_modules\@tencentcloud\web-push\dist\sw.js public\sw.js
Step 3: Register for Push Services
In your homepage (for example:
index.js), add @tencentcloud/web-push and register.Parameter | Type | Description |
SDKAppID | Number | The SDKAppID for the push service Push. For reference: Prerequisites > Enabling a Service to obtain the SDKAppID. |
appKey | String | The client key for the push service Push. For reference: Prerequisites > Enabling a Service to obtain the AppKey. |
userID | String | Register the userID for push services. User's Unique Identifier, defined by you, can only include uppercase and lowercase letters (a-z, A-Z), numbers (0-9), underscores, and hyphens. |
import WebPush from '@tencentcloud/web-push';const SDKAppID = 0; // Your SDKAppIDconst appKey = ''; // client keyconst userID = ''; // user ID// Register for push serviceawait WebPush.registerPush({ SDKAppID, appKey, userID });// Listen to push messagesWebPush.addPushListener(WebPush.EVENT.MESSAGE_RECEIVED, (message) => {console.log('received push message:', message);});// Listen to notification clickWebPush.addPushListener(WebPush.EVENT.NOTIFICATION_CLICKED, (data) => {console.log('notification clicked:', data);});
Step 4: Experience Your First Push
Before the test push, follow these step operations:
1. Open the browser console and check whether there is
registerPush ok.2. Send your first push message using the Server API > UserID-Targeted Push feature.
3. After a successful API call (normally returning a successful status code), check whether the device notification bar has received the notification normally.
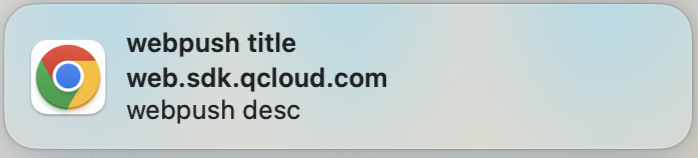
Successful push notifications are shown below:
Push Result Callback
After enabling the push service, the push result will be forwarded to the backend via webhook. For details, see:
FAQs
Push Reception Failure Troubleshooting
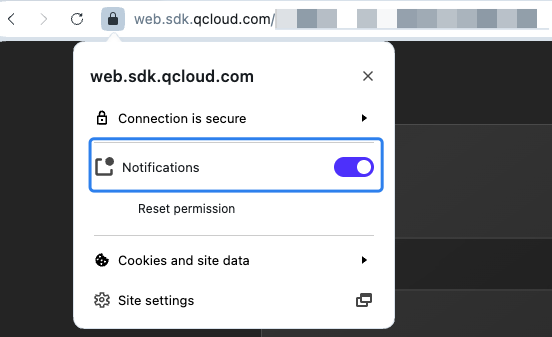
1. Confirm notification permission is on.
The operating system allows the browser to send notifications.
macOS: System Preferences > Notifications, enable notification permission for the corresponding browser.
Windows: Settings > Privacy > Notifications, enable notification permission for the corresponding browser.
Allow websites to send notifications in the browser.
2. Confirm the website is actually accessed via
https (Exclusion: local localhost).Production environment:
https://Local development:
http://localhost3. Confirm sw.js is configured successfully.
Local environment: After starting up your project, visit
http://localhost:port number/sw.js in the browser. If you can see JavaScript code, it represents successful configuration.Production environment: Visit
https://your-domain.com/sw.js in the browser. If you can see JavaScript code, it represents successful configuration.4. Check whether the browser supports WebPush. See: Prerequisites > Browser support.
5. Check that the browser environment can access the international network.
6. Use the Push Notification Troubleshooting Tool provided by the push service to diagnose the sending status and possible reasons for failure.
Troubleshooting RegisterPush Error: "Error: {"Message": Invalid Webpush Domain, "Code": 70109}"
Live production environment: The primary domain name of the website differs from the console configured domain name.
Local environment: The website domain name is not
http://localhost.
