
Host Live Streaming (RESTful API)
RESTful API Live Streaming is built for scenarios that require strict control over live rooms. By centrally configuring room rules—such as room ID, layout template, and permissions—through your business backend, you can achieve cloud-based room management, multi-device streaming, and cross-platform viewing.
Applicable Scenarios
Starting a live stream via RESTful API allows you to tightly integrate live streaming workflows with your business logic. This approach is ideal for scenarios where you need strong control over live rooms:
Business Scenario | Core Value |
Paid/Reserved Live Streaming | Rooms are created only after backend permission verification, ensuring controlled allocation of live resources ( RoomId) and preventing unauthorized use. |
Enterprise/Education Live Streaming | The backend pre-configures layout templates (such as fixed grid layouts), ensuring a consistent viewing experience across different hosts and devices. |
Platform Operations Management | Supports server-side forced room dismissal, admin configuration, and user banning, enabling full lifecycle supervision of live streaming. |
Activate the Service
Activate the Service: See Activate the Service to obtain your
SDKAppID.Configure Application Admin Account: In the console, Configure Admin for API authentication.
Step 1: Create Room on Server Side
Have your business backend call the RESTful API to configure a live room. Refer to Create Room for details on invoking the room creation API.
https://xxxxxx/v4/live_engine_http_srv/create_room?sdkappid=88888888&identifier=admin&usersig=xxx&random=99999999&contenttype=json
Required Room Parameters
Field | Type | Required | Description |
RoomId | String | Required | Unique room identifier, up to 48 bytes. |
RoomType | String | Required | Room type. Use the fixed value: Live. |
SeatTemplate | String | Required | Layout template ID. See below for SeatTemplate Layout Options. |
Owner_Account | String | Required | Host ID (must be an account imported into the Live account system). It is recommended to use the host's userID for the current live room. |
SeatTemplate Layout Options
Note:
The number of mic seats you can configure depends on your package. For details, see Live Monthly Package regarding co-hosting capacity.
Vertical Video Streaming
Layout Type | Dynamic Grid Layout | Floating Window Layout | Fixed Grid Layout | Fixed Floating Window Layout |
Template ID | VideoDynamicGrid9Seats | VideoDynamicFloat7Seats | VideoFixedGrid9Seats | VideoFixedFloat7Seats |
Max Seats | 9 | 7 | 9 | 7 |
Description | Default layout. Grid size dynamically adjusts based on the number of co-hosts. | Audience co-hosts are displayed as floating windows. | Fixed co-host count. Each guest occupies a fixed grid slot. | Fixed co-host count. Guests are displayed as fixed floating windows. |
Preview | 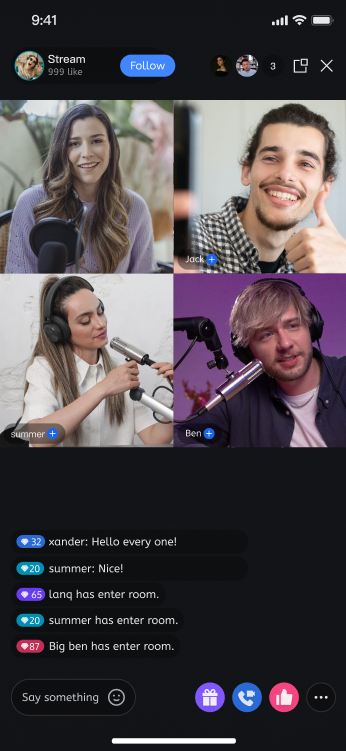 |  | 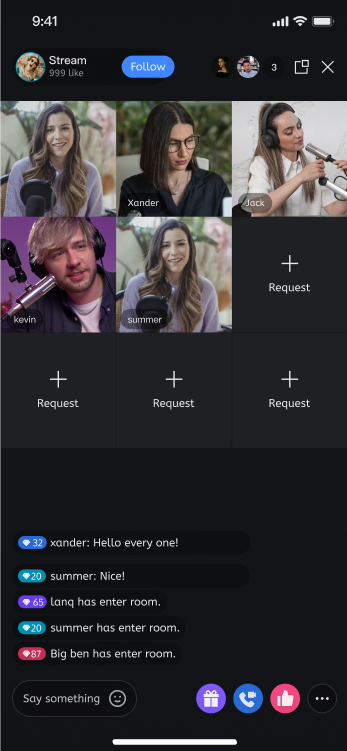 | 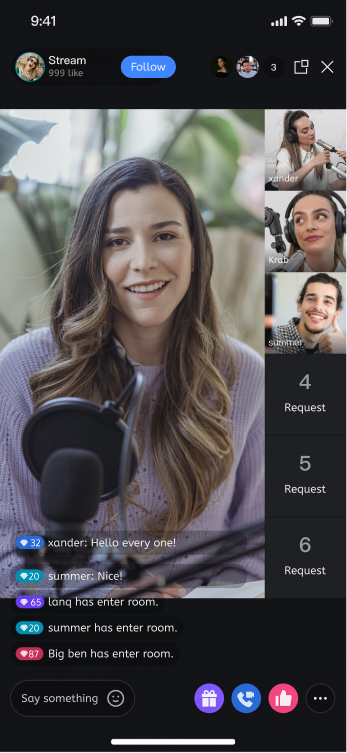 |
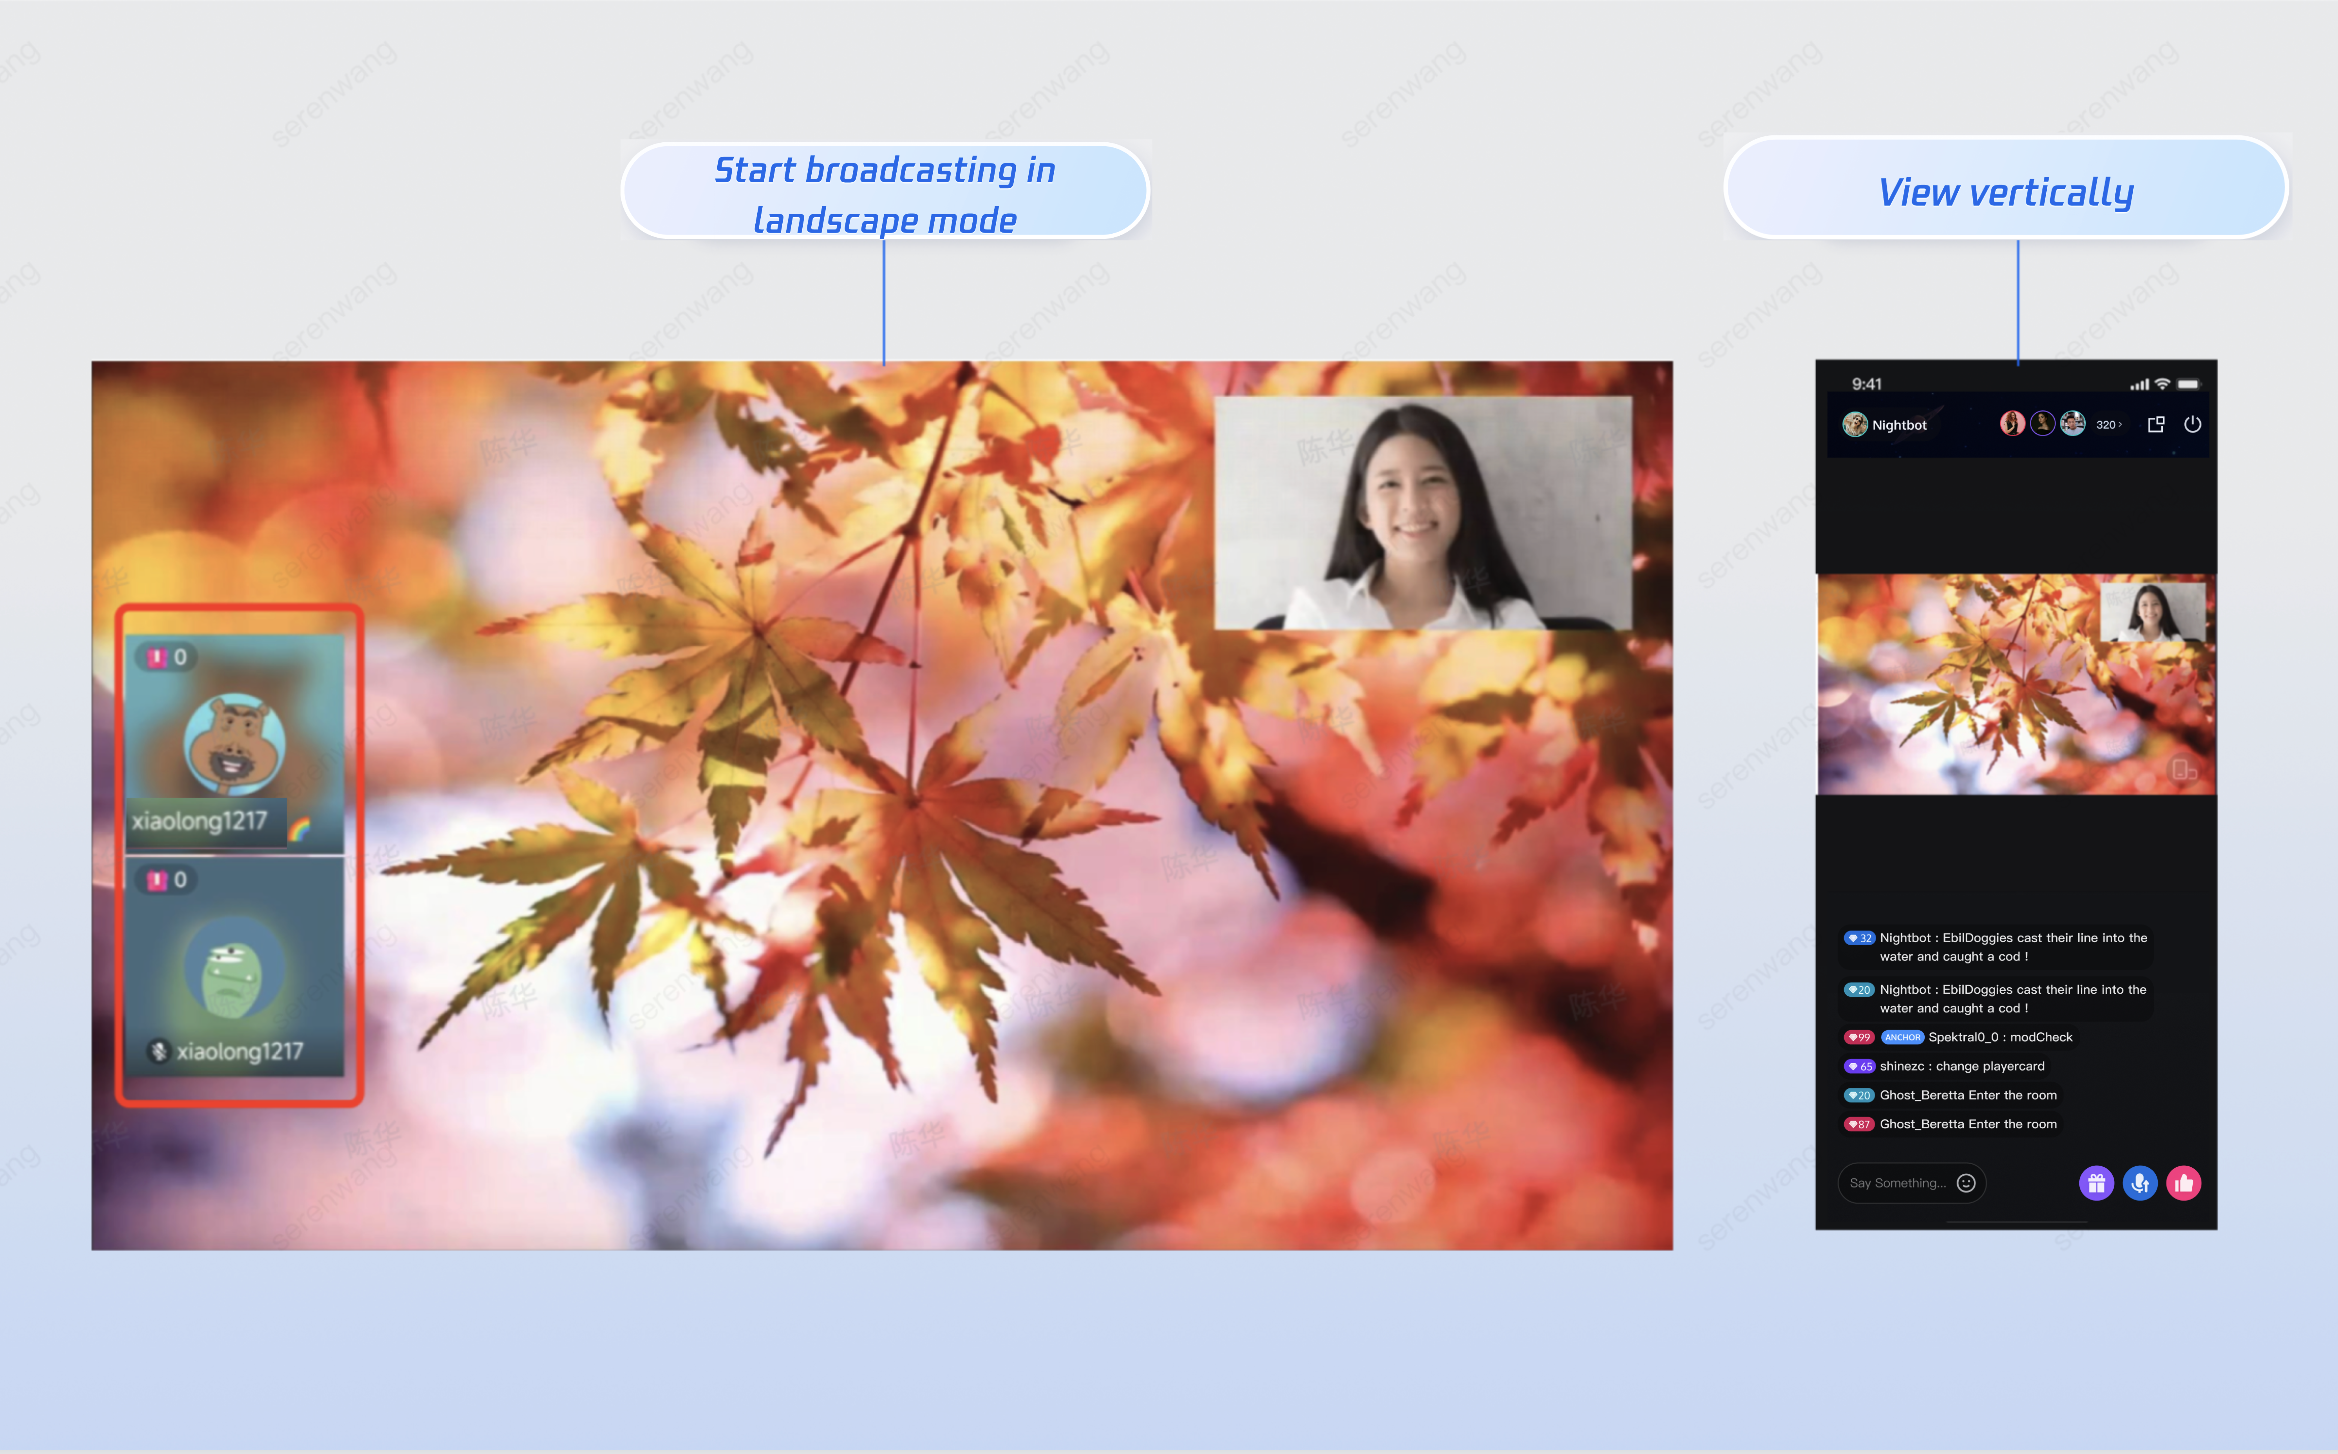
Horizontal Video Streaming
Template ID:
VideoLandscape4SeatMax Mic Seats: Supports up to 4 mic seats (1 host video seat, 3 audience co-host audio seats).
Live Effect:
Step 2: Select Streaming Method
In RESTful API mode, live room instances are pre-created by your backend. To simplify client logic, LiveKit standardizes the streaming API: the host only needs to call
startLive to begin streaming.Note:
Make sure the host's login
userId matches the Owner_Account set in the backend.Mobile App Streaming
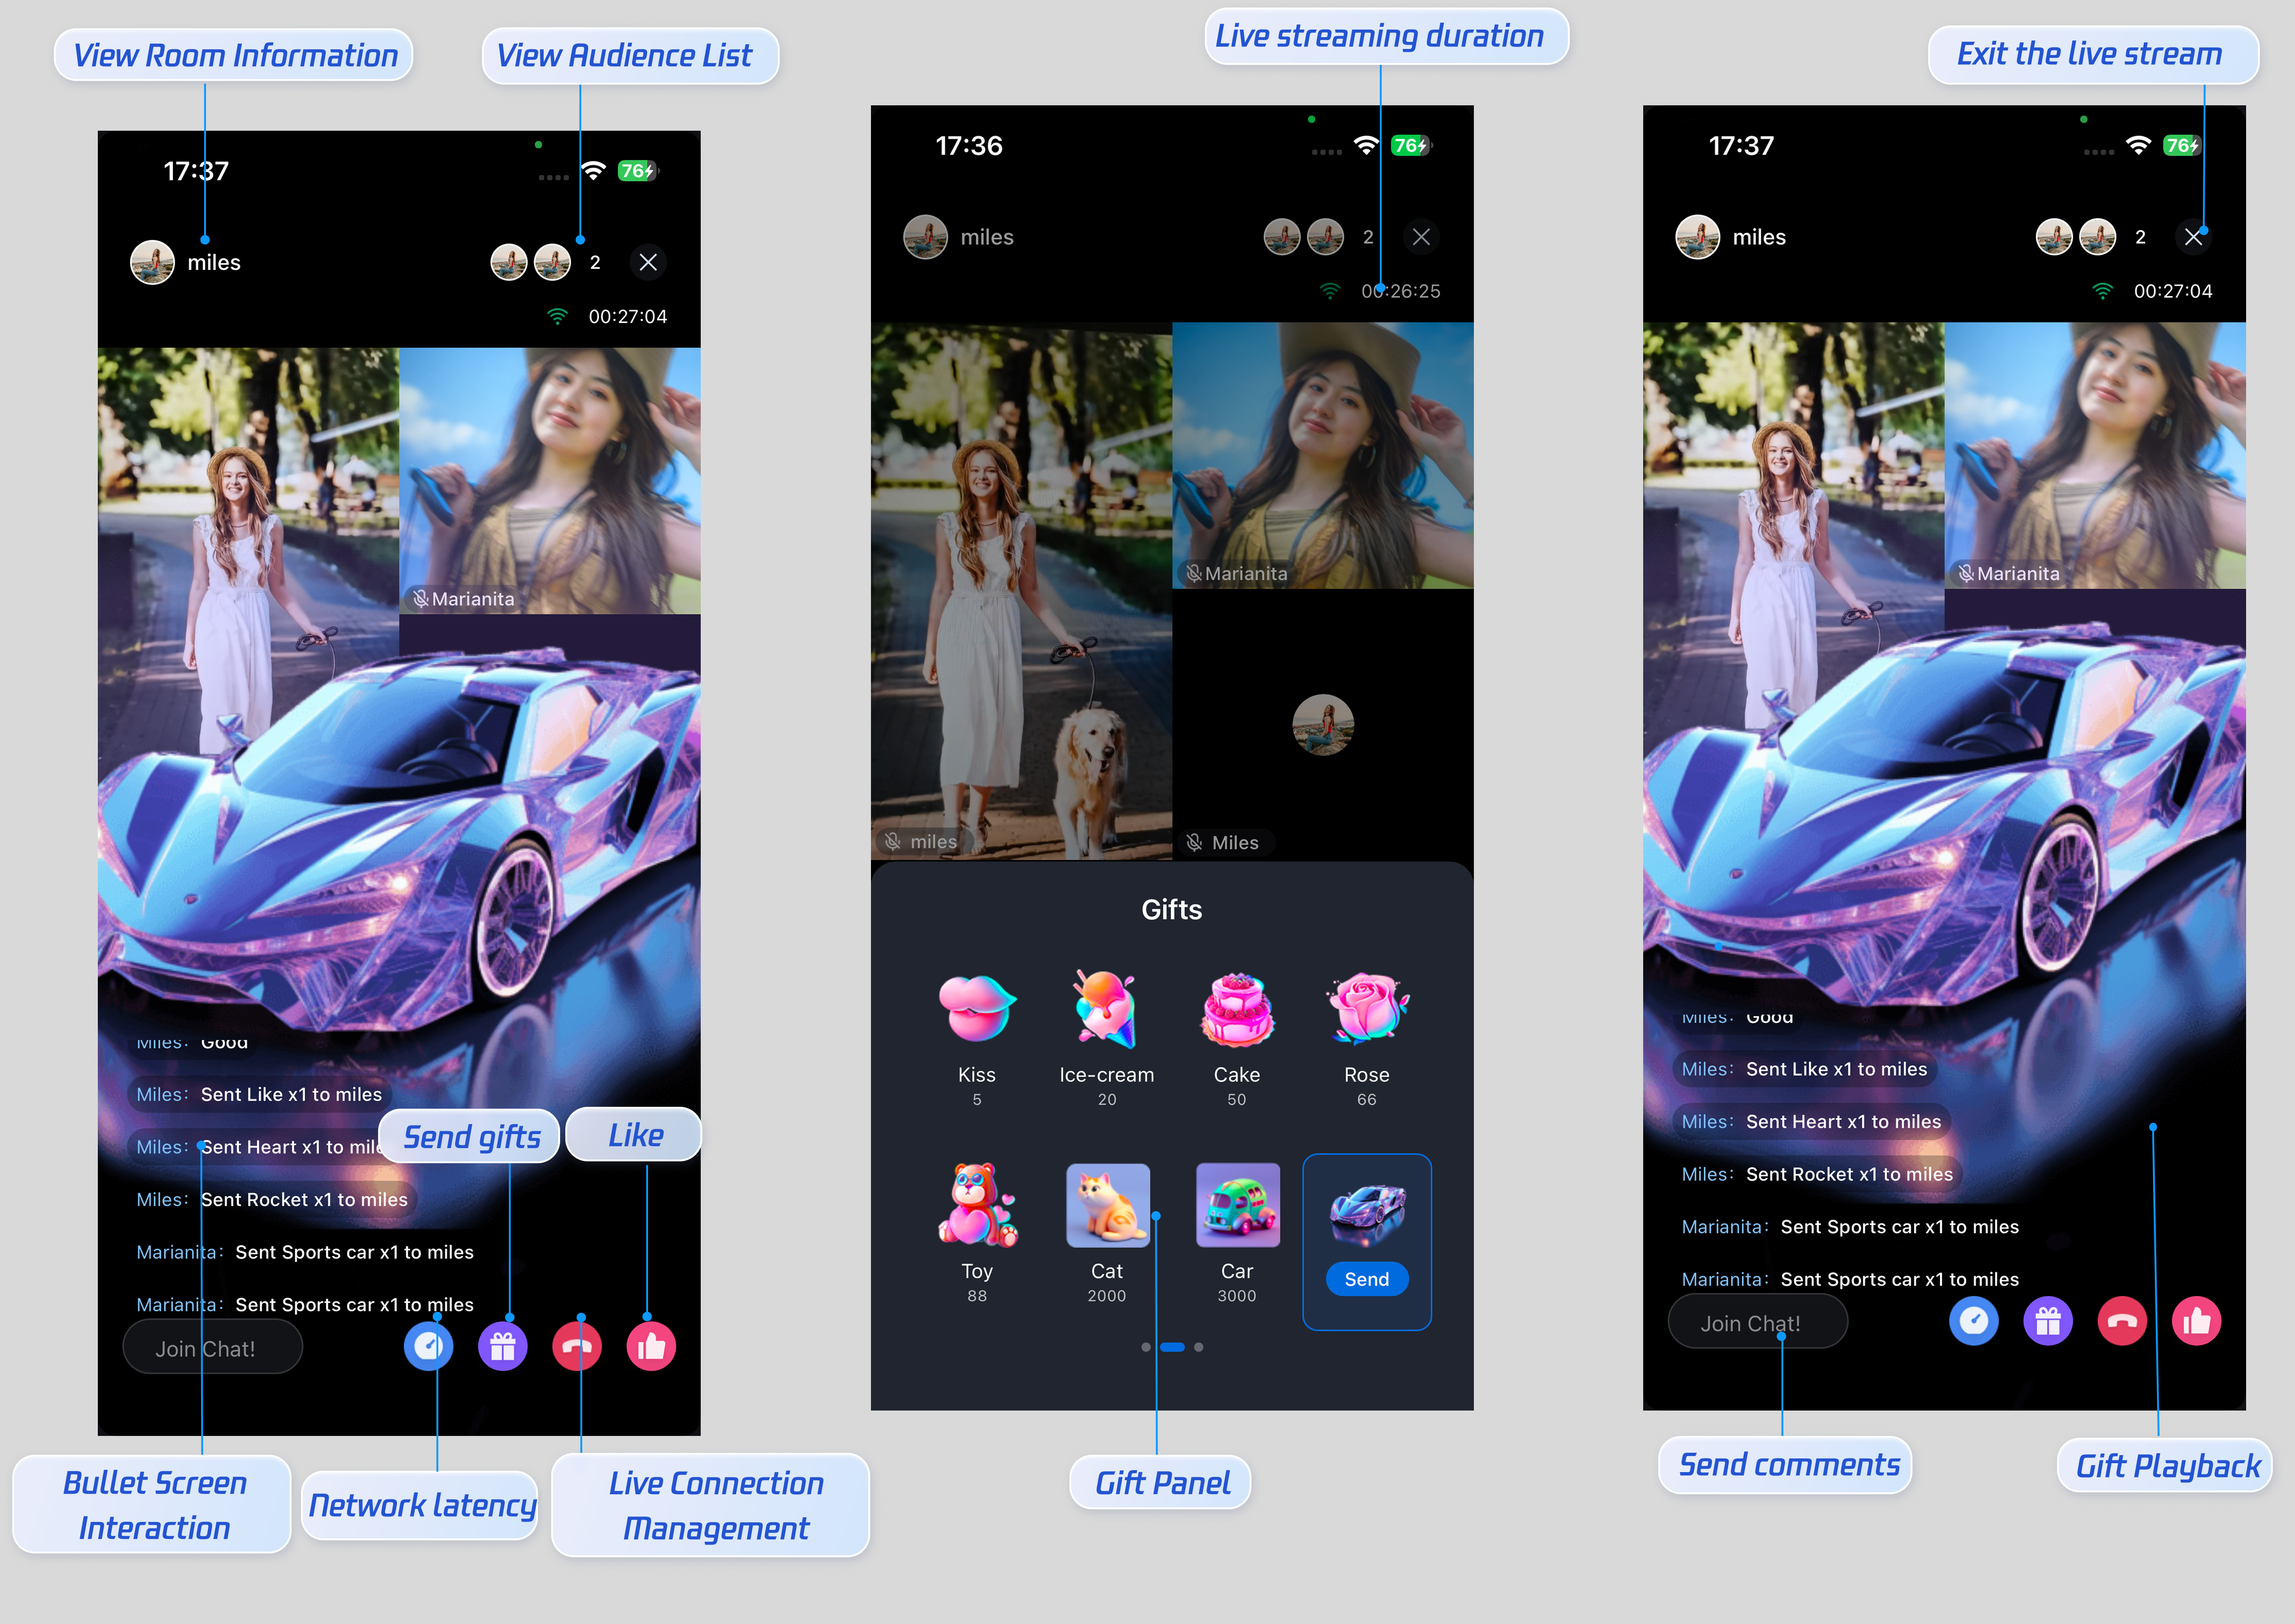
Applicable Scenarios: Outdoor streaming, mobile showrooms, lifestyle vlogs—ideal for portability and real-time interaction.
Core Advantages:
Easy Integration: Built-in beauty filters, voice changing, live comments, gifts, mic seat management, and more. Handles complex audio/video capture automatically.
Complete Interaction Suite: All mobile interactive features (beauty, stickers, voice changing, live comments, gifts, mic seat management) are included, so you don't need to assemble UI components manually.
High Performance & Low Power: Optimized for mobile devices, supports hardware encoding/decoding, and enables long-duration streaming without overheating or frame drops.
Flexible Scenarios: Natively supports automatic landscape/portrait switching, auto-reconnect after network loss, and background stream switching.
Integration Guide: See the sidebar Streaming Method for your platform's Host Streaming documentation. For iOS, when initializing the host streaming page, set the
LiveID parameter in the LiveInfo instance to the server-generated RoomId.// Assemble LiveInfo and set roomId from serverlet liveInfo = LiveInfo()liveInfo.liveID = "your_server_room_id" // Use the RoomId from your serverpublic init(liveInfo: LiveInfo, coreView: LiveCoreView? = nil) {self.liveInfo = liveInfoif let coreView = coreView {self.coreView = coreView} else {self.coreView = LiveCoreView()}self.anchorView = AnchorView(liveInfo: liveInfo, coreView: self.coreView, behavior: .createRoom)super.init(nibName: nil, bundle: nil)}
Web Browser Streaming

Applicable Scenarios: E-commerce hosting, online education. Supports multi-layer layouts in desktop browsers.
Core Advantages:
Multi-source Layout: Supports camera, screen sharing, window sharing, and image layering with drag-and-drop and mirroring.
Interactive Features: Built-in audience co-host layout switching, host PK, and full audience management (mute/kick).
Integration Guide (Vue3): See Web Browser Streaming for details. When integrating the host streaming page, set
liveId to the server-generated RoomId:// Set liveId in createLive to the server-generated RoomId during handleStartLiveconst handleStartLive = async () => {await createLive({liveId: 'your_server_room_id', // Use the RoomId from your server});};
PC Streaming Assistant
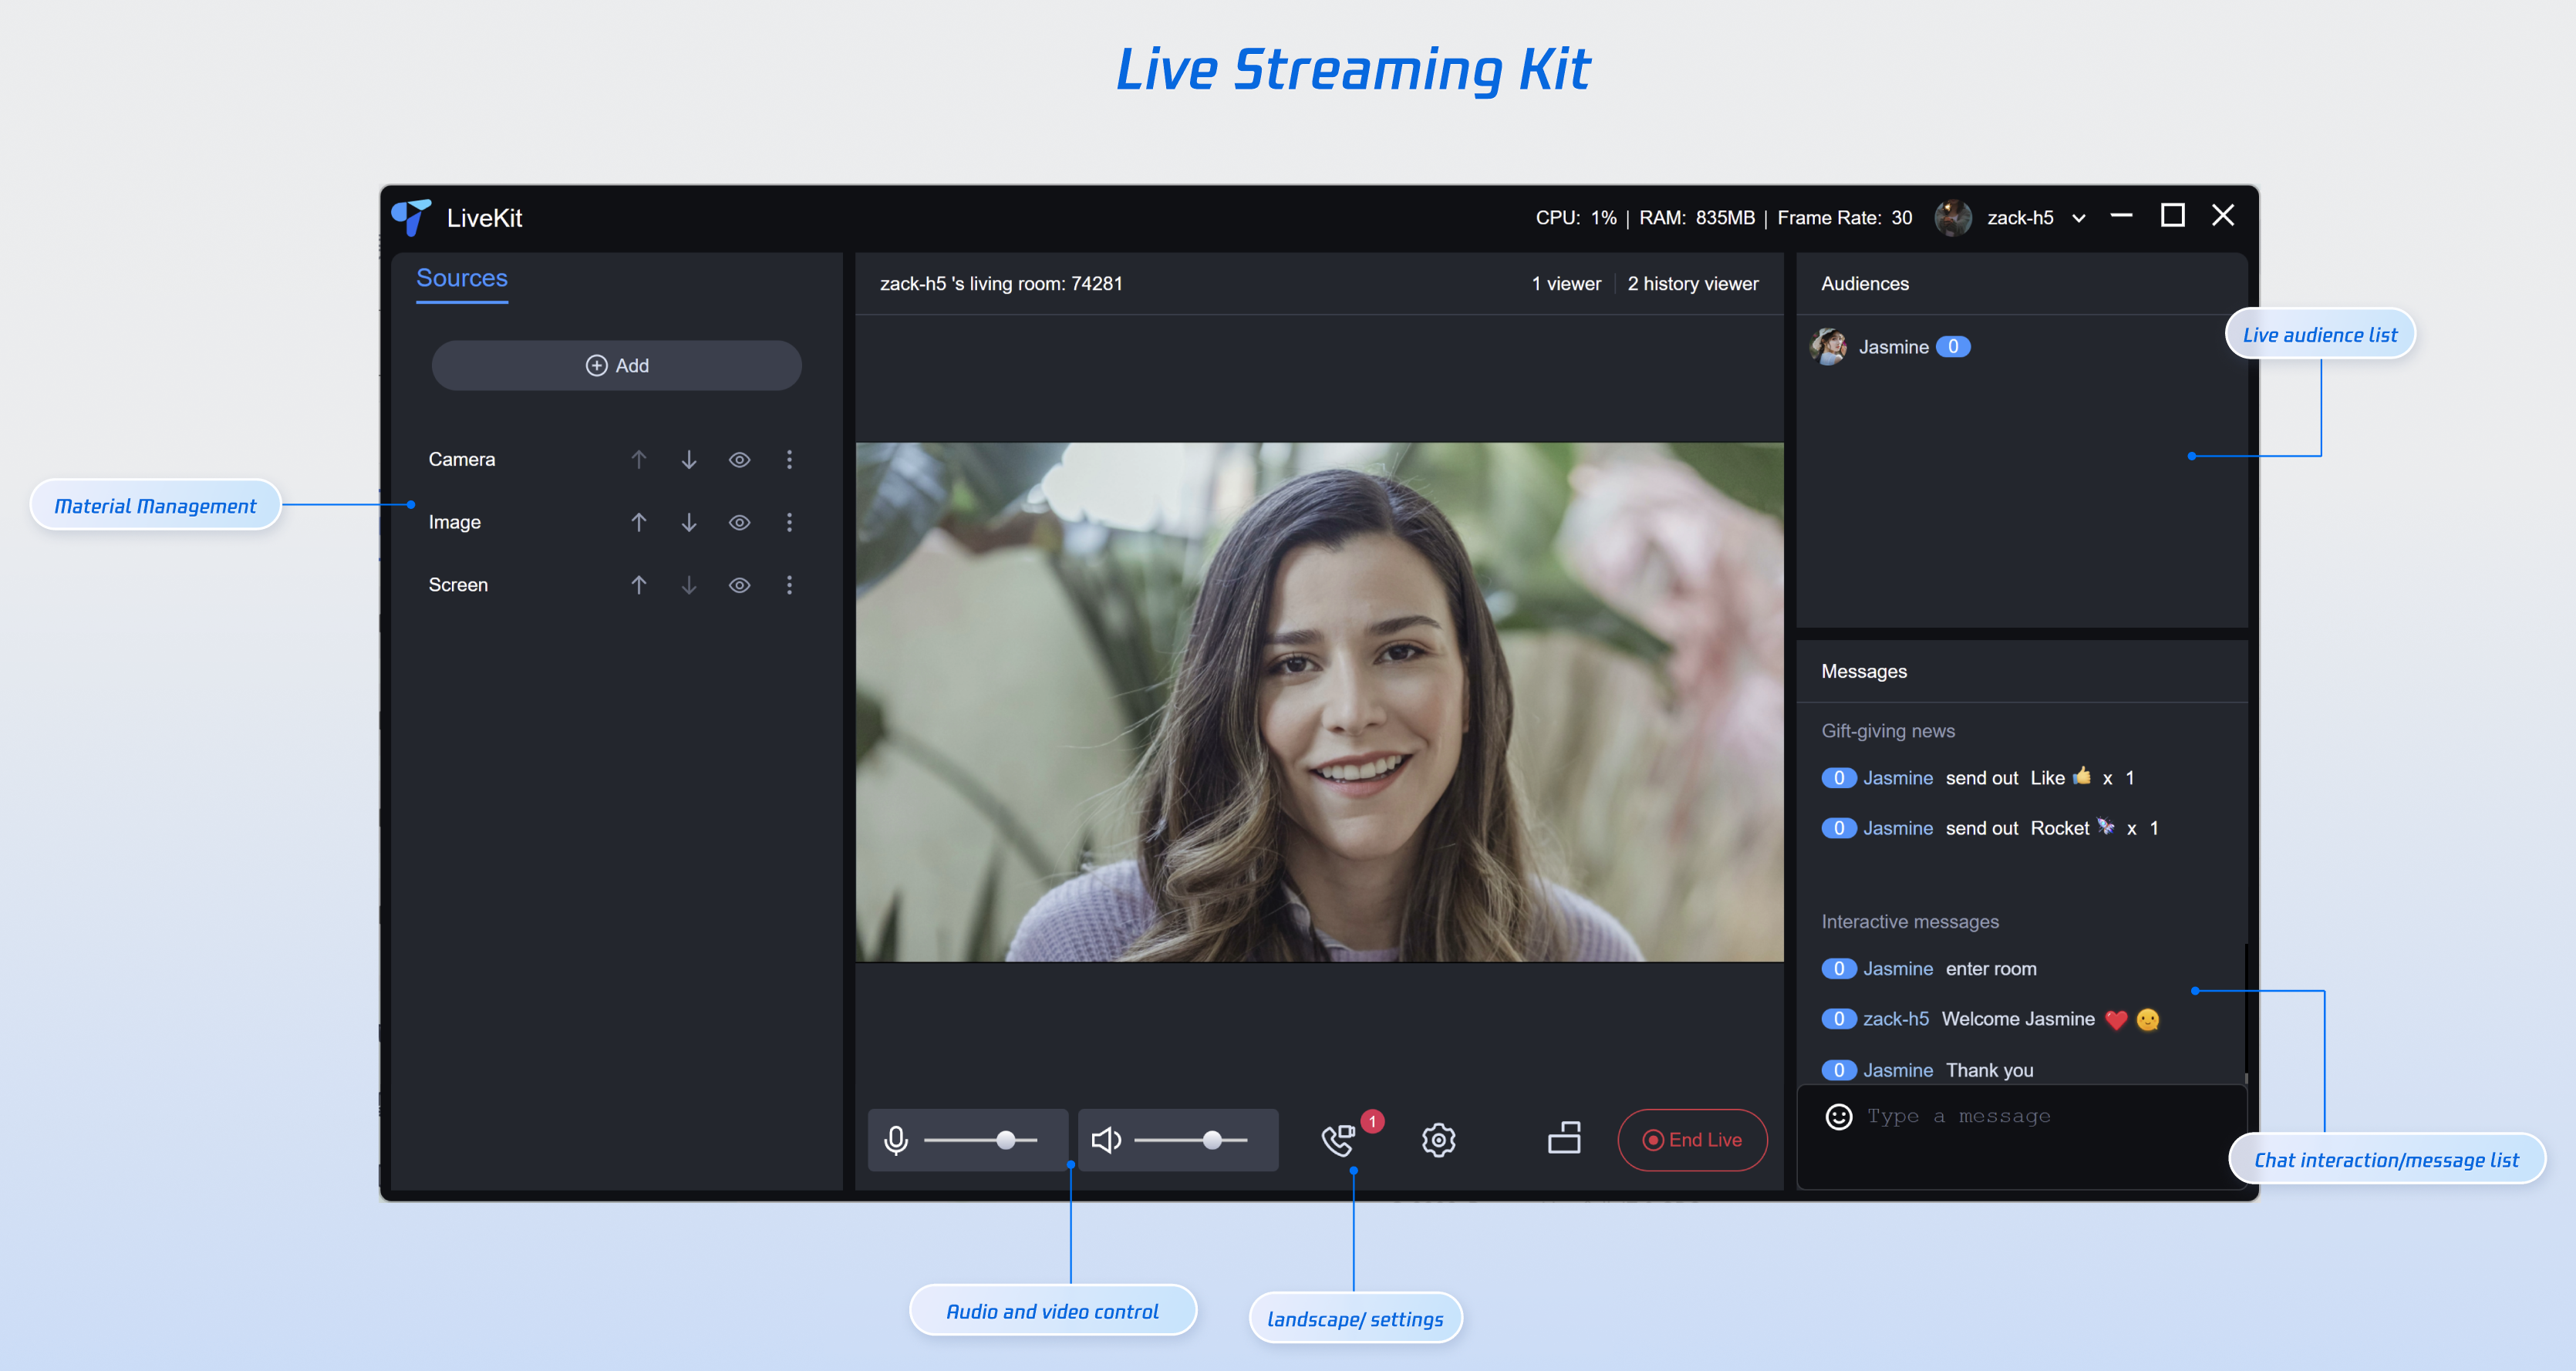
Applicable Scenarios: Game streaming, large events, corporate meetings—ideal for high-definition video and complex local media mixing.
Core Advantages:
Video Capabilities: Supports up to 2K/60fps streaming and advanced local video file (MP4/MKV) mixing.
Audio Effects: Includes 13 voice changing effects, 11 reverbs, and background music control, suitable for professional sound card setups.
Co-host Layouts: Supports vertical nine-grid/floating window, horizontal 1v3 audio co-hosting, and custom templates.
Integration Guide: See PC Streaming Assistant for details. When the host starts streaming, set
liveId to the server-generated RoomId:// Set liveId to the server-generated RoomId during handleStartLiveconst handleStartLive = async () => {await createLive({liveId: 'your_server_room_id', // Use the RoomId from your server});};
OBS Studio Streaming
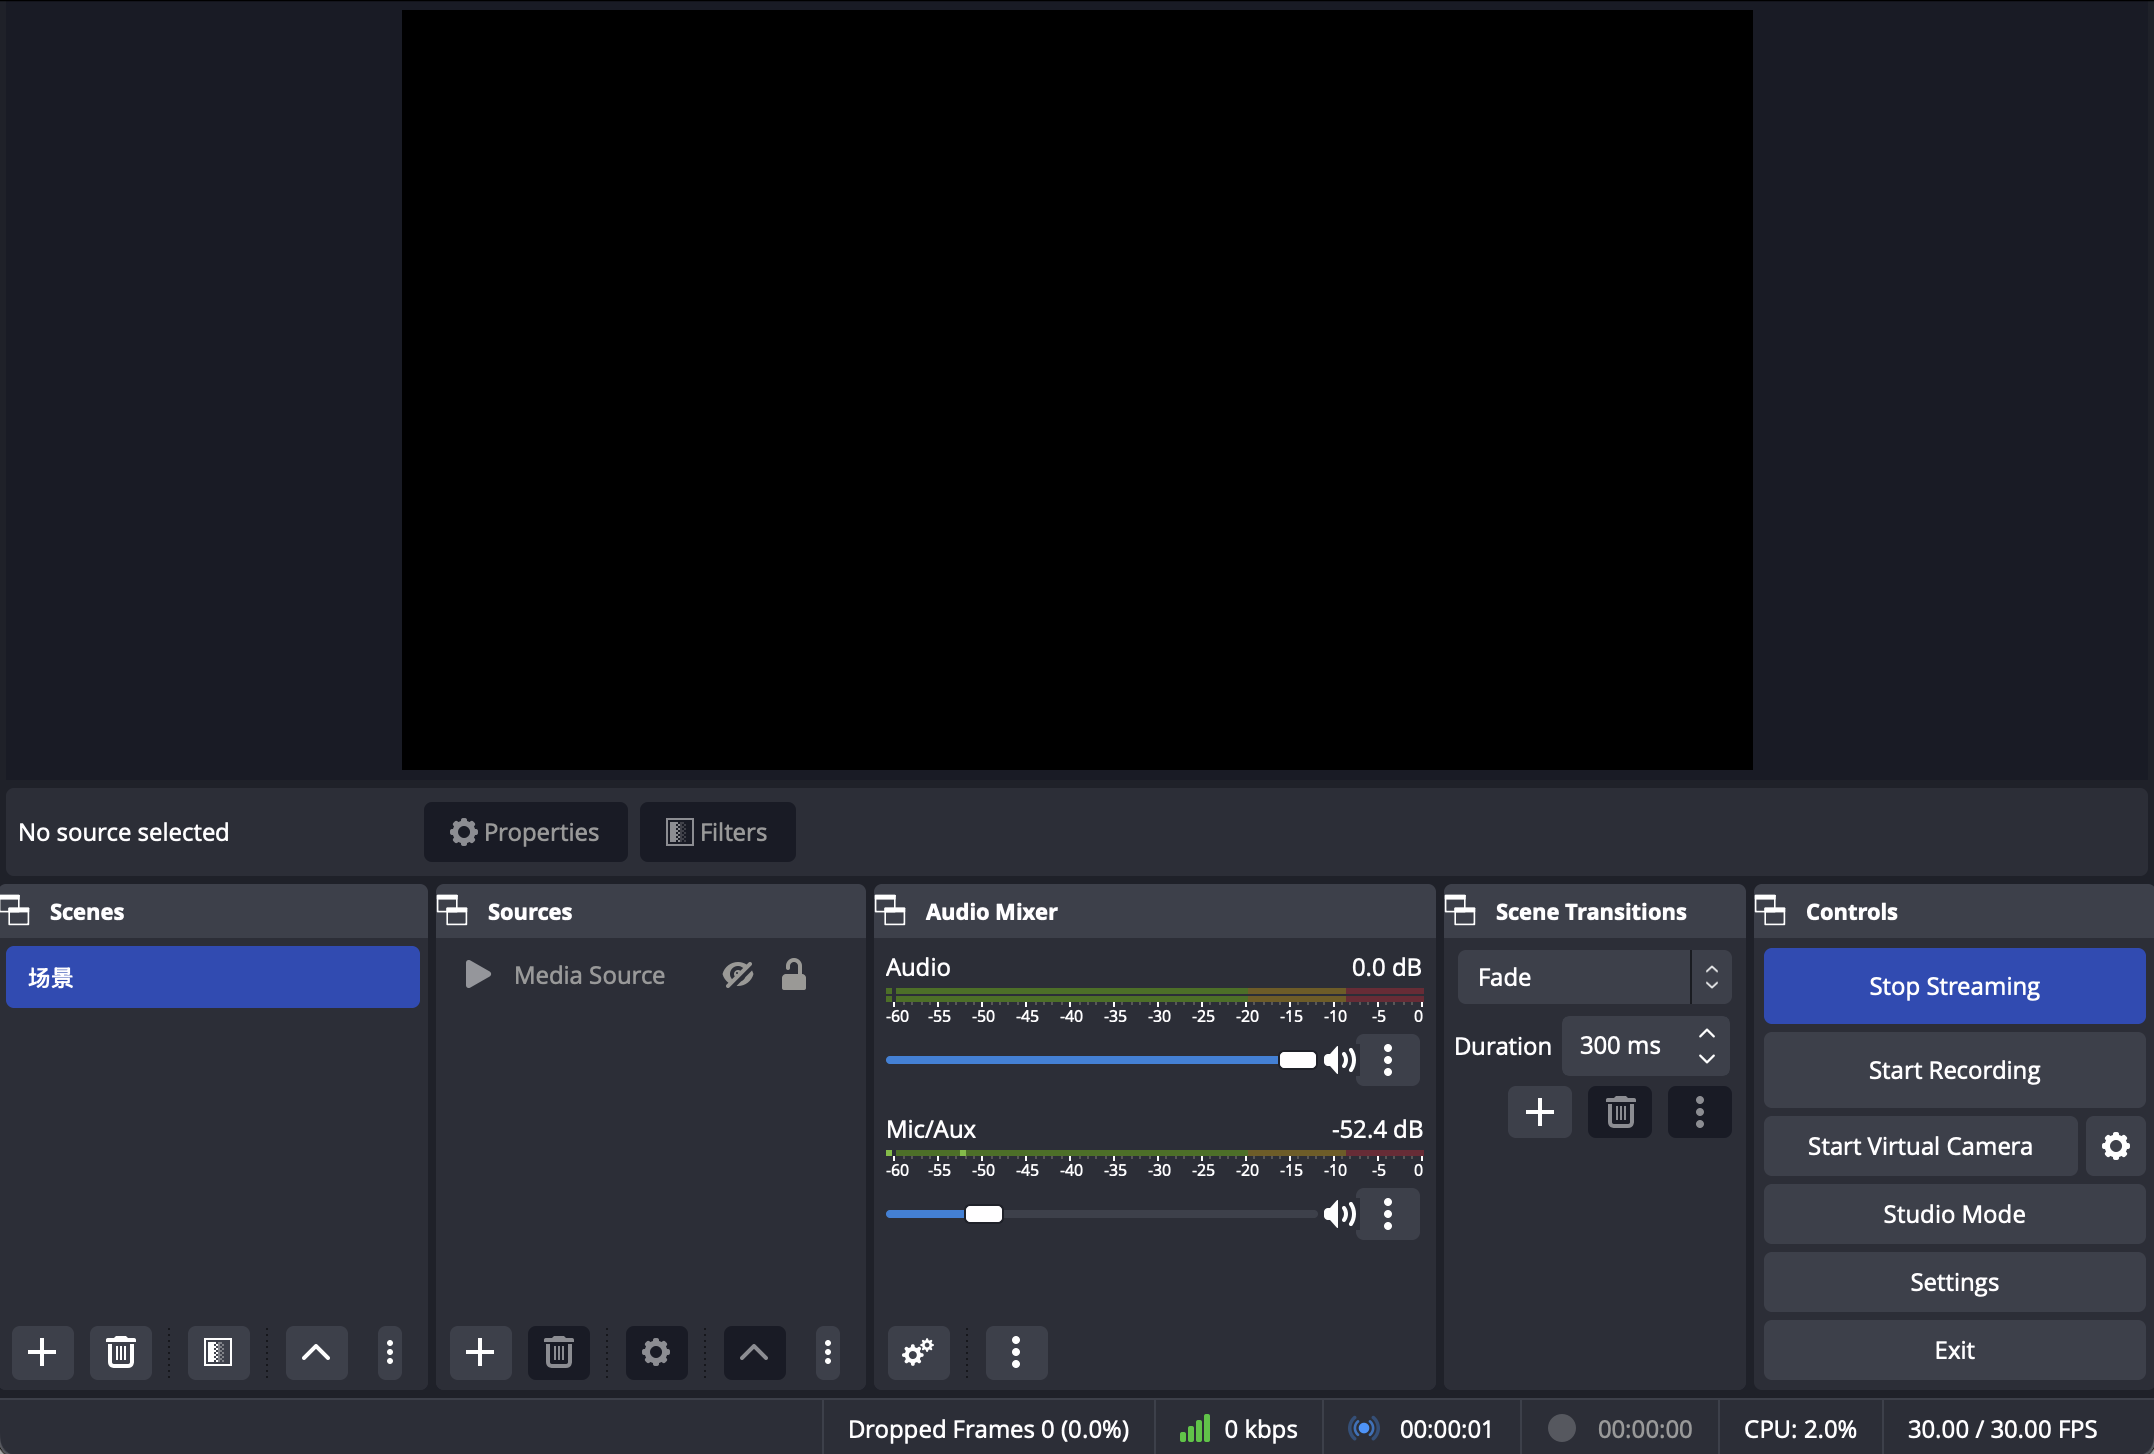
Applicable Scenarios: Professional teams with established OBS plugin systems or production workflows.
Integration Guide: See OBS Studio Streaming to obtain the server and stream key for OBS. Open OBS, configure the live streaming service, and start streaming.
Step 3: Select Viewing Method
LiveKit supports cross-platform audience integration. Once the audience has the server-configured
RoomId, they can join the live room using the following methods:Web / H5 Web Viewing
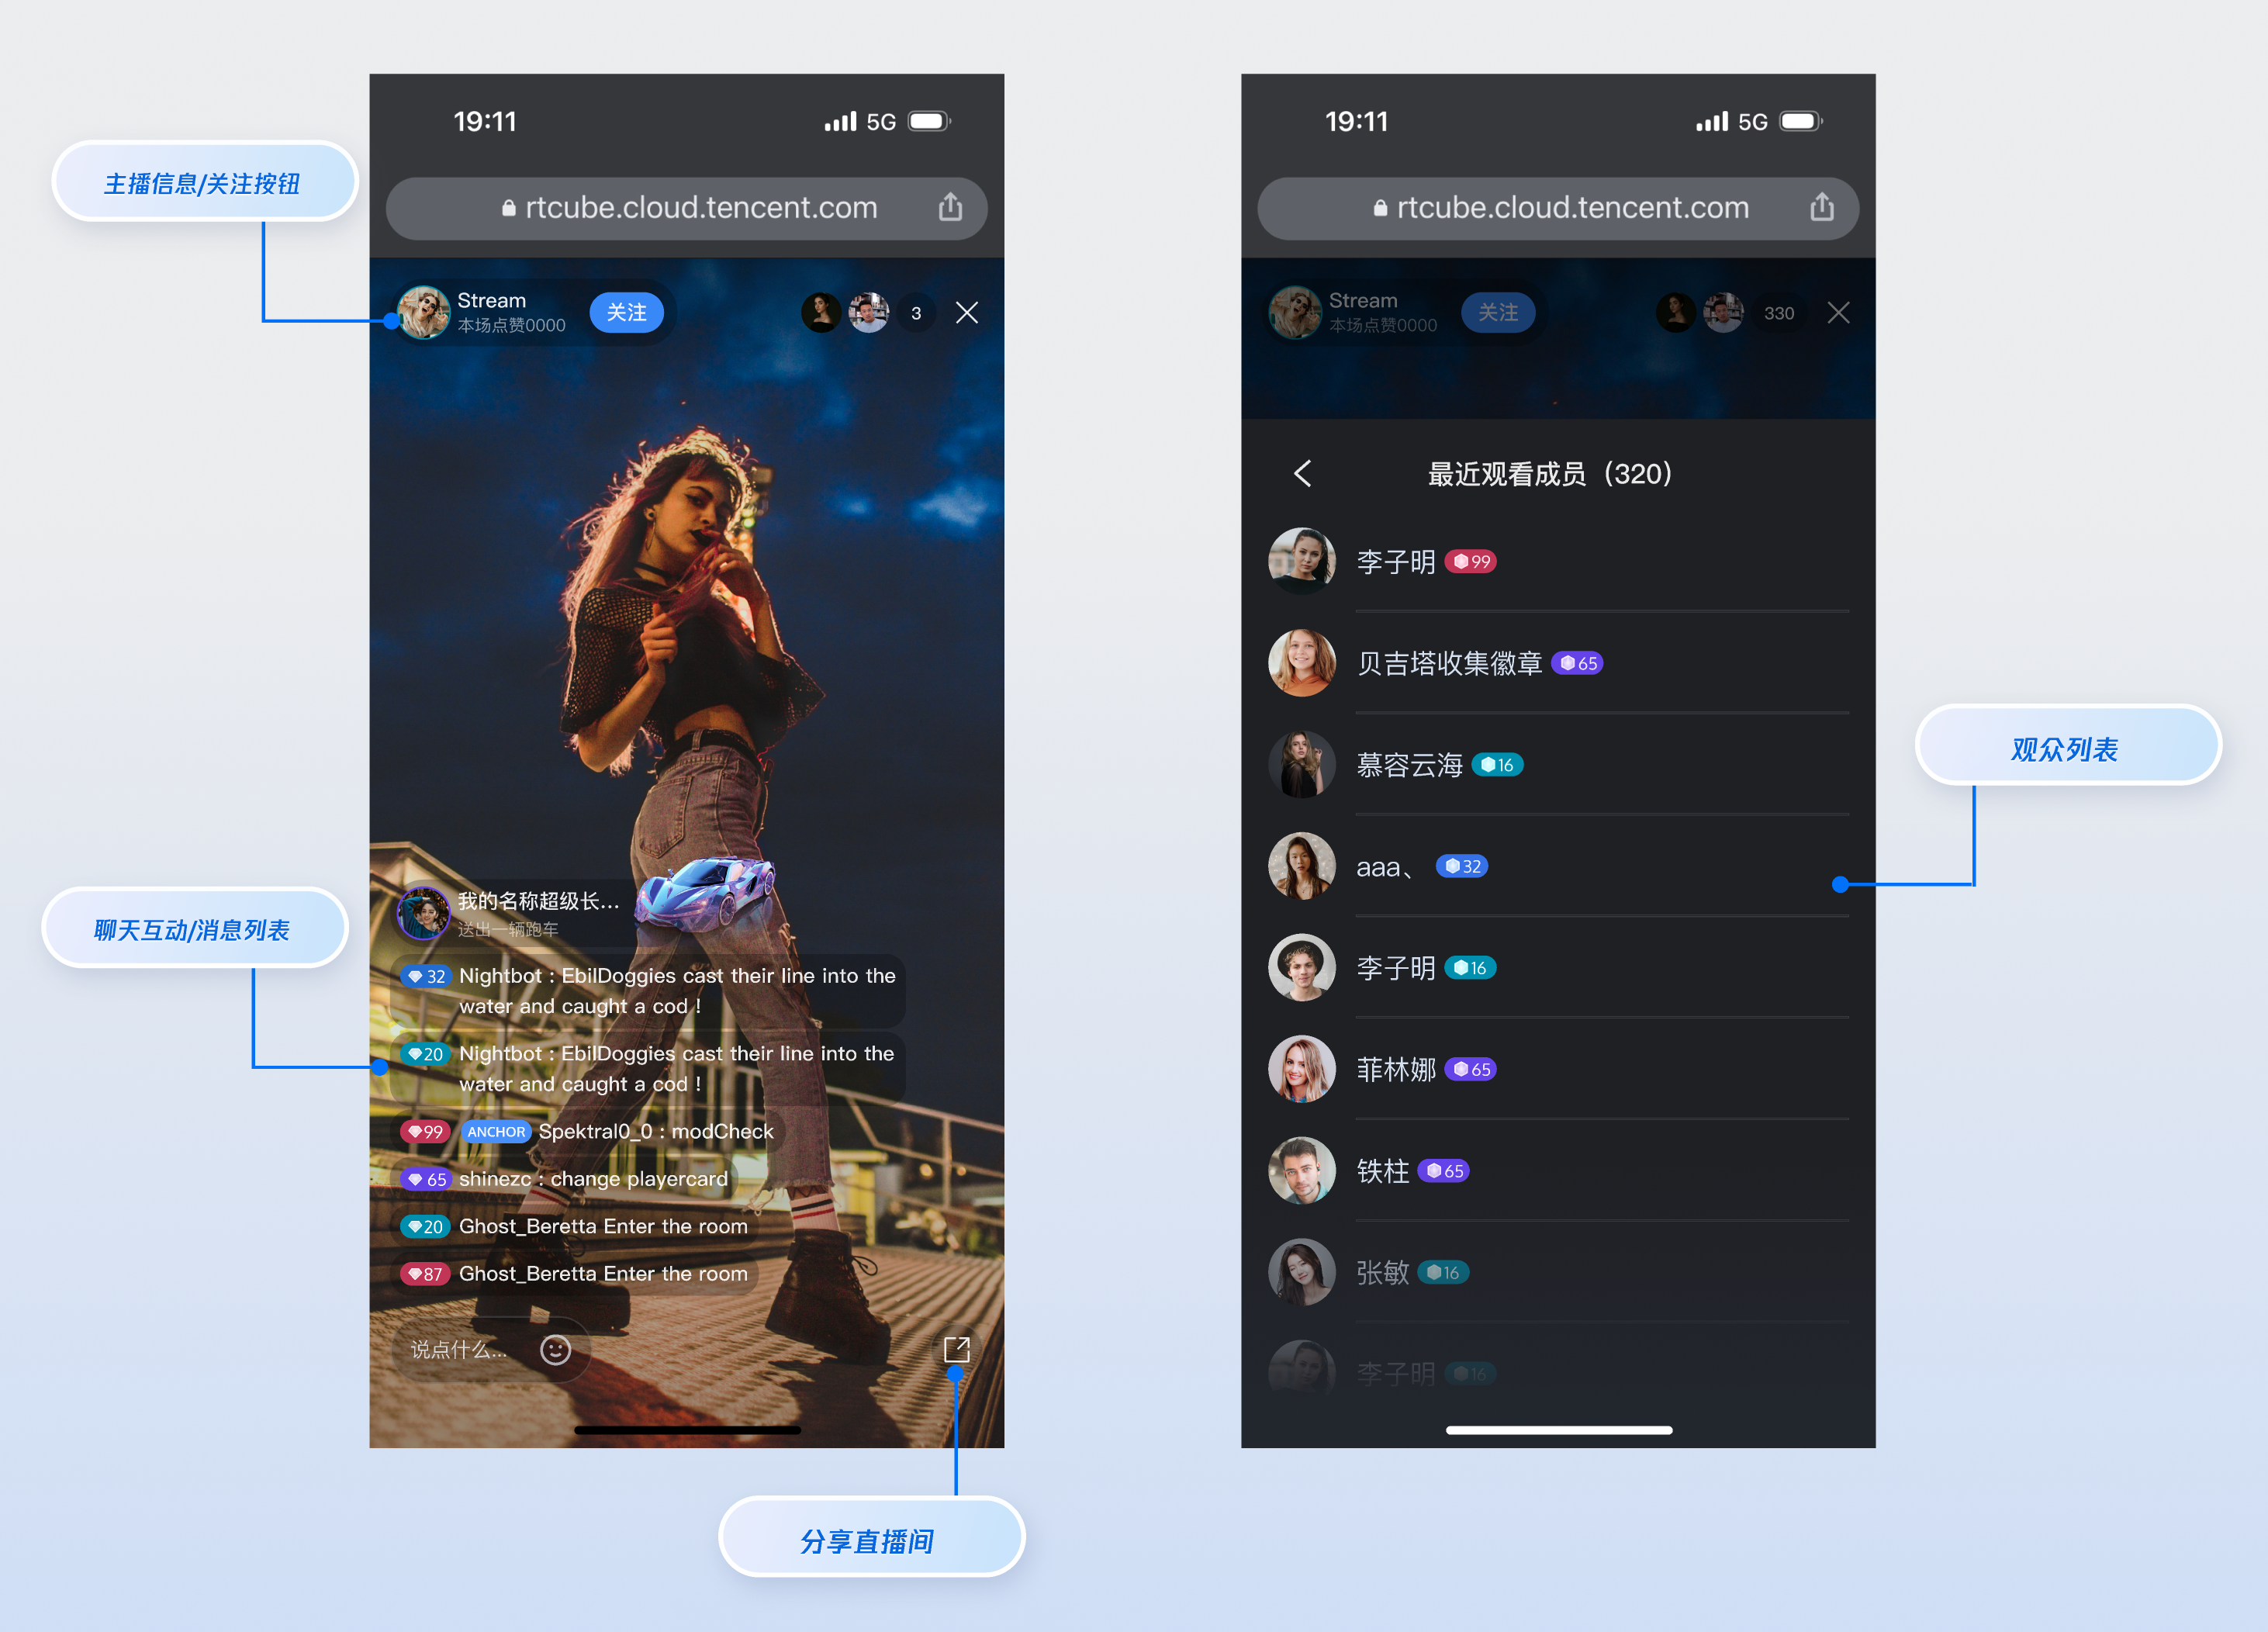
Applicable Scenarios: Social sharing, viral growth. Ideal for web embedding—users can watch instantly via a link, with no app installation required.
Core Advantages: Broad cross-platform compatibility, supports browser-based streaming and basic text interaction.
Integration Guide: See the sidebar Viewing Method for your platform's Audience Viewing documentation. For Web Vue3 mobile browsers, when integrating the audience viewing page with Web UI components, set
liveId to the server-generated RoomId.const liveId = 'your_server_room_id' // Use the RoomId from your server
Live Monitoring Viewing
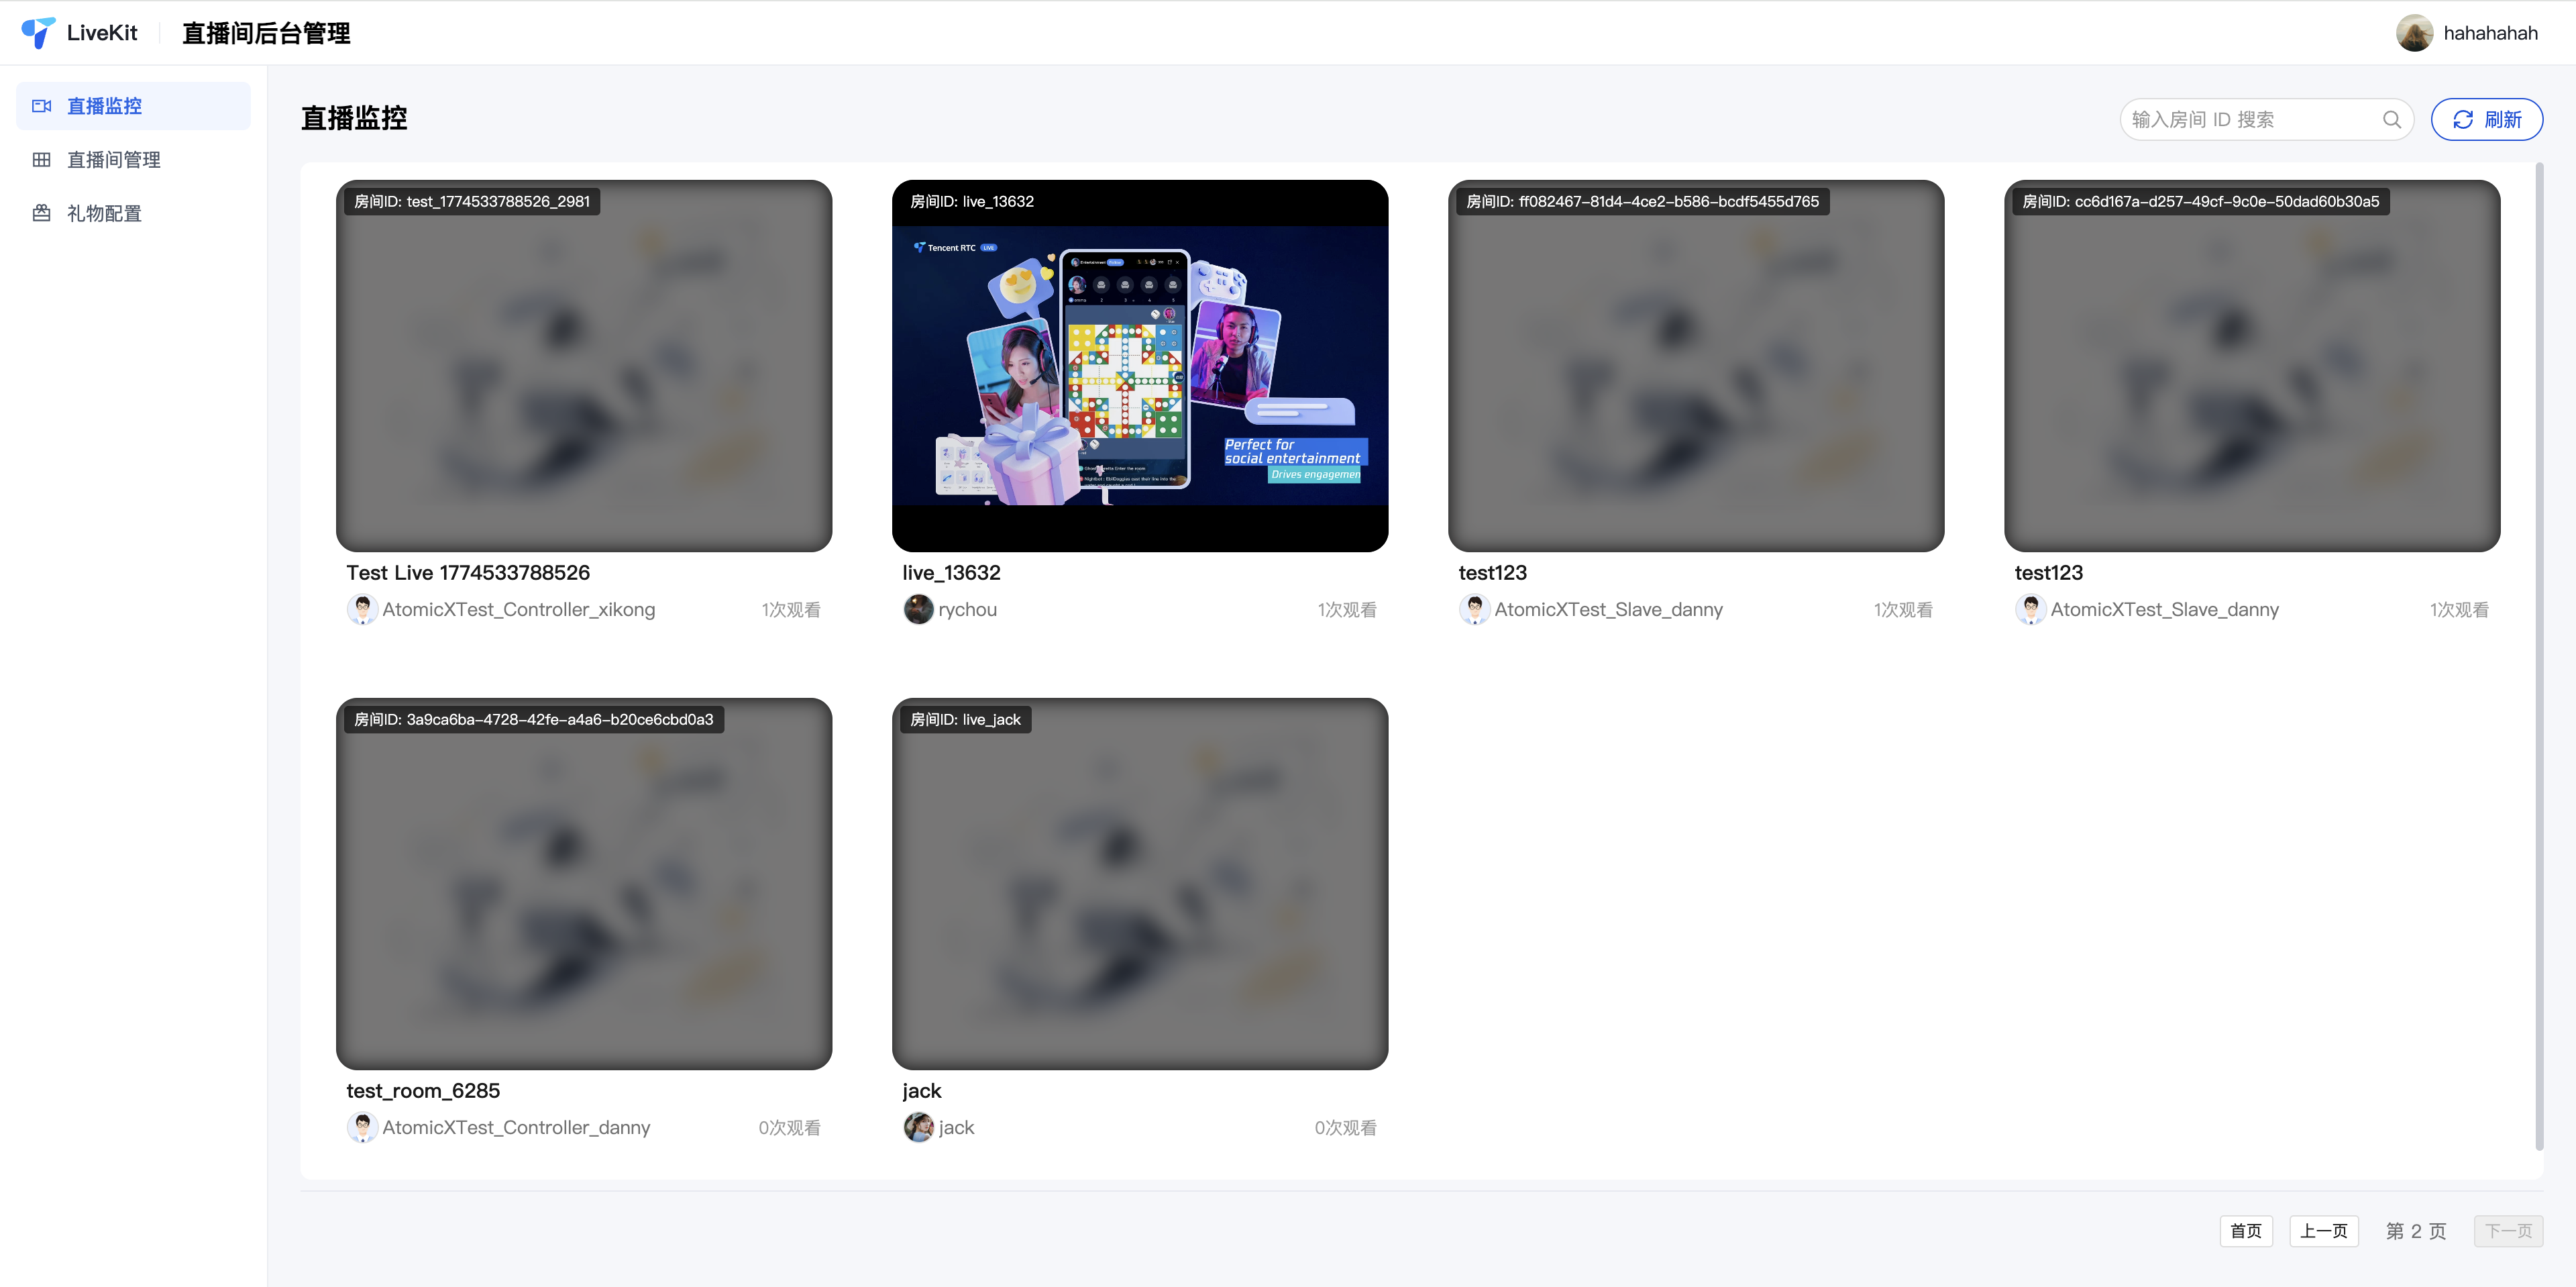
Applicable Scenarios: Platform compliance and supervision. Admins can monitor multiple live rooms simultaneously, review content, and handle violations.
Core Advantages:
Multi-room Monitoring: Monitor multiple live rooms at once, view real-time online user counts, reward totals, and more.
Powerful Controls: Integrates backend "one-click end stream" and "user ban" features.
Integration Guide: See Live Management Deployment Guide to deploy the live management system. After logging in, admins can access the "monitoring details page" for a specific room from the "live room list."
Step 4: Server-Side Room Dismissal (End Live Stream)
When a live stream ends or a violation is detected, your backend can call the Dismiss Room API to forcibly dismiss the room.
Effect: All users (hosts and audience) in the room will receive a dismissal notification and be forcibly removed. Cloud resources will be released.
Applicable Scenarios:
Automatic cleanup by the backend after an abnormal host disconnect.
Immediate ban when violations are detected.
System-enforced end when a paid live stream reaches its time limit.
Core Parameter:
Field | Type | Required | Description |
RoomId | String | Required | ID of the live room to be dismissed. |
FAQs
After the server creates a room, if the host hasn't entered and started streaming, can the audience enter the live room in advance?
Supported: Once the room is created on the server, the audience can join using
joinLive.Viewing Experience: If the host hasn't started streaming, the audience will not see audio/video content—typically resulting in a black screen or placeholder image.
Optimization Suggestion: To prevent the audience from entering a "black screen room," set
IsPublicVisible to false (hide the live room) when creating the room on the server. After the host starts streaming, update the room info to set it to true (publicly visible).Is creating a room via server API a mandatory step for starting a live stream?
Not Mandatory: LiveKit supports two streaming modes.
Self-service Streaming: Hosts can create and enter rooms directly in the app without using the server API.
Business Pre-configuration: Creating rooms via the server API is recommended for paid or reserved live streaming scenarios where the backend needs to allocate room IDs and preset layout templates.
What's the difference between using startLive and joinLive when the host enters a pre-created room?
Hosts should always call
startLive in any scenario.Consistent Role: If the room is already created on the server, whether the host calls
startLive or joinLive, they will be recognized as the host and have streaming permissions.Integration Differences:
UI Component Integration: After calling
startLive or joinLive, the SDK automatically takes a mic seat and enables the camera and microphone for the host.No UI Integration (Core SDK): After calling
startLive or joinLive, only the mic seat is automatically taken; developers must manually enable media tracks (camera/microphone) as needed.
