This article will guide you through a quick integration of TUIRoomKit components. You will go through several key steps in less than 10 minutes and end up with a full user interface for multiplayer conferencing.
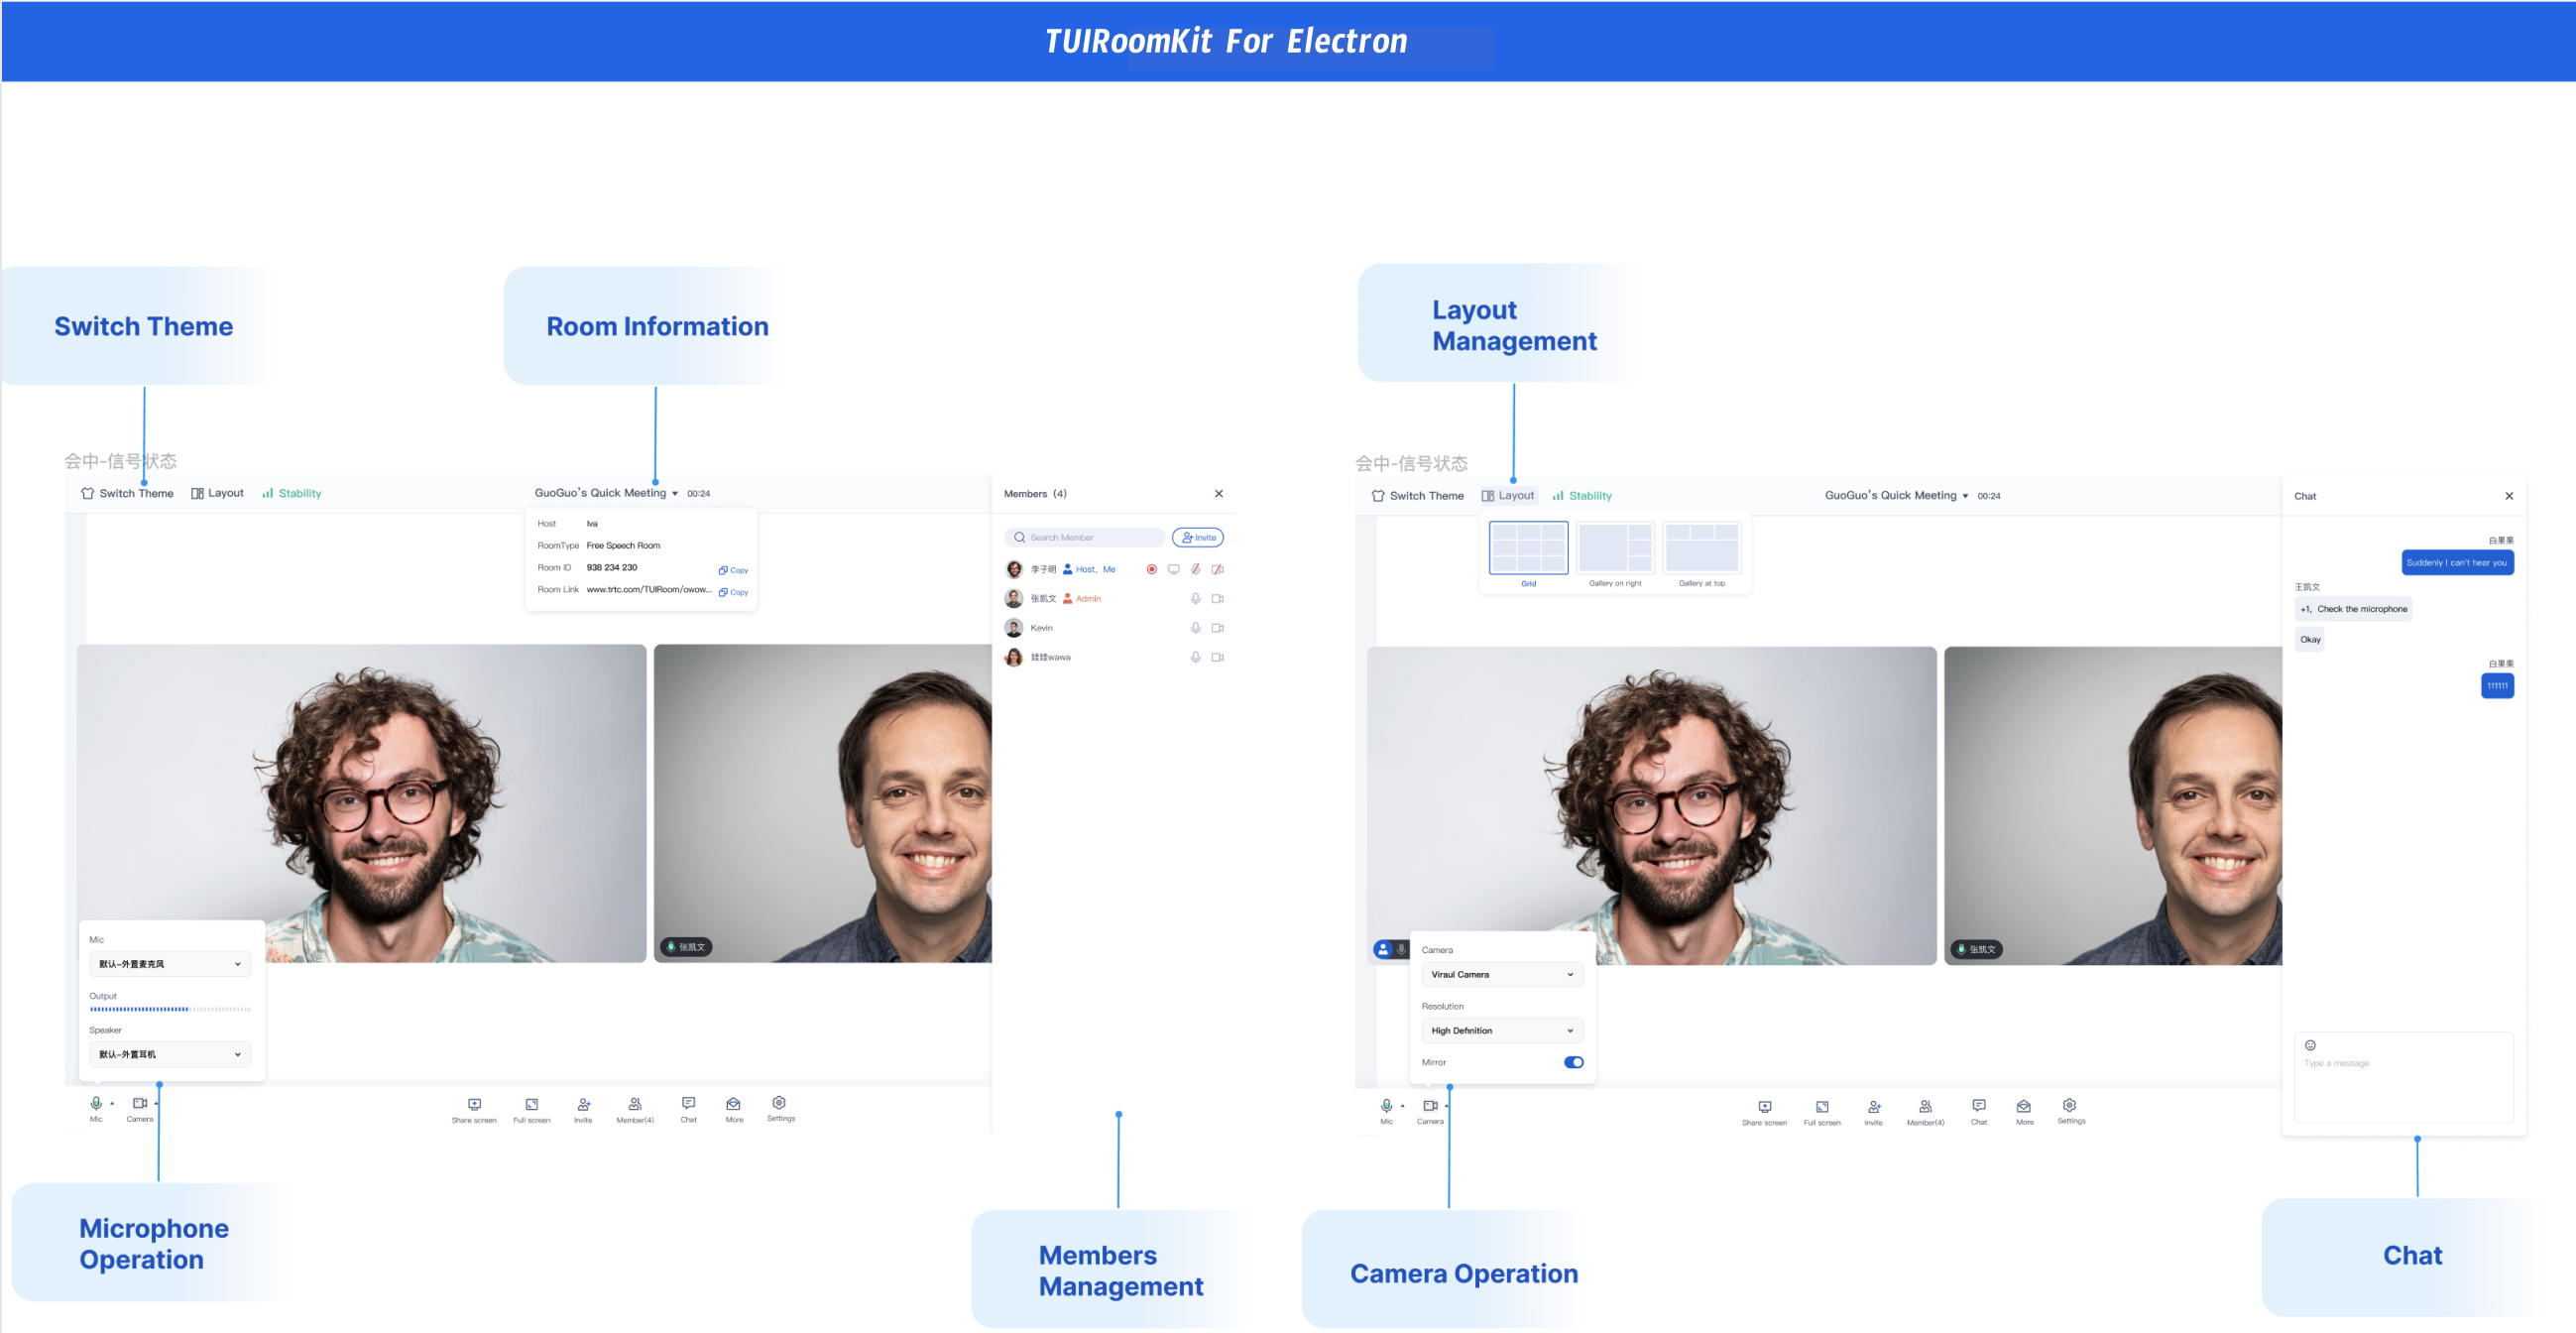
TUIRoomKit Demo Experience
You can click Mac OS Version and Windows Version to download and experience more features of TUIRoomKit Electron.
You can click GitHub to download the TUIRoomKit code, and refer to the README.md document in the code repository to run through the TUIRoomKit Electron sample project.
Environment preparations
Node.js version: Node.js ≥ 16.19.1 (Using the official LTS version is recommended; please ensure the npm version matches the node version).
If you don't have a Vue project, you can go to GitHub to download the TUIRoomKit code, and refer to the code repository's README.md to run the TUIRoomKit Electron sample project.
If you need to integrate it into an existing project, please follow the steps below.
If you are integrating by downloading the template project electron-vite-vue, you need to switch the template project to v1.0.0, you can refer to the following instruction:
In Mac system, the default content security policy settings will cause an error when loading TUIRoomKit components. In order to prevent TUIRoom pages from not loading or interface calls from reporting errors, you can adjust the content security policy. The adjustment file is packages/renderer/index.html .
TUIRoom uses Pinia for room data management, so you need to register Pinia in the entry file of the project. The entry file is the src/main.ts file.
Vue3
Vue2
// src/main.ts file
import{ createPinia }from'pinia';
const app =createApp(App);
// Register pinia
app.use(createPinia());
app.mount('#app')
// src/main.ts file
import{ createPinia, PiniaVuePlugin }from'pinia';
Vue.use(PiniaVuePlugin);
const pinia =createPinia();
newVue({
pinia,
render:h=>h(App),
}).$mount('#app');
3. Configure vite.config.ts
To unify code style and import trtc-electron-sdk through import in the UI layer (otherwise, it must be imported via require), you need to configure in packages/renderer/vite.config.ts. Please replace the content in resolve with the following configuration items, refer to the file packages/renderer/vite.config.ts for details.
Note:
If your project is packaged with vite, please follow the steps below to configure it. The reason is that vite only supports ES6 modules by default, and trtc-electron-sdk needs to interface with the Node.js API, which is a Common JS module, so this step is for module type compatibility. If your project is packaged with webpack, you can skip the vite.config.ts step.
Introduce the ConferenceMainView component, which is defaulted to Permanent Mode (the component is always displayed, its visibility is not controlled internally. Without business side control, the component will remain visible).
Customers can customise the user ID according to their business, only case-sensitive English letters (a-z A-Z), numbers (0-9) and underscores and hyphens are allowed.
sdkAppID
int
Unique identification SDKAppID of the Activate the Service created in the real-time audio/video TRTC console.
secretKey
String
SDKSecretKey of the Activate the Service created in the real-time audio/video TRTC console.
userSig
String
A security protection signature used to authenticate a user's login credentials, confirm that the user is genuine, and stop malicious attackers from stealing your access to cloud services.
Note:
Development environment: If you are in the local development and debugging stage, you can use the local GenerateTestUserSig.genTestSig function to generate a userSig. The SDKSecretKey in this method can be easily decompiled and cracked in reverse, and once your key is leaked, attackers can steal your Tencent Cloud traffic.
Production environment: If your project is to be released online, please use the server-side UserSig generation method.
Step Five: Launch a New Meeting
The meeting host can initiate a new meeting by invoking the start interface. Other participants can refer to the description in Step Six and join the meeting by calling the join interface.
// Note the package name. If you are using the vue2 version, please change the package name to @tencentcloud/roomkit-electron-vue2.7
1. Execute the development environment command. (As an example, this uses a vue3 + vite default project, however, the dev command may differ for different projects. Please adjust according to your own project)
npm run dev
Note:
If there are eslint errors in the src/TUIRoom directory during execution, you can add the /src/TUIRoom/ path to the .eslintignore file to ignore the eslint checks.
2. Experience the TUIRoomKit component features.
Production environment deployment
Packaging of projects
npm run build
Common Problems
If you have problems with vue version mismatch when installing dependencies in step 1, how to solve it?
ou need to fix the vue version to 3.3.13 in the package.json file
If you get an app crash during the runtime phase, how to solve it?
The issue may be caused by the inability to obtain camera and microphone permissions.
Solution:
1. Please check whether your camera or microphone device is working properly, and whether it is occupied by other apps.
2. In /packages/main/index.ts, comment out the call of checkAndApplyDevicePrivilege method, so that you can skip the device privilege check.
If you encounter the following error in the runtime or packaging phase, how to solve it?
yYou need to enable the allowJs option in the tsconfig.json file:
// tsconfig.json
{
"compilerOptions":{
"allowJs":true
// ...Other options
}
// ...Other options
}
If you encounter the following error during the runtime or packaging stage, how to solve it?
You need to add the following content to the index.html file: