
iOS
This document will guide you on how to integrate the
AIConversationKit component in a short time. Following this guide, you will complete the following key steps within 20 minutes and implement a conversational AI project with a complete UI.Conversational AI Interface 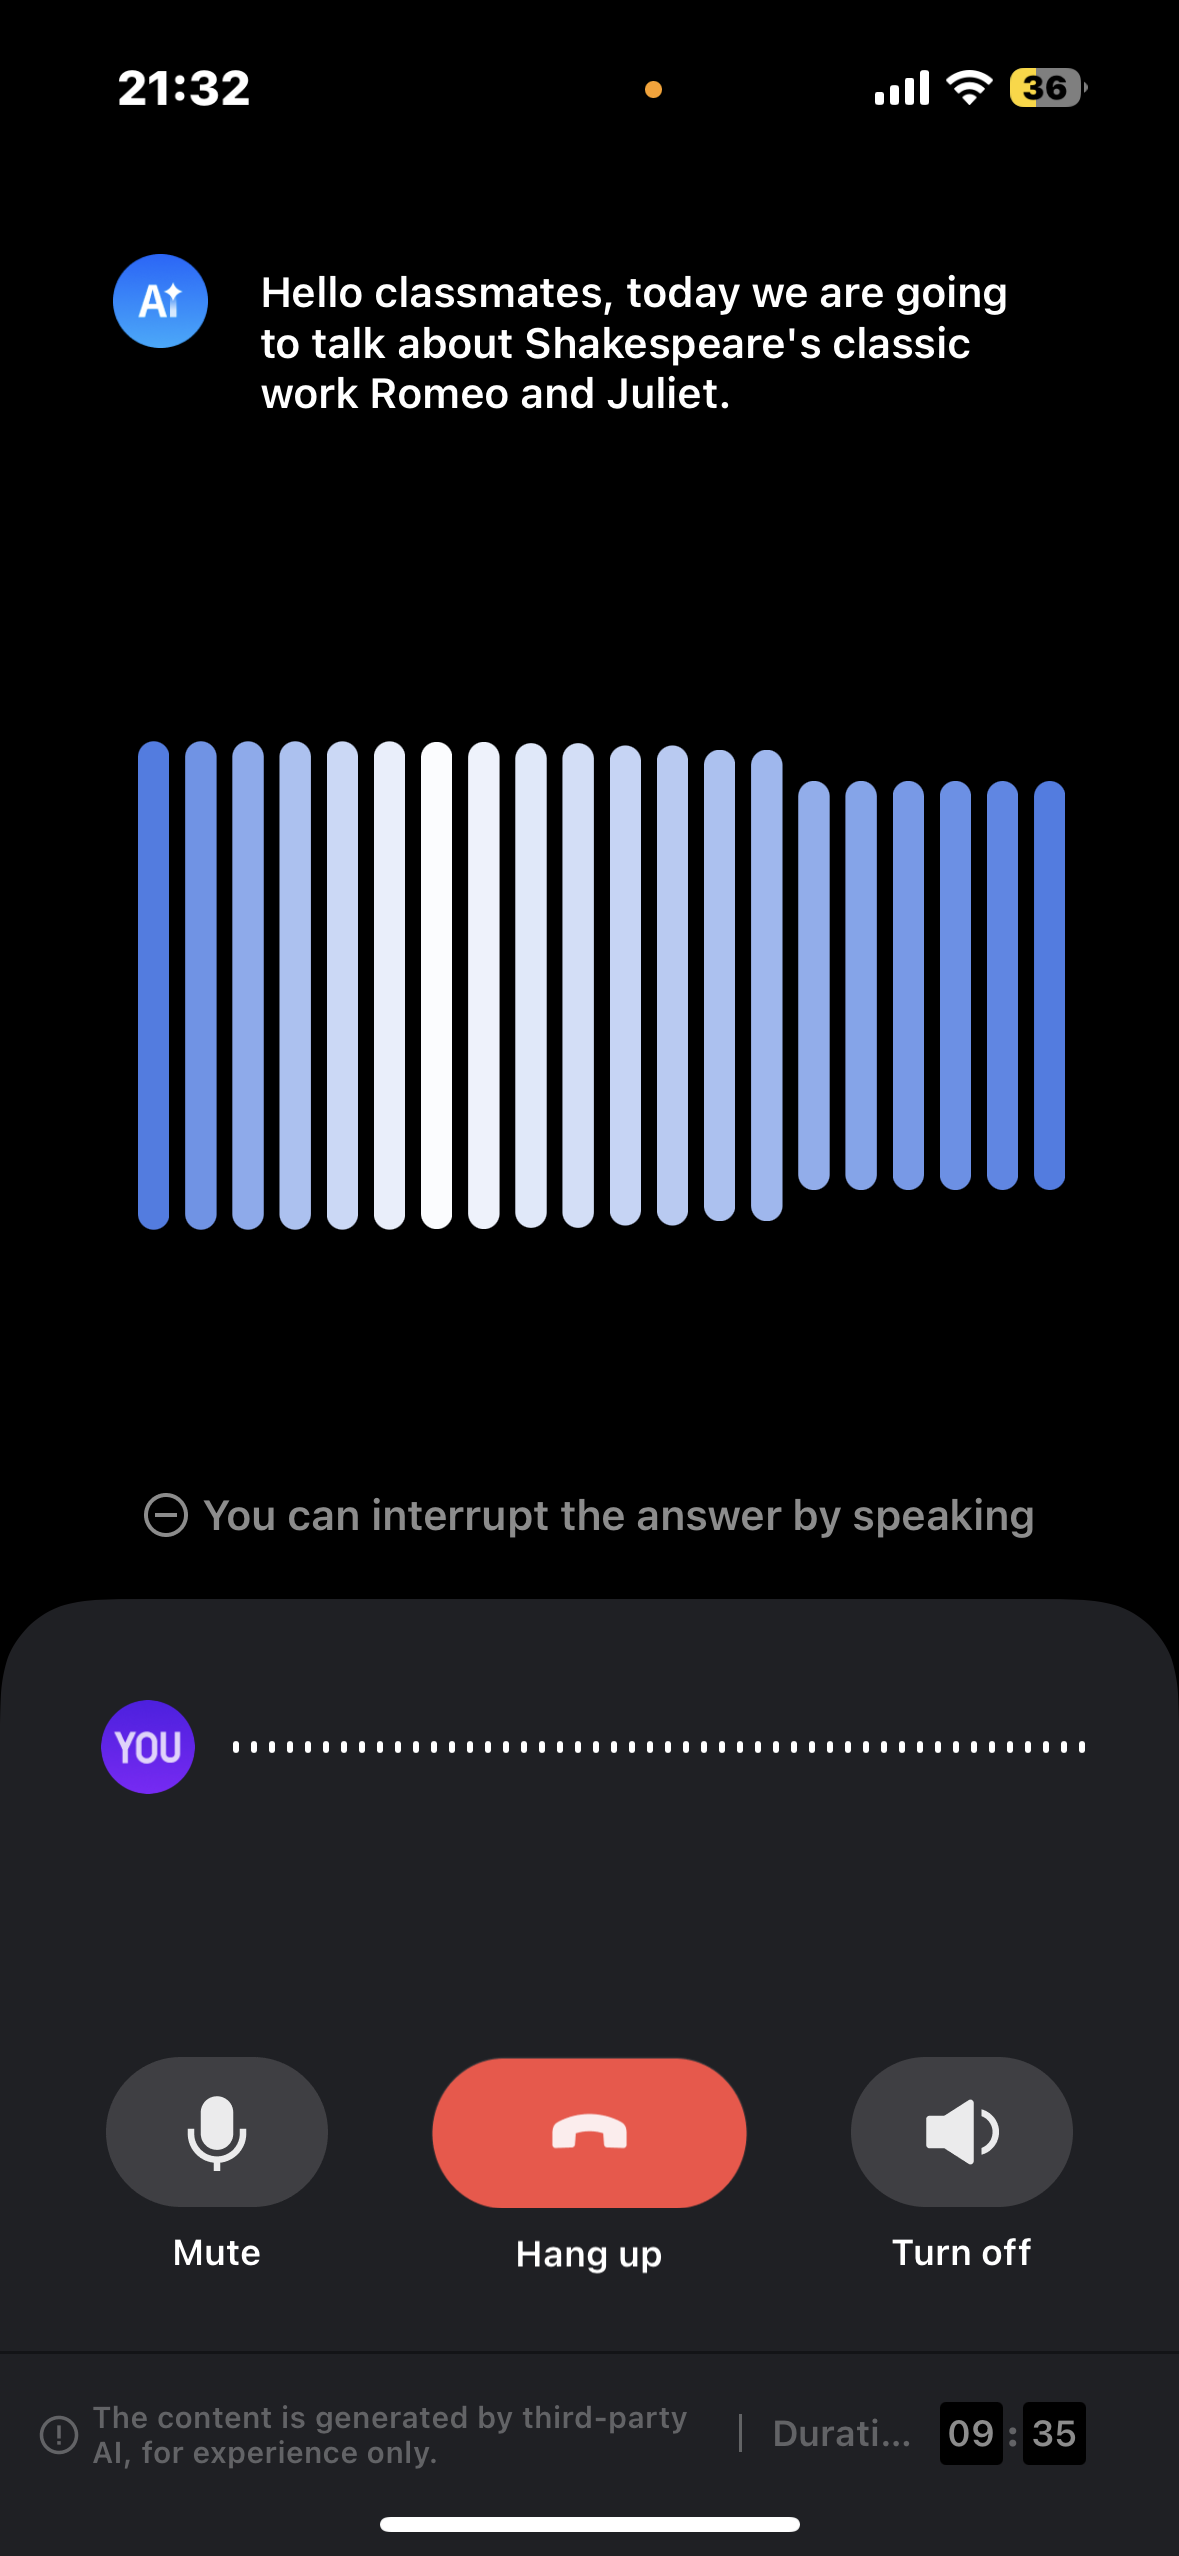 |
|
Environment Preparation
Minimum compatibility with iOS 13. Recommend using iOS 13 and above versions.
Xcode 13 and above versions.
Step One: Activating Service
Before initiating a conversation using AiConversationKit, you need to go to the console to activate conversational AI service for AiConversationKit. For specific steps, please refer to Activate Service.
Step Two: Download the AIConversationKit Component
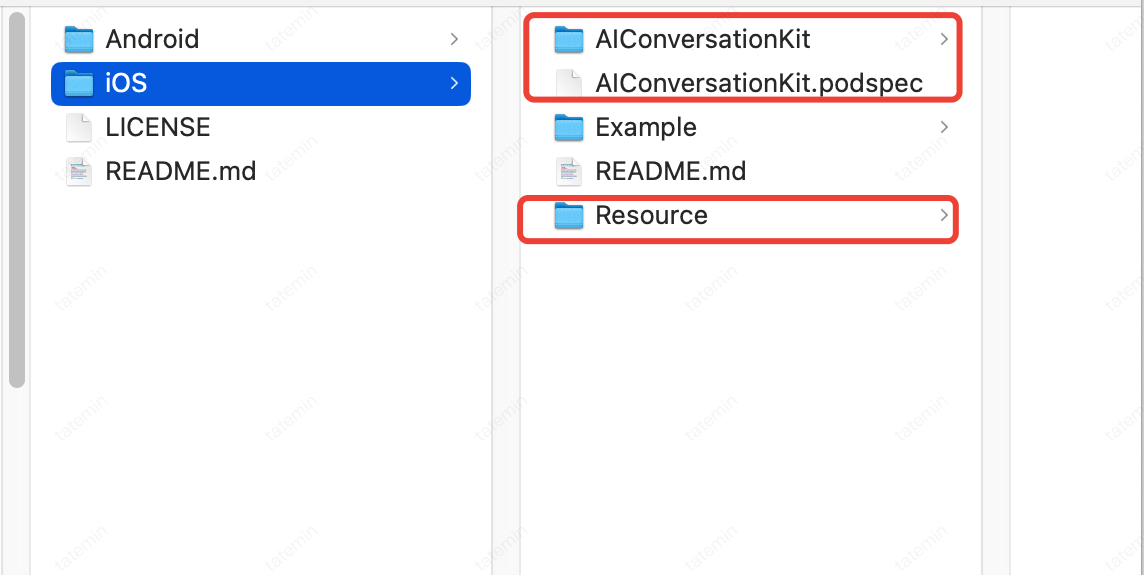
Go to Github to download the zip file. After decompressing it, you will see the AIConversationKit directory, the AIConversationKit.podspec file, and the Resource directory.
Step Three: Configuration
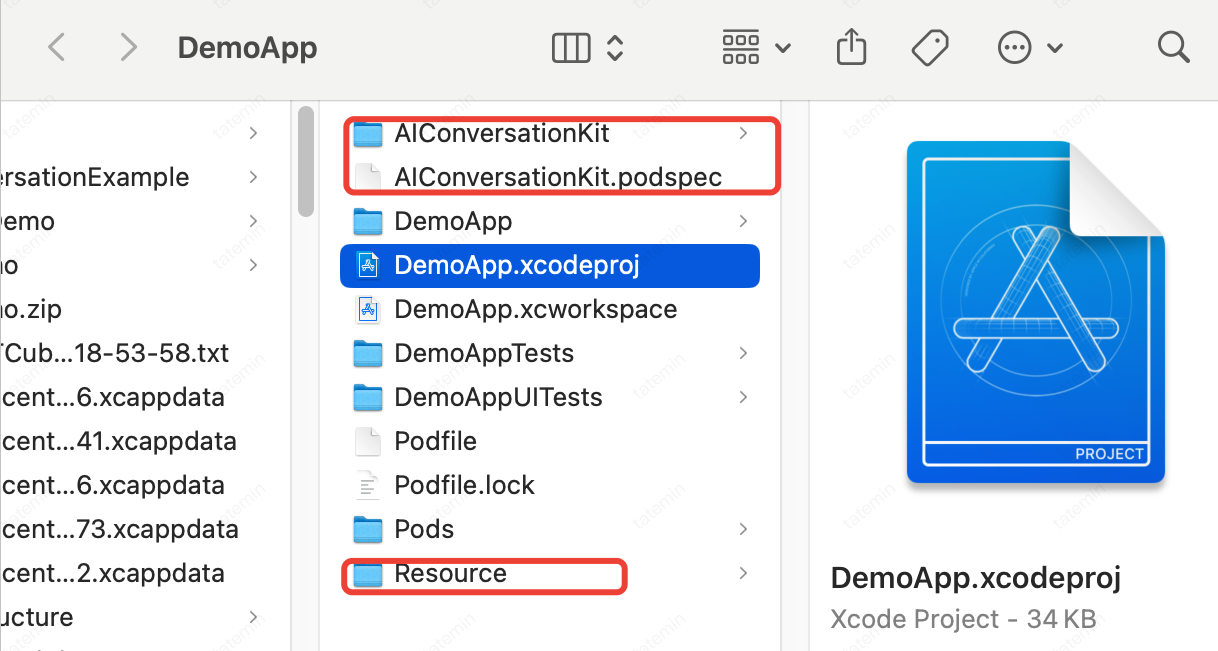
1. Copy the AIConversationKit, podspec and Resource in the directory decompressed in the above step two to your project:
2. Then, in the
Podfile of your project, add the following dependencies:pod 'AIConversationKit',:path => 'AIConversationKit.podspec':
3. Once the configuration completed, execute
pod install to complete the installation of dependencies;4. Use XCode to open
.xcworkspace and configure the certificate information: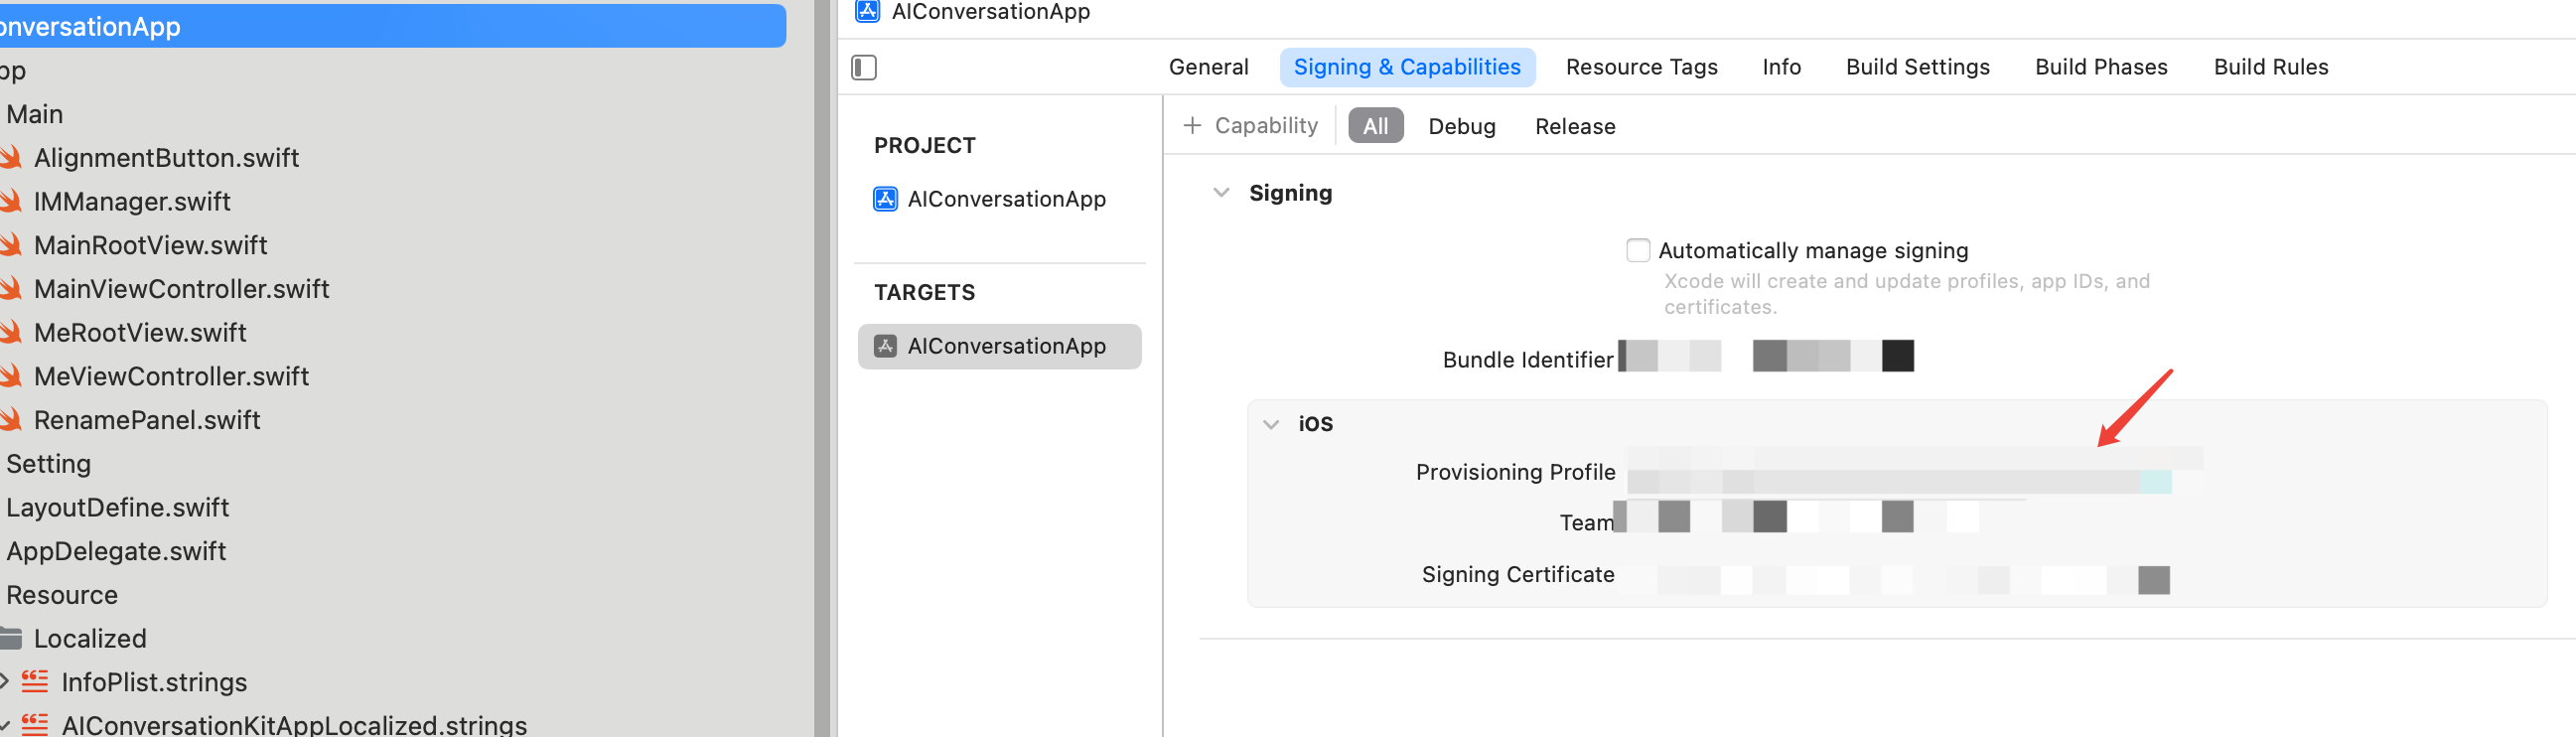
Step Four: Sign In
Add the following code to your project. It enables the component to log in by calling relevant APIs in
TUILogin. This step is critical because only after logging in can AIConversationkit features be used properly. Please patiently check if the relevant parameters are configured correctly.import TUICoreimport AIConversationKitfunc application(_ application: UIApplication, didFinishLaunchingWithOptions launchOptions: [UIApplication.LaunchOptionsKey: Any]?) -> Bool {let sdkAppId = 1600000001 // Please replace with your sdkAppIdlet userId = "people" // Please replace with your UserIDlet secretKey = "xxx" // Please replace with your sdkSecretKeylet userSig = GenerateTestUserSig.genTestUserSig(sdkAppId: sdkAppId, identifier: userId, secrectkey: secretKey)TUILogin.login(Int32(sdkAppId), userID: userId, userSig:userSig){print("login success")} fail: { code, message inprint("login failed, code: \(code), error: \(message ?? "nil")")}return true}
Parameter | Type | Description |
userID | String | Customers customize their Custom User IDs according to their own business, only allowing a combination of uppercase and lowercase letters (a-z A-Z), numbers (0-9), underline, and hyphen. |
sdkAppID | Int32 | |
secretKey | String | |
userSig | String | A security protection signature used for user login authentication, confirming the authenticity of the user, and preventing malicious attackers from misappropriating your cloud service usage rights. |
Note:
Development environment: If you are in the local development and debugging stage, you can use the local GenerateTestUserSig.genTestSig function to generate userSig. Note that the SDKSecretKey in this method may be easily decompiled and reverse engineered. Once the key is leaked, attackers may misappropriate your Tencent Cloud traffic.
Production environment: If you want to launch your project, use UserSig generation by the server.
Step Five: Start Your First Conversational AI project
let startParams = StartAIConversationParams()let sdkAppId = 1600000001 // 1,Replace your sdkAppIdlet secretKey = "xxx" // 2,Replace your sdkSecretKeylet aiRobotId = "robot_\(TUILogin.getUserID() ?? "")"let aiRobotSig = GenerateTestUserSig.genTestUserSig(sdkAppId: sdkAppId, identifier: aiRobotId, secrectkey: secretKey)startParams.agentConfig = AIConversationDefine.AgentConfig.generateDefaultConfig(aiRobotId: aiRobotId, aiRobotSig: aiRobotSig)startParams.secretId = "xxx" // 3,Replace your secretIdstartParams.secretKey = "xxx" // 4,Replace your secretKey// 5,Replace your llmConfigstartParams.llmConfig = "{\"LLMType\":\"openai\",\"Model\":\"hunyuan-turbo-latest\",\"SystemPrompt\":\"You are a personal assistant\",\"APIUrl\":\"https://hunyuan.cloud.tencent.com/openai/v1/chat/completions\",\"APIKey\":\"xxxx\",\"History\":5,\"Streaming\":true}"// 6,Replace your ttsConfigstartParams.ttsConfig = "{\"TTSType\":\"tencent\",\"AppId\":\"xxx\",\"SecretId\":\"xxx\",\"SecretKey\":\"xxx\",\"VoiceType\":\"502001\",\"Speed\":1.25,\"Volume\":5,\"PrimaryLanguage\":1,\"FastVoiceType\":\"\"}"let aiViewController = AIConversationViewController(aiParams: startParams)navigationController?.pushViewController(aiViewController, animated: true)
1. Use the data obtained in step four for sdkAppId and sdkSecretKey.
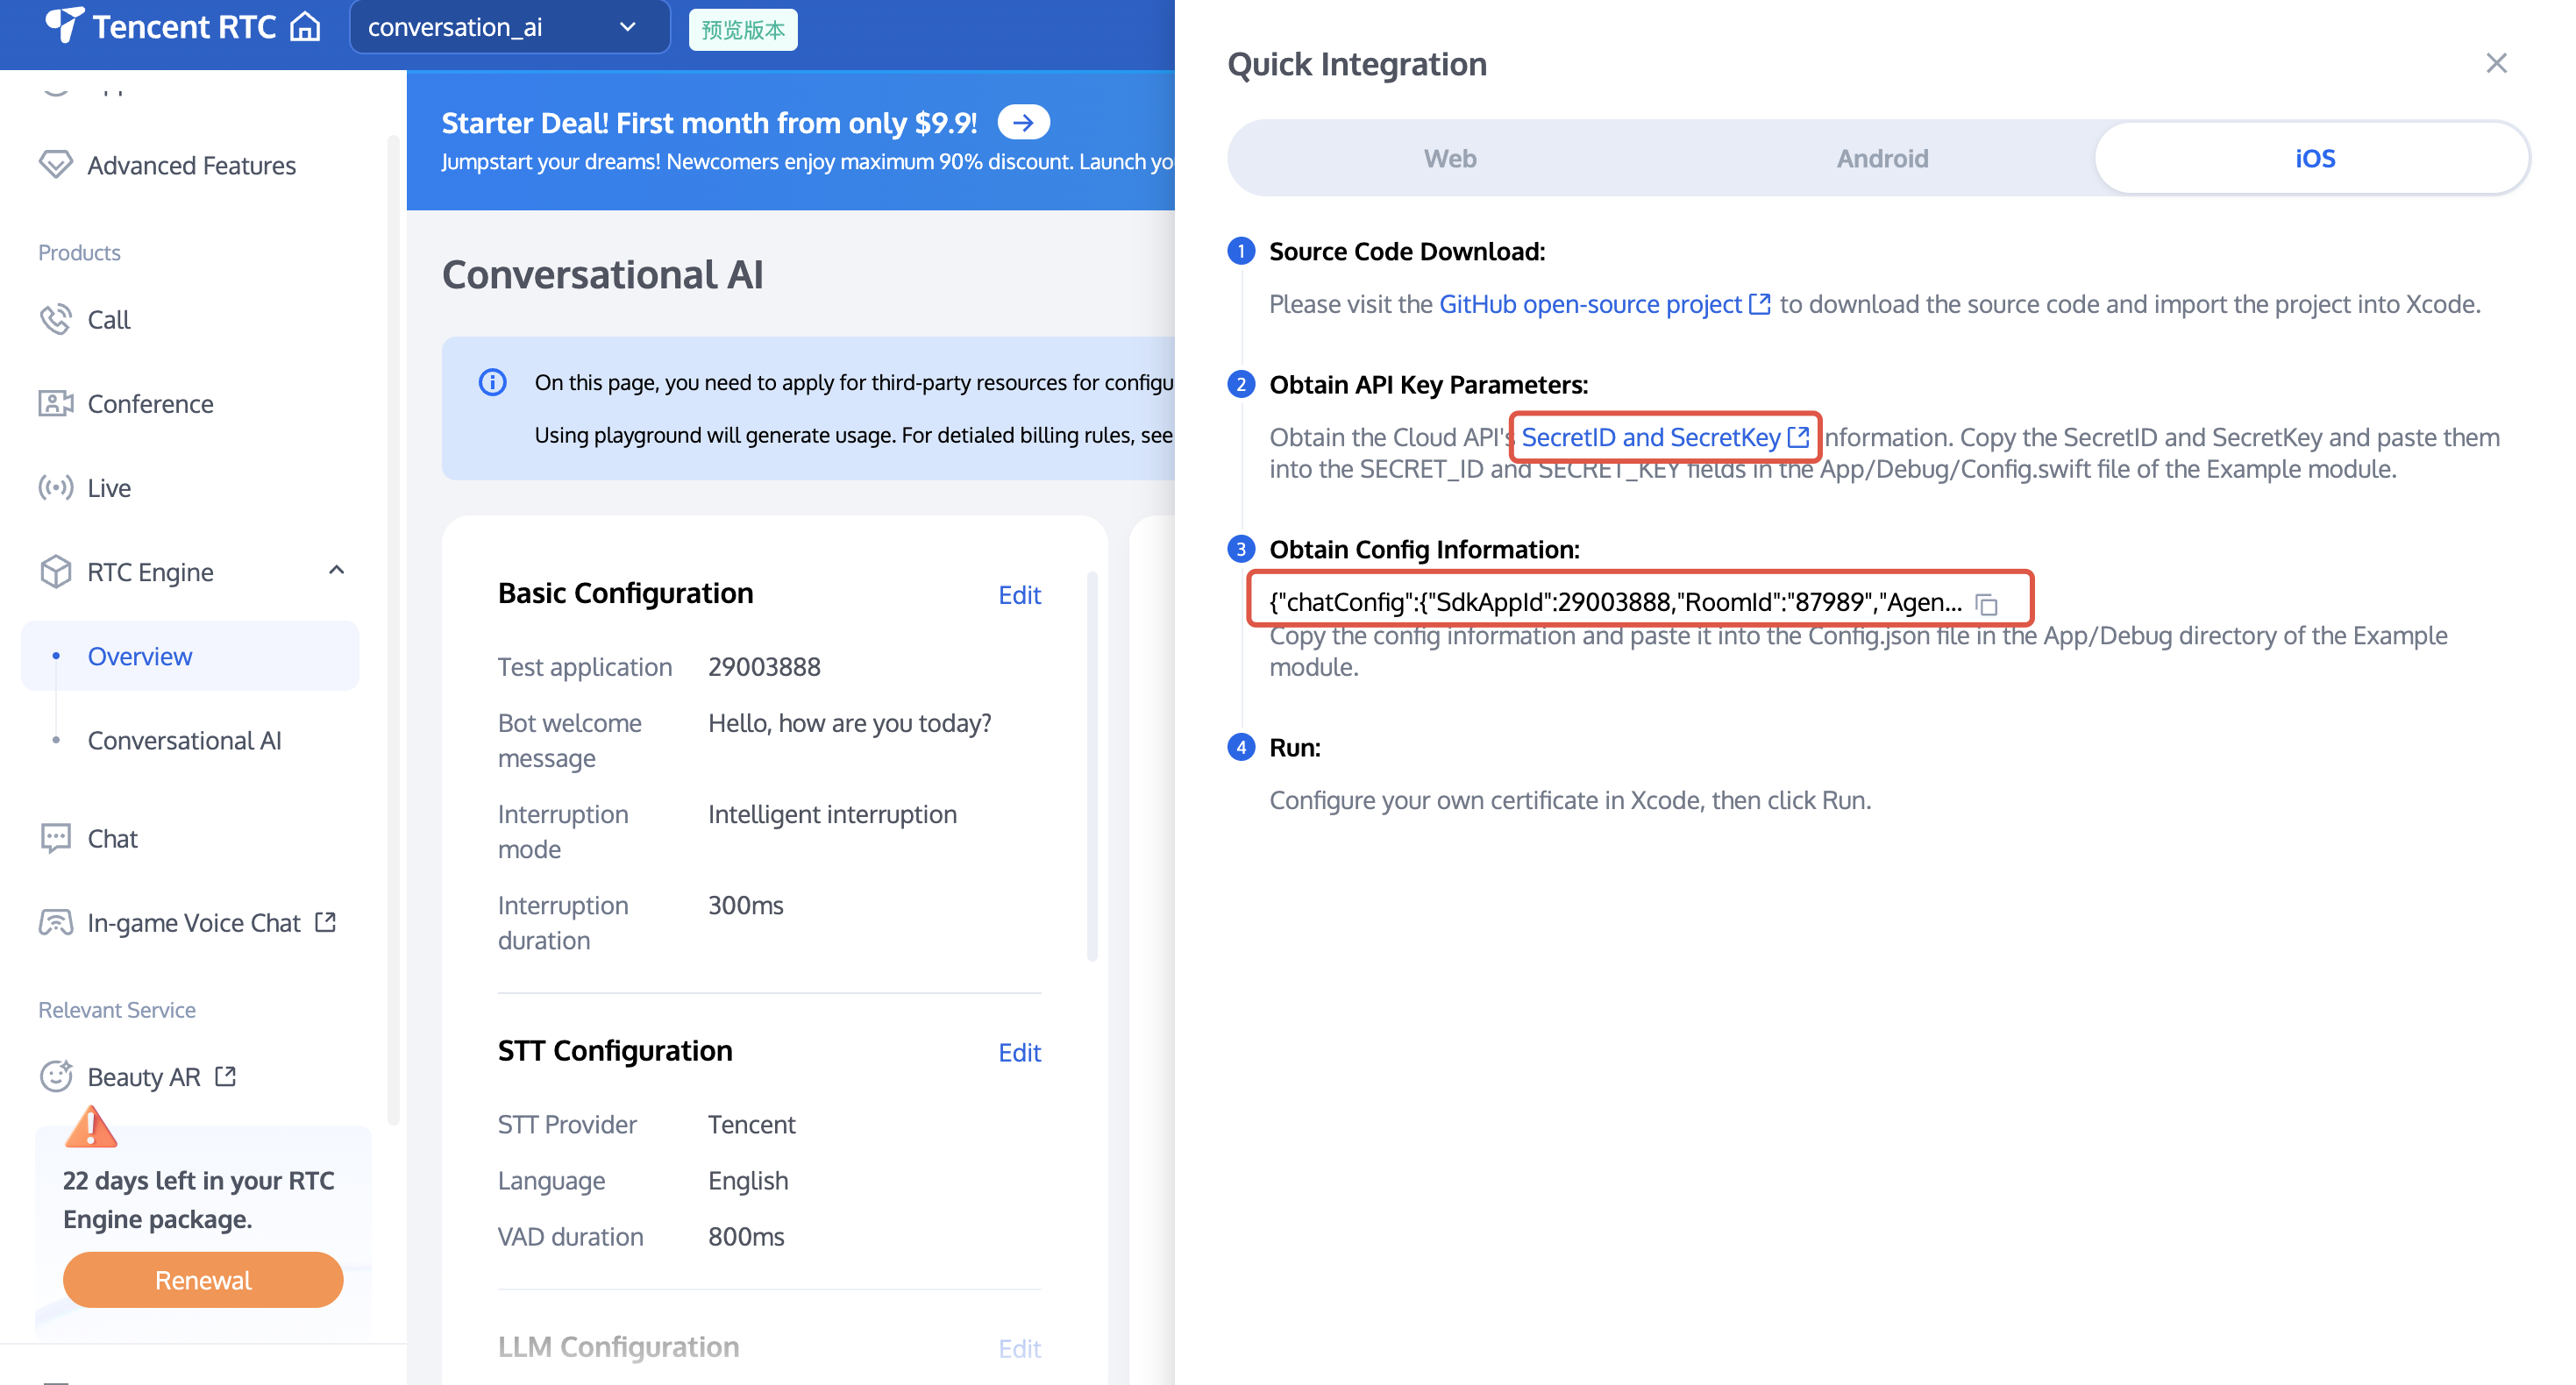
2. On the application details page, select RTC-Engine > Conversational AI, refer to No-Code Quick Integration Of Conversational AI Feature configure conversational AI service parameters, including basic configuration, STT, LLM, TTS, click lower right corner Quick Interation, switch to iOS, obtain SecretId, SecretKey and Config parameters.
3. Copy the SecretId and SecretKey of TencentCloud API to
startParams.secretId and startParams.secretKey.4. Copy the Config information to a JSON parsing tool, such as JsonUtil. Copy the string value corresponding to LLMConfig to
startParams.llmConfig, and copy the string value corresponding to TTSConfig to startParams.ttsConfig.Note:
Development environment: If you are in the local development and debugging stage, you can quickly integrate AI conversation by adopting the above method. In this method, account information is very easy to be decompiled and reverse cracked. Once your key is leaked, attackers can misappropriate your Tencent Cloud traffic.
Live production environment: If your project is going to be launched, please save the above account information to the server to avoid misappropriation of traffic; related dialogue configurations can also be saved to the server for convenient dynamic adjustment of the AI dialogue effect.
Contact us
If you have any questions or suggestions during the integration process, you are welcome to contact: info_rtc@tencent.com .

