Overview
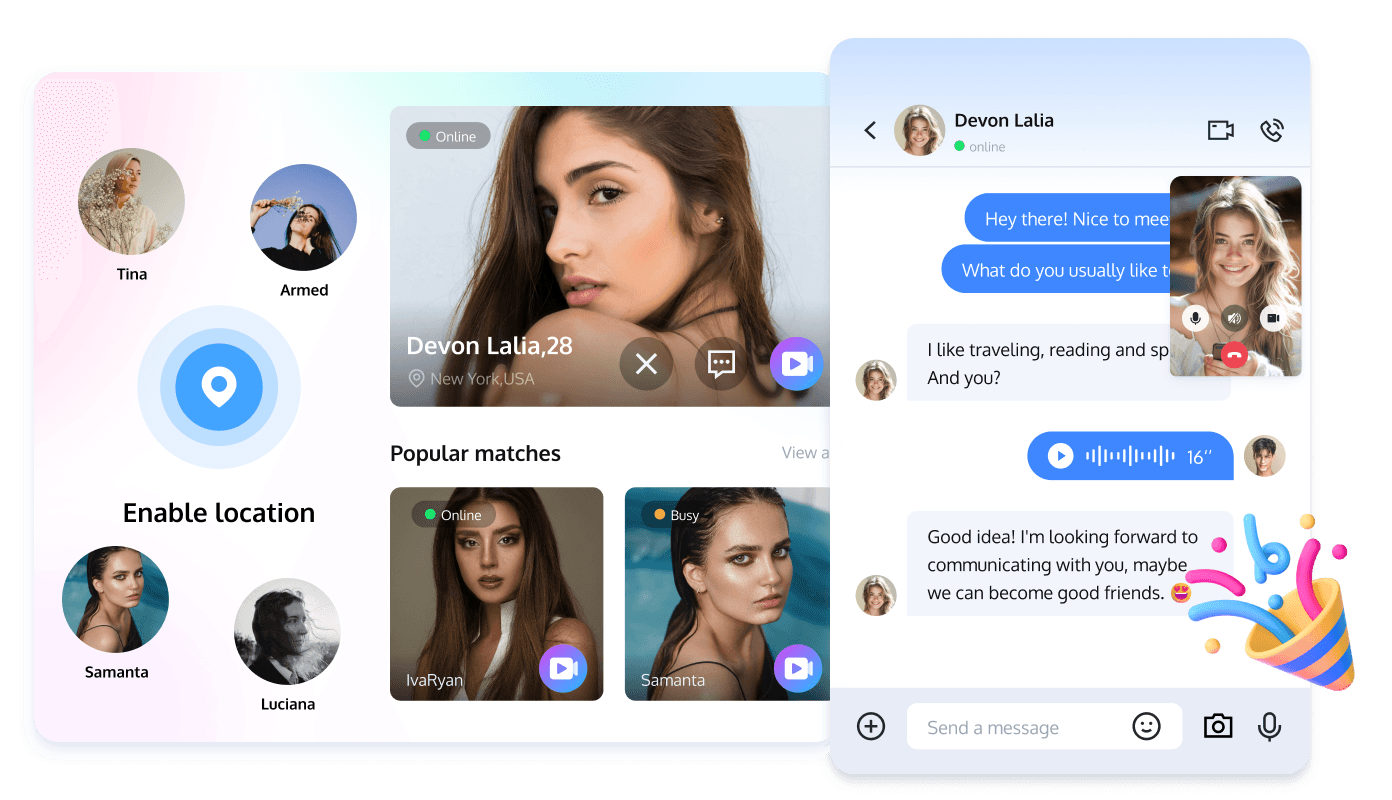
The stranger socializing/dating application can help you quickly make new friends from around the world, enabling you to enjoy the great fun of making friends and online dating. Users can find people they are interested in with the application, and then know each other through text, voice, or video.
Scenario Description
Based on Tencent RTC Call and Tencent RTC Chat, you can quickly build your own stranger socializing/dating application. The service provides highly connected, highly reliable, and strongly secure network connection channels covering the globe. It uses a self-developed algorithm for multiplexed optimal addressing, features network-wide scheduling capability, and has rich high-bandwidth resource reserves, ensuring that your socializing experience is smooth.

Technical Solutions
Solution Strengths
Quick integration. 1v1 socializing scenario customization components are provided to help developers implement features quickly and easily.
Perfect and scalable features. Essential features for 1v1 socializing/online friend-making scenarios are met, business scenario APIs are highly fitted, and modular components support the free expansion of beauty mode features.
Exceptionally high quality, global node distribution. With years of technical expertise, the success rate of message sending and receiving is higher than 99.99%, the resistance to network jitter exceeds 1,000 ms, and a packet loss rate exceeding 70% still allows normal voice calls; nodes cover 200+ countries and regions around the world such as Asia-Pacific, North America, Europe, the Middle East, and Africa, and the end-to-end call latency is as low as 300 ms. Protection can be provided for customers in 1v1 overseas socializing business.
Preparations for Access
Service Activation
You need to activate both Call and Chat services simultaneously.
To provide a better experience for Audio and Video Call and Chat Interaction features, we provide each SDKAppID with a free 7-day trial package for the Call service (the trial version does not include additional call duration) and a 1-month trial package for the Chat service. Each SDKAppID can experience the trial twice for free, and the total number of trials for all SDKAppIDs under one account is 10.
You can activate the Call and Chat trial editions in the Tencent Real-Time Communication (TRTC) console. The specific steps are as follows:
1. Log in to the TRTC console and click Create Application.
2. In the pop-up window, select Call, enter the application name, choose the data storage region, and click Create.
3. Upon application creation, the Call application details page will be displayed by default. At this point, you have quickly created the application and successfully received the audio and video call (Call) trial package. You can view the information on the current Call application details page or the Application Overview page, and refer to the integration guide for integration. The SDKAppID and SDKSecretKey will be used in the integration guide.
4. Click Chat in the left menu and then click Get Started on the page. You have now quickly activated the Chat service and successfully received the Chat trial package.
Environmental Preparations
Note:
TUICallKit supports multiple platforms such as mini programs, iOS, Android, Web, uni-app, and Flutter. For convenience, the subsequent integration and feature realization will be demonstrated using Android as an example. For access guidelines on other platforms, refer to the quick access documentation.
- Android 5.0 (SDK API Level 21) or later.
- Gradle 4.2.1 or later.
- Mobile device with Android 5.0 or later.
Integration of TUIKit Components
Step 1: Project Import
Download the TUIKit source code from GitHub. Ensure that the TUIKit folder is at the same level as your own project folder, for example:
Step 2: Project Configuration
1. Find the settings.gradle.kts (or settings.gradle) file in the root directory of the project, and add the following code in it to import the tuikit component into the project.
settings.gradle.kts
// Include the internal component communication module (required module).
include(":tuicore")
project(":tuicore").projectDir = File(settingsDir, "../TUIKit/TUICore/tuicore")

// Include the IM component common module (required module).
include(":timcommon")
project(":timcommon").projectDir = new File(settingsDir, "../TUIKit/TIMCommon/timcommon")

// Include the chat feature module (basic feature module).
include(":tuichat")
project(":tuichat").projectDir = File(settingsDir, "../TUIKit/TUIChat/tuichat")

// Include the conversation feature module (basic feature module) include(":tuiconversation").
include(":tuiconversation")
project(":tuiconversation").projectDir = File(settingsDir, "../TUIKit/TUIConversation/tuiconversation")

// Include the audio/video call feature module.
include(":tuicallkit-kt")
project(":tuicallkit-kt").projectDir = File(settingsDir, "../TUIKit/TUICallKit/tuicallkit-kt")
settings.gradle
// Include the internal component communication module (required module).
include ':tuicore'
project(':tuicore').projectDir = new File(settingsDir, '../TUIKit/TUICore/tuicore')

// Include the IM component common module (required module).
include ':timcommon'
project(':timcommon').projectDir = new File(settingsDir, '../TUIKit/TIMCommon/timcommon')

// Include the chat feature module (basic feature module).
include ':tuichat'
project(':tuichat').projectDir = new File(settingsDir, '../TUIKit/TUIChat/tuichat')

// Include the conversation feature module (basic feature module).
include ':tuiconversation'
project(':tuiconversation').projectDir = new File(settingsDir, '../TUIKit/TUIConversation/tuiconversation')

// Include the audio/video call feature module.
include ':tuicallkit-kt'
project(':tuicallkit-kt').projectDir = new File(settingsDir, '../TUIKit/TUICallKit/tuicallkit-kt')
2.In the app directory, find the build.gradle.kts (or build.gradle) file, and add the following code in the dependencies section to declare the dependency of the current app on the newly added component.
build.gradle.kts
dependencies {
    api(project(":tuicore"))
    api(project(":tuichat"))
    api(project(":tuiconversation"))
    api(project(":tuicallkit-kt"))
}
build.gradle
dependencies {
    api project(':tuicore')
    api project(':tuichat')
    api project(':tuiconversation')
    api project(':tuicallkit-kt')
}
3.As Java's reflection feature is used within the SDK, you need to add certain classes in the SDK to the obfuscation allowlist by adding the following code to the end of the proguard-rules.pro file in the app directory. After the addition, click Sync Now in the upper right corner to synchronize the code.
-keep class com.tencent.** { *; }4.Find the AndroidManifest.xml file in the app directory, and add tools:replace="android:allowBackup" in the application node to override the component settings with your own settings.
Step 3: Log in to the Component
Add the following code in your project. Its feature is to complete the login to the TUI component by calling the relevant interfaces in TUICore. This step is crucial. Only after successful login will you be able to use the features provided by TUIKit properly.
Java:
import com.tencent.qcloud.tuicore.TUILogin;
import com.tencent.qcloud.tuicore.interfaces.TUICallback;
import com.tencent.qcloud.tuikit.tuicallkit.debug.GenerateTestUserSig;

public class MainActivity extends AppCompatActivity {
    @Override
    public void onCreate(Bundle savedInstanceState) {
        super.onCreate(savedInstanceState);

        //begin
        String userID = "denny";     // Replace it with your UserId.
        int sdkAppID = 0;            // Replace it with the SDKAppID obtained from the console in step 1.
        String secretKey = "****";   // Replace it with the SecretKey obtained from the console in step 1.

        String userSig = GenerateTestUserSig.genTestUserSig(userId, sdkAppId, secretKey);

        TUILogin.login(this, sdkAppId, userId, userSig, new TUICallback() {
            @Override
            public void onSuccess() {
            }

            @Override
            public void onError(int errorCode, String errorMessage) {
            }
        });
        //end
    }
}
Kotlin:
import com.tencent.qcloud.tuicore.TUILogin
import com.tencent.qcloud.tuicore.interfaces.TUICallback
import com.tencent.qcloud.tuikit.tuicallkit.debug.GenerateTestUserSig

class MainActivity : ComponentActivity() {
    override fun onCreate(savedInstanceState: Bundle?) {
        super.onCreate(savedInstanceState)

        // begin
        val userID = "denny"     // Replace it with your UserId.
        val sdkAppID = 0         // Replace it with the SDKAppID obtained from the console in step 1.
        val secretKey = "****"   // Replace it with the SecretKey obtained from the console in step 1.

        val userSig = GenerateTestUserSig.genTestUserSig(userId, sdkAppId, secretKey)

        TUILogin.login(this, sdkAppId, userId, userSig, object : TUICallback() {
            override fun onSuccess() {
            }
            override fun onError(errorCode: Int, errorMessage: String) {
            }
         })
        // end
    }
}| Parameter | Type | Description |
| userID | String | Customers define their own user IDs based on their business. It can only include letters (a-z, A-Z), digits (0-9), underscores (_), and hyphens (-). |
| sdkAppID | int | The unique identifier SDKAppID for the audio and video application created in the TRTC console. |
| secretKey | String | SDKSecretKey for the audio and video application created in the TRTC console. |
| userSig | String | A security protection signature used for user login authentication to confirm the user's identity and prevent malicious attackers from stealing your cloud service usage rights. |
Note:
Development environment: If you are in the local development and debugging stage, you can use the local GenerateTestUserSig.genTestSig function to generate userSig. In this method, the SDKSecretKey is vulnerable to decompilation and reverse engineering, and once your key is leaked, attackers can steal your Tencent Cloud traffic.
Production environment: If your project is going to be launched, adopt the method of server-side generation of UserSig.
Business Feature Implementation
Socializing Hall
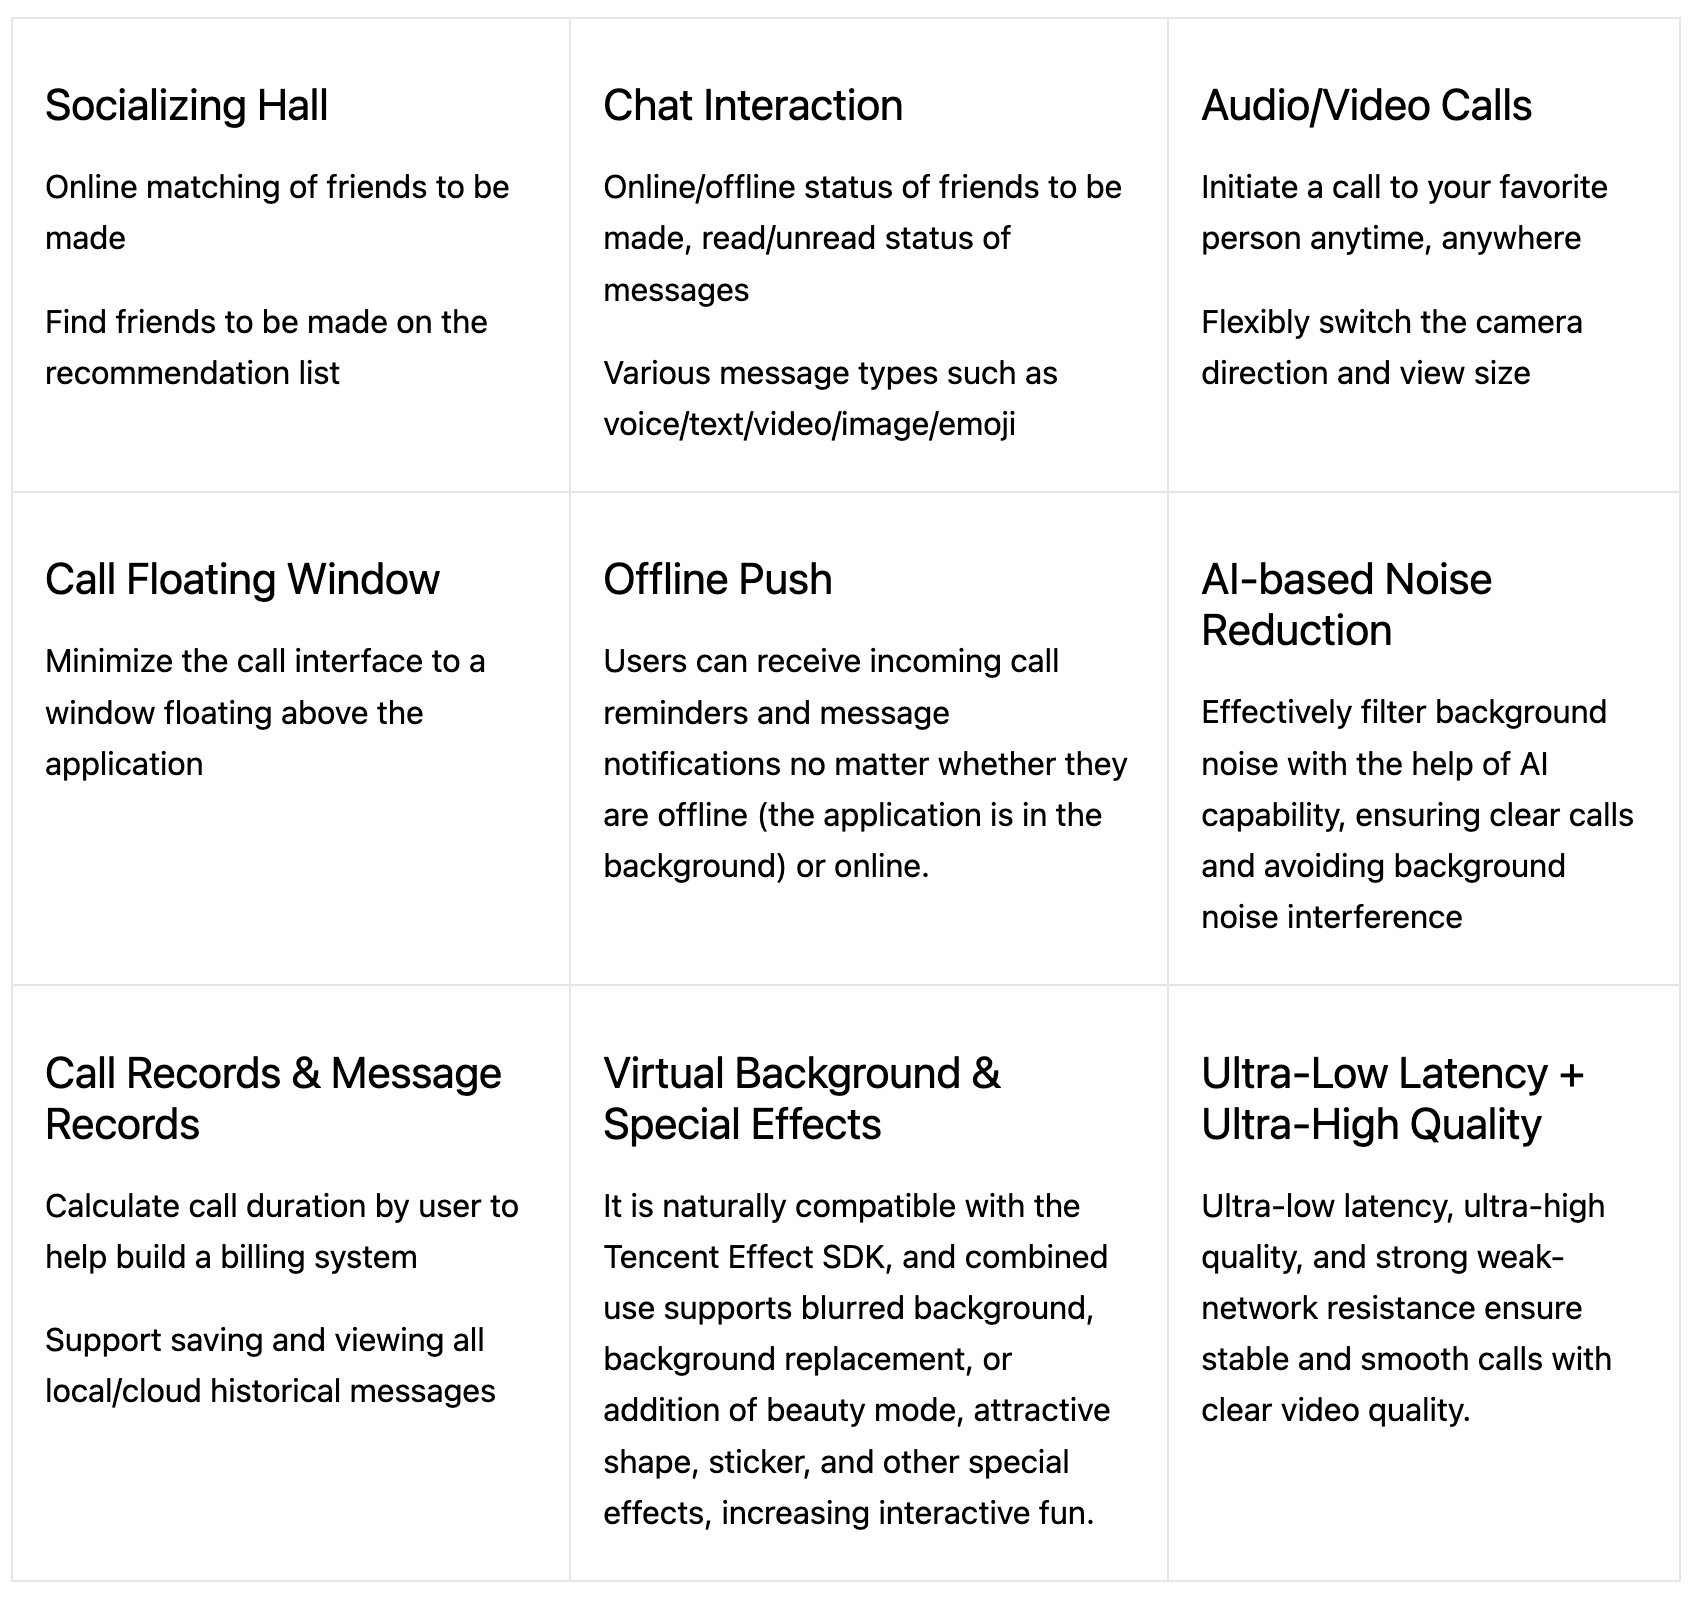
You can record every registered and logged-in user on your own business server and display them in the user's Socializing Hall page according to a specific recommendation algorithm.
Chat Interaction
After the above login method is called successfully, you can also display the conversation list page through the following operation. Click a member on the conversation list to jump to the message page.
Add FragmentContainerView in your XML file (for example, activity_main.xml).
<?xml version="1.0" encoding="utf-8"?>
<androidx.constraintlayout.widget.ConstraintLayout xmlns:android='httpschemasandroidcomapkresandroid'
    xmlns:app="http://schemas.android.com/apk/res-auto"
    xmlns:tools="http://schemas.android.com/tools"
    android:layout_width="match_parent"
    android:layout_height="match_parent"
    tools:context=".MainActivity">

    <!-- Add fragment container -->
    <androidx.fragment.app.FragmentContainerView
        android:id='idfragment_container_view'
        android:layout_width="match_parent"
        android:layout_height="match_parent"/>

</androidx.constraintlayout.widget.ConstraintLayout>
Call the following code where you need to display the conversation list page to bring up the conversation list page.
Java:
TUIConversationFragment conversationFragment = new TUIConversationFragment();
getSupportFragmentManager().beginTransaction()
        .replace(R.id.fragment_container_view, conversationFragment)
        .commit();
Kotlin:
val conversationFragment = TUIConversationFragment()
supportFragmentManager.beginTransaction()
    .replace(R.id.fragment_container_view, conversationFragment)
    .commit()
Audio/Video Calls
After the above login method is called successfully, call the call method of TUICallKit, specify the callee's userID and the call type, and initiate an audio/video call. The callee can receive an incoming call invitation.
Java:
import com.tencent.qcloud.tuikit.tuicallengine.TUICallDefine;
import com.tencent.qcloud.tuikit.tuicallkit.TUICallKit;

// Initiate a 1-to-1 voice call (assuming the callee's userID is mike).
TUICallKit.createInstance(context).call("mike", TUICallDefine.MediaType.Audio);
Kotlin:
import com.tencent.qcloud.tuikit.tuicallengine.TUICallDefine
import com.tencent.qcloud.tuikit.tuicallkit.TUICallKit

// Initiate a 1-to-1 voice call (assuming the callee's userID is mike).
TUICallKit.createInstance(context).call("mike", TUICallDefine.MediaType.Audio)
Offline Push
The offline push feature allows users to receive message notifications and incoming call requests from friends promptly, enhancing user stickiness and activity level. The TUICallKit component supports implementing the offline push feature through the integration of TIMPush plugin **(paid)**, enabling users to receive call notifications even when the application is running in the background or offline.
The following is an example of the effect after TIMPush integration.
Note:
To achieve a good call experience as shown above, it is recommended to enable the "notification", "display over other applications", and "launch interface in the background" permissions in your application. For detailed methods, see enabling relevant permissions.
Floating Window
During the audio/video call between friends, if the user needs to exit the call interface but does not want to terminate the current call process, the floating window feature can be used. The implementation effect is shown in the figure below:
Use the enableFloatWindow method to enable this feature when initializing the TUICallKit component. The code is as follows:
Java:
TUICallKit.createInstance(context).enableFloatWindow(true);Kotlin:
TUICallKit.createInstance(context).enableFloatWindow(true)Beauty Effects
Enabling beauty effects can enhance users' visual appeal during the video socializing process, creating a lively and fun atmosphere. The Tencent Effect SDK supports integration with the TUICallKit component, and can provide rich beauty effects such as virtual backgrounds, beautification, image adjustment, filters, stickers, Animoji, and face pinching DIY.
For more information on the Tencent Effect SDK, refer to the Tencent Effect SDK documentation.
If you want to integrate beauty effects into your business, refer to the Tencent Effect SDK documentation.
Call Records
You can view call records and obtain call duration through the server API of TUICallKit, thereby building your own billing system.
UI Customization
To meet your personalized product UI needs, the TUICallKit product supports custom modifications to the UI interface, including setting nickname/avatar, custom ringtone, and adjusting text and icons, which can help you quickly complete the setup of personalized business scenarios. If you have custom UI needs, refer to the following documentations.
Setting Nickname and Avatar (Across All Platforms)
Setting Resolution and Fill Mode (Web)
Interface Customization (Including Text, Icons, and Custom UI)
Solutions at Source Code Level
For 1v1 socializing scenarios, Tencent Cloud has also launched solutions at source code level. You only need to download the source code and set up the backend according to the documentation to run the 1v1 social networking app, after which paid TRTC Call and TRTC Chat can be officially launched. The product sample images are as follows:
If you want to learn more about solutions at source code level to 1v1 socializing scenarios, please feel free to submit a ticket. Our technical staff will contact you later.