
Scenario Overview
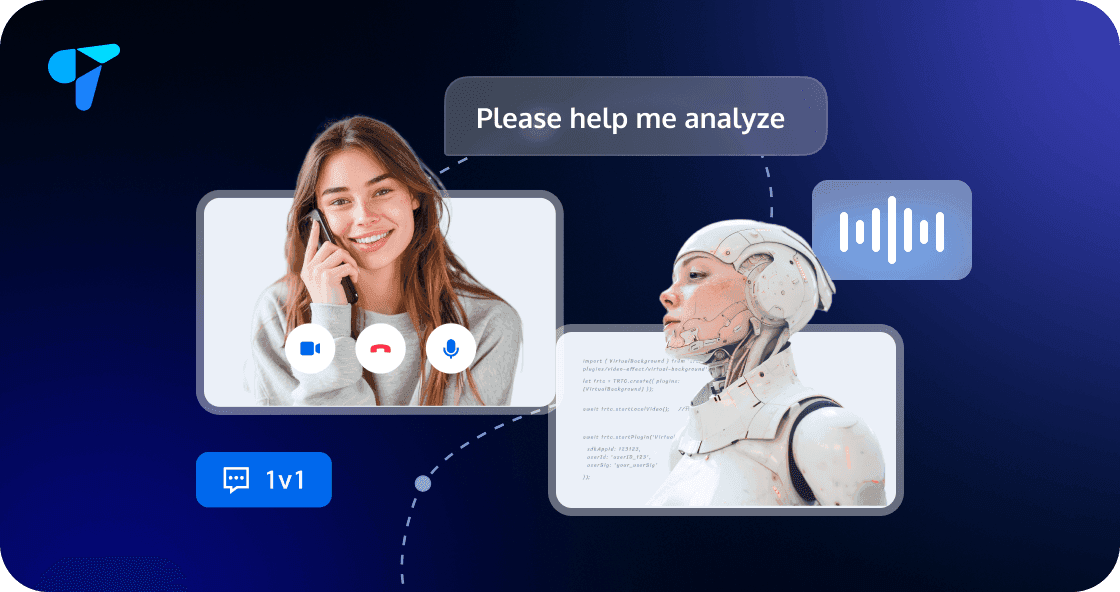
With the global popularity of ChatGPT, artificial intelligence (AI) has become the focus of developers today, and mainstream vendors in China have launched their own big model (BM) applications and products. Many vendors have combined their applications with AI to discover new opportunities. The powerful conversational communication capabilities of next-generation large language models (LLMs) are naturally compatible with all kinds of instant messaging scenarios, which brings broad imagination space for the combination of Chat and AI.
In office scenarios, users can chat with conversational AI to efficiently make work notes, write documents, collect information, and more. In customer service scenarios, AI-powered smart customer service can provide a conversational experience similar to human customer service and guide users to purchase and use products more effectively. In social scenarios, AI chatbots can provide users with 24-hour online psychological counseling and emotional companionship, increasing user engagement and more. Chat, the world's leading provider of communication cloud services, has also seen the huge potential of AI in the instant messaging scenario, and quickly released AI capability call APIs. Based on the communication base provided by Chat, developers can freely call industry-leading BM capabilities and empower themselves with rich AI capabilities to efficiently implement scenario-specific innovations.
This document describes how to integrate AI service capabilities into Chat through the webhook feature of Chat to build an AI chatbot for users to implement features such as intelligent customer service, creative assistance, and work assistant. (The procedure in this document takes the MiniMax LLM as an example. You can use the same method to integrate other ChatGPT-like services.)
Products Applied
Basic Integration Guidelines
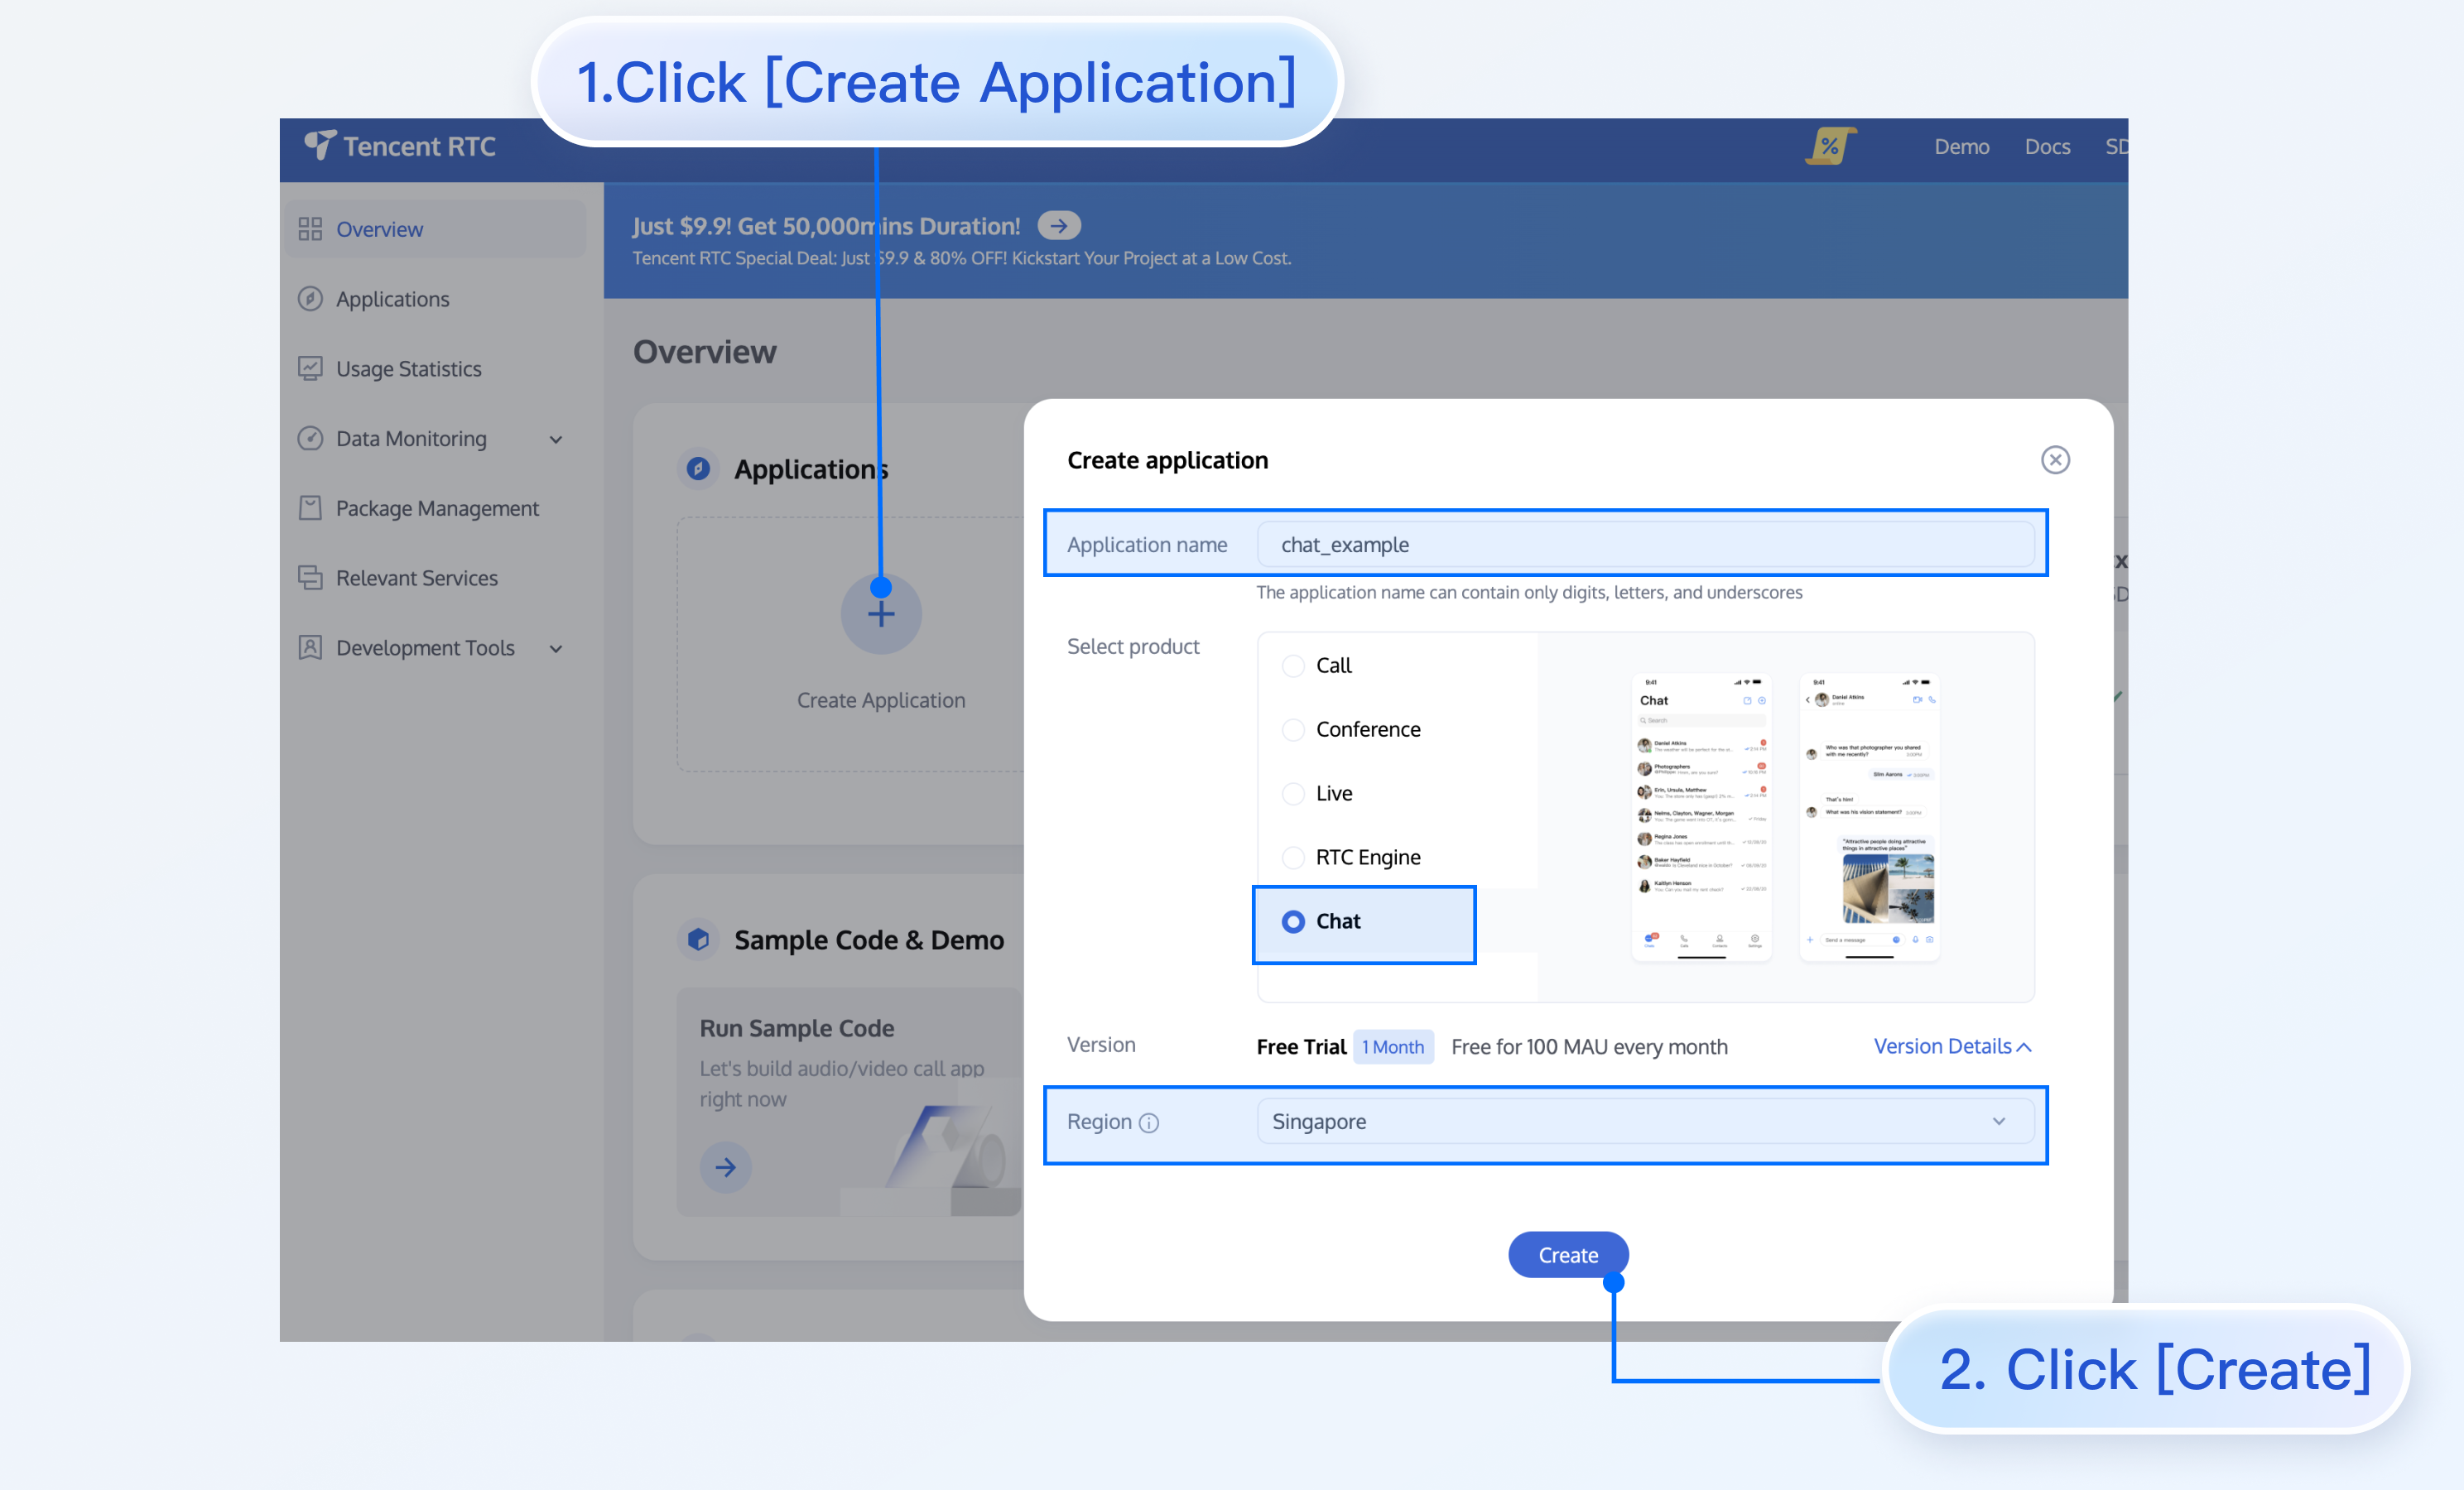
Creating a Chat account
Log in to your account, go to the console, create an application, get the application's SDKAppID and key (Chat key).
Signing up for an account with the corresponding AI service provider
Sign up for an account with the provider of the AI service to be integrated, log in, and get the API key (AI_SECRET_KEY).
Creating a Chat chatbot account
Create a Chat chatbot account through the RESTful API. The Chat chatbot is a special user whose user ID begins with @RBT#.
curl -d '{"UserID":"@RBT#001","Nick":"MyRobot"}' "https://console.tim.qq.com/v4/openim_robot_http_svc/create_robot?sdkappid= {}&identifier=administrator&usersig={}&random=123456789&contenttype=json"Replace sdkappid={} and usersig={} in the command above with your SDKAppID and the UserSig generated based on the Chat key. For more information, see Generating UserSig. After you run the command in Linux, the server returns the following information:
{"ActionStatus": "OK", "ErrorCode": 0, "ErrorInfo": ""}The information above indicates that the chatbot @RBT#001 with the nickname MyRobot was created successfully.
Configuring Chat webhooks
A Chat webhook is a request sent by the Chat backend to the backend server of the corresponding application before or after an event. The application backend can then perform the necessary data synchronization or intervene in the subsequent processing of the event. We will use a "robot event webhook" to listen for and react to user messages sent to the chatbot or @RBT# events in group chats. You need to locate and click "Robot Event Webhook" in the Chat console to enable the feature and save the settings.
Scenario-specific implementation
Taking a one-to-one chat as an example, the overall working process is as follows:
1. The user1 user sends the "hello" message to the chatbot @RBT#001.
2. The Chat backend sends a webhook to notify the application backend of the event.
3. The application backend receives the event notification which contains information such as the message sender user1, message recipient @RBT#001, and message content hello.
4. The application backend calls the AI service API (MiniMax API) and receives the response containing the reply message, such as "nice to meet you".
5. The application backend calls the Chat RESTful API (API sendmsg for a one-to-one chat and API send_group_msg for a group chat) to send the reply message to user1 as @RBT#001.
Take the Go programming language as an example, the key code of the application backend is as follows.
Note:
The following code is for demonstration only and omits a lot of exception handling code. It cannot be used directly in production environments.
Distributing and processing the webhook command
We create an HTTP service which is listened to on port 80 and register a handler with the /im URL that handles all requests sent to http://im. All webhook requests sent by Chat contain a CallbackCommand parameter, with different values representing different webhook commands. The handler performs processing according to the CallbackCommand parameter set by Chat.
func handler(w http.ResponseWriter, r *http.Request) {
   command := r.URL.Query().Get("CallbackCommand")
   reqbody, _ := io.ReadAll(r.Body)
   var rspbody []byte
   switch command {
   case "Bot.OnC2CMessage": // Chatbot’s webhook command word for a one-to-one message
       dealC2c(context.Background(), reqbody)
       rspbody = []byte("{\"ActionStatus\": \"OK\", \"ErrorCode\": 0, \"ErrorInfo\": \"\"}")
   default:
       rspbody = []byte("invalid CallbackCommand.")
   }
   w.Write(rspbody)
}

func main() {  // Register a handler to process the webhook command sent to the application backend
    http.HandleFunc("/im", handler)
    http.ListenAndServe(":80", nil)
}
Processing the one-to-one message received by the chatbot
When processing a one-to-one message, we first check that the sender is not a chatbot (generally a chatbot does not send a message to another chatbot) to prevent infinite webhook loops. We then parse the body of the message to obtain the content text of the message sent by the user to the chatbot, save the sender's UserID into the context to facilitate the subsequent action of calling the RESTful API to reply, and finally call askAI to request the AI service.
func dealC2c(ctx context.Context, reqbody []byte) error {
  root, _ := simplejson.NewJson(reqbody)
  jFromAccount := root.Get("From_Account")
  fromAccount, _ = jFromAccount.String()
  // Check the sender's ID to avoid processing requests sent by one chatbot to another chatbot, which leads to infinite loops.
  if strings.HasPrefix(fromAccount, "@RBT#") {
    return nil
  }
  jToAccount := root.Get("To_Account")
  toAccount, _ := jToAccount.String()
  msgBodyList, _ := root.Get("MsgBody").Array()
  for _, m := range msgBodyList {
    msgBody, _ := m.(map[string]interface{})
    msgType, _ := msgBody["MsgType"].(string)
    if msgType != "TIMTextElem" {
      continue
    }
    msgContent, _ := msgBody["MsgContent"].(map[string]interface{})
    text, _ := msgContent["Text"].(string)
    ctx = context.WithValue(ctx, "from", fromAccount)
    ctx = context.WithValue(ctx, "to", toAccount)
    go askAI(ctx, text)
  }
  return nil
Calling the AI service API
In this step, we use a third-party AI service, MiniMax LLM, to implement intelligent chat. Any other AI service can be used instead of the MiniMax LLM service. Note that here we demonstrate a simple completion API that does not contain the context of the conversation, and you can see the MiniMax documentation for details on other APIs as needed.
type MiniMaxRsp struct {
  Reply string `json:"reply"`
}

// Send a request to MiniMax and get a reply
func askAI(ctx context.Context, prompt string) {
  url := "https://api.minimax.chat/v1/text/completion"
  var reqData = []byte(`{
    "model": "abab5-completion",
    "prompt": prompt
  }`)
  request, _ := http.NewRequest("POST", url, bytes.NewBuffer(reqData))
  request.Header.Set("Content-Type", "application/json; charset=UTF-8
  request.Header.Set("Authorization", API_SECRET_KEY)
  client := &http.Client{}
  response, _ := client.Do(request)
  defer response.Body.Close()
  body, _ := ioutil.ReadAll(response.Body)
  rsp := &MiniMaxRsp{}
  json.Unmarshal(body, rsp)
  reply(ctx, rsp.Reply) // Send the content replied by the AI service to the user
}
Returning the result replied by the AI service to the user
After receiving the reply from the AI service, we only need to call the sendmsg RESTful API of Chat to simulate the chatbot to reply to the user, specifying the sender of the message as @RBT#001 and the recipient as user1.
// Send a RESTful API request
func doRestAPI(host string, sdkappid int, admin, usersig, command, body string) {
  url := fmt.Sprintf("https://%s/v4/%s?sdkappid=%d&identifier=%s&usersig=%s&random=%d&contenttype=json",
    host, command, sdkappid, admin, usersig, rand.Uint32())
  req, _ := http.NewRequest("POST", url, bytes.NewBufferString(body))
  req.Header.Set("Content-Type", "application/json")
  cli := &http.Client{}
  rsp, err := cli.Do(req)
  if err != nil {
    log.Printf("REST API failed. %s", err.Error())
    return
  }
  defer rsp.Body.Close()
  rsptext, _ := io.ReadAll(rsp.Body)
  log.Printf("rsp:%s", rsptext)
}

// Call the RESTful API of Chat to reply to the user
func reply(ctx context.Context, text string) {
  rsp := make(map[string]interface{})
  msgbody := []map[string]interface{}{{
    "MsgType":    "TIMTextElem",
    "MsgContent": map[string]interface{}{"Text": text},
  }}
  // For the implementation of `GenUserSig`, see the documentation.
  usersig, _ := GenUserSig(IM_SDKAPPID, IM_KEY, "administrator", 60)
  rsp["From_Account"] = ctx.Value("to").(string) //"@RBT#001"
  rsp["To_Account"] = ctx.Value("from").(string)
  rsp["SyncOtherMachine"] = 2
  rsp["MsgLifeTime"] = 60 * 60 * 24 * 7
  rsp["MsgSeq"] = rand.Uint32()
  rsp["MsgRandom"] = rand.Uint32()
  rsp["MsgBody"] = msgbody
  rspbody, _ := json.Marshal(rsp)
  doRestAPI("console.tim.qq.com", IM_SDKAPPID, "administrator", usersig, "openim/sendmsg", string(rspbody))
}
Effect Demonstration
The following demonstrates the final implementation effect of the Chat chatbot demo:
With the above steps, we have implemented one-to-one chat connectivity between the Chat server side and the MiniMaxAI open platform. It is also possible to integrate AI services from another AI service provider following the above steps by simply replacing the askAI function with the corresponding API call from that AI service provider. For group chat chatbots, only the implementation of the Bot.OnGroupMessage webhook command processing needs to be supplemented.
Order Now
Click here to quickly go to the purchase page to order.