


Hello everyone, I’m excited to share this article with you all.
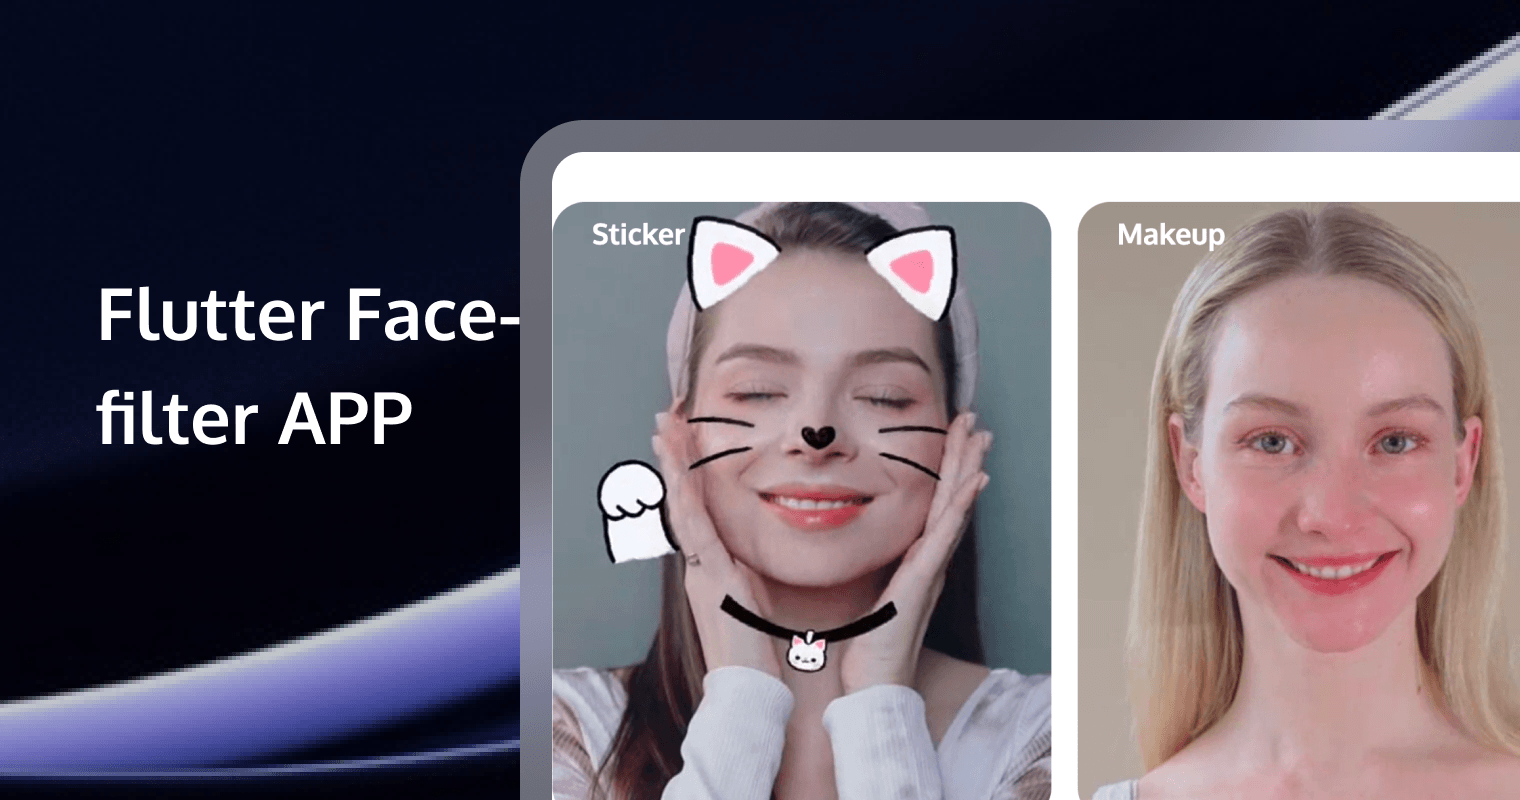
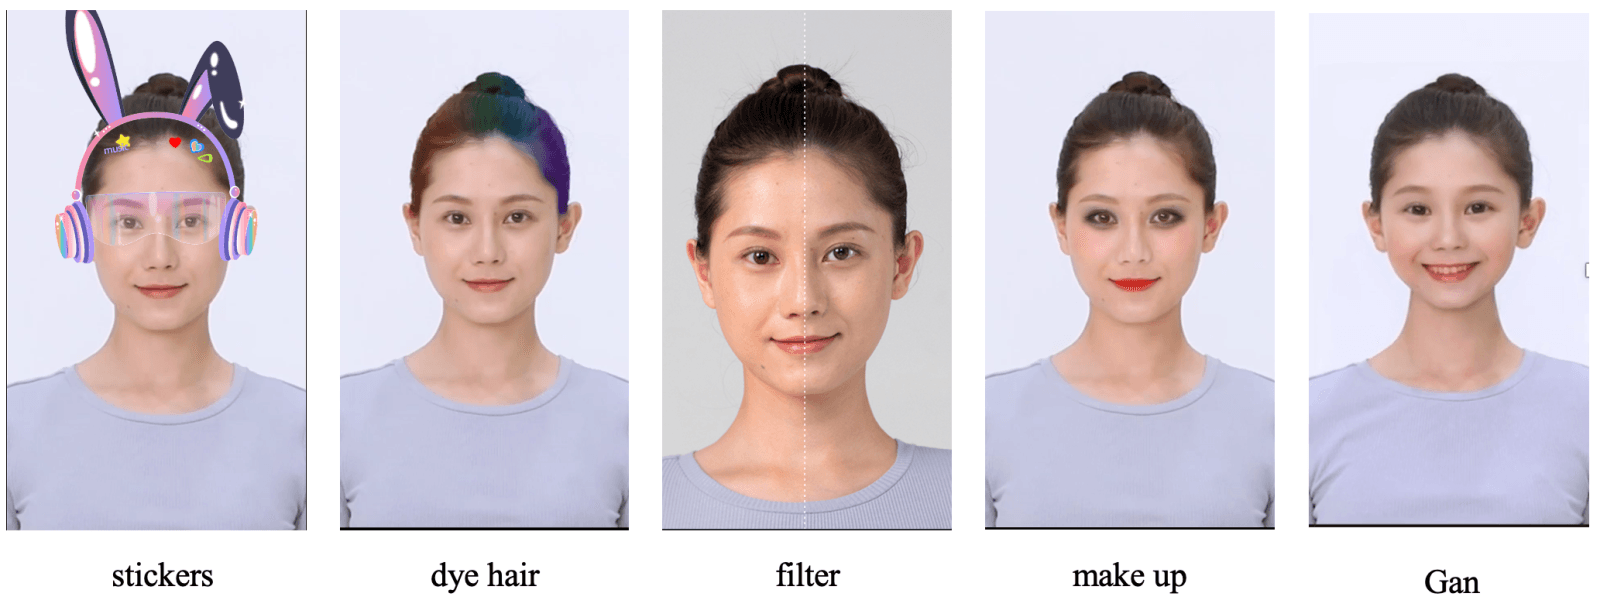
By the end of this article, you’ll be able to build a face filter app from scratch using Flutter and the TRTC Beauty AR SDK. You’ll get hands-on experience with AR stickers, face filters, virtual makeup, and face/gesture recognition — and you can customize all the special effects to your liking.
Step 1: Creating a new Flutter project.
Log in to TRTC Console > Relevant Services, and click Get Started.
Select Mobile, and based on your actual needs, fill in the App Name, Package Name, and Bundle ID. Check the features you want to trial: All Beauty Features, Virtual Background, Face Recognition, Gesture Recognition, then click Confirm.
After activation, you can view your information on the current page and refer to the Integration Guide below for integration. The License Url and License Key will be used in the integration guide.
Beauty Flutter SDK requires dependence on the Beauty SDK of the Android/iOS end. Through the Plugins provided by Flutter, the native end features can be exposed to the Flutter client. Therefore, when integrating the beauty filter features, you need to integrate the SDK of the native end manually.
Step 2: Running Demo
Download the demo project, modify the demo/lib under the main.dart file, add your licenseUrl and licenseKey in this file. The sample code for using beauty features in TRTC is primarily located in demo/lib/page/trtc_page.dart and demo/lib/main.dart.
Android
- In demo/app, find the build.gradle file, open the file, and change the value of applicationId to the package name you used when applying for the license.
- In demo/lib, execute flutter pub get.
- Use Android Studio to open the demo project and run it.
Step 3: SDK Integration
- In the app module, find the build.gradle file and add the Maven repository URL for your corresponding package. For example, if you choose the S1-07 package, add the following:
dependencies {
   implementation 'com.tencent.mediacloud:TencentEffect_S1-07:latest.release'
}
For the Maven URL corresponding to each package, please refer to the documentation. The latest version number of the SDK can be found in theRelease History.
- In your project, find the
android/appmodule and locate thesrc/main/assetsfolder. Copy thedemo/android/app/src/main/assetslutandMotionResfolders from the demo project to your own project'sandroid/app/src/main/assets. If your project doesn't have an assets folder, you can create one manually. - If you are using an Android of the Tencent Effect SDK that is lower than 3.9, you will need to locate the AndroidManifest.xml file under the app module, and add the following Tag in the application section:
   <uses-native-library
            android:name="libOpenCL.so"
            android:required="false" />
        //true indicates that libOpenCL is essential for the current app. Without this library, the system will not allow the app to install
        //false indicates that libOpenCL is not essential for the current app. The app can be installed normally with or without this library. If the device has this library, GAN-type special effects in the Tencent Special Effects SDK (e.g., fairy tale face, comics face) will function normally. If the device does not have this library, GAN-type effects won't work, but it will not affect the use of other features within the SDK.
        //For information about uses-native-library, please refer to the Android official website: <https://developer.android.com/guide/topics/manifest/uses-native-library-element>
- Obfuscation configuration
If you enable compile optimization (setting minifyEnabled to true) when packaging the release, it will trim some code that is not called in the Java layer. This code may possibly be invoked by the native layer, thus causing the no xxx method exception.
If you enabled such compile optimization, you should add these keep rules to avoid trimming xmagic's code:
-keep class com.tencent.xmagic.** { *;}
-keep class org.light.** { *;}
-keep class org.libpag.** { *;}
-keep class org.extra.** { *;}
-keep class com.gyailib.**{ *;}
-keep class com.tencent.cloud.iai.lib.** { *;}
-keep class com.tencent.beacon.** { *;}
-keep class com.tencent.qimei.** { *;}
-keep class androidx.exifinterface.** { *;}
Step 4: Flutter Integration
Method 1:
Remote Dependencies, add the following reference in your project's pubspec.yaml file:
  tencent_effect_flutter:
   git:
     url: <https://github.com/Tencent-RTC/TencentEffect_Flutter>
Method 2:
Local Dependencies, download the latest version of tencent_effect_flutter, then add the folders android, ios, lib and the files pubspec.yaml, tencent_effect_flutter.iml to your project directory, and then add the following reference in your project's pubspec.yaml file: (refer to demo)
tencent_effect_flutter:
    path: ../
Run the following command:
flutter pub getStep 5: SDK usage
1. Associated with TRTC
Add the following code in the onCreate method of the application class (or the onCreate method of FlutterActivity):
TRTCCloudPlugin.register(new XmagicProcesserFactory());
- Call the resource initialization API
void _initSettings(InitXmagicCallBack callBack) async {
  _setResourcePath();
  /// Resource copying only needs to be done once. In the current version, if copied successfully once, there is no need to copy the resources again.
  /// Copying the resource only needs to be done once. Once it has been successfully copied in the current version, there is no need to copy it again in future versions.
  if (await isCopiedRes()) {
    callBack.call(true);
    return;
  } else {
    _copyRes(callBack);
  }
}

void _setResourcePath() async {
  String resourceDir = await ResPathManager.getResManager().getResPath();
  TXLog.printlog(
      '$TAG method is _initResource ,xmagic resource dir is $resourceDir');
  TencentEffectApi.getApi()?.setResourcePath(resourceDir);
}

void _copyRes(InitXmagicCallBack callBack) {
  _showDialog(context);
  TencentEffectApi.getApi()?.initXmagic((result) {
    if (result) {
      saveResCopied();
    }
    _dismissDialog(context);
    callBack.call(result);
    if (!result) {
      Fluttertoast.showToast(msg: "initialization failed");
    }
  });
}
3. Perform beauty authorization
TencentEffectApi.getApi()?.setLicense(licenseKey, licenseUrl,
           (errorCode, msg) {
         TXLog.printlog("Print the authentication result errorCode = $errorCode   msg = $msg");
         if (errorCode == 0) {
            // Authentication succeeded
         }
       });
4. Enable Beauty Filter
/// Enable beauty filter operation
 var enableCustomVideo = await trtcCloud.enableCustomVideoProcess(open);
5. Set Beauty Attributes
For specific beauty attributes, refer to Beauty Attributes Table.
TencentEffectApi.getApi()?.setEffect(sdkParam.effectName!,
    sdkParam.effectValue, sdkParam.resourcePath, sdkParam.extraInfo)
6. Set other properties
Pause Beauty Sound Effects
TencentEffectApi.getApi()?.onPause();
Resume Beauty Sound Effects
TencentEffectApi.getApi()?.onResume();
Monitor Beauty Events
TencentEffectApi.getApi()
     ?.setOnCreateXmagicApiErrorListener((errorMsg, code) {
       TXLog.printlog("Error creating an effect object errorMsg = $errorMsg , code = $code");
 });   /// Needs to be set before creating the beauty filter
Set Callback for Face, Gesture, and Body Detection Status
TencentEffectApi.getApi()?.setAIDataListener(XmagicAIDataListenerImp());
Set Callback Function for Dynamic Prompt Messages
TencentEffectApi.getApi()?.setTipsListener(XmagicTipsListenerImp());
Configure the Callback of Facial Keypoints and Other Data (only available in S1-05 and S1-06)
TencentEffectApi.getApi()?.setYTDataListener((data) {
   TXLog.printlog("setYTDataListener  $data");
 });
Remove All Callbacks. You need to remove all callbacks when terminating the page:
 TencentEffectApi.getApi()?.setOnCreateXmagicApiErrorListener(null);
 TencentEffectApi.getApi()?.setAIDataListener(null);
 TencentEffectApi.getApi()?.setYTDataListener(null);
 TencentEffectApi.getApi()?.setTipsListener(null);
For more information on the APIs, see API Documentation. For others, refer to the Demo Project.
7. Add Data to and Remove Data from the Effect Panel
Add effect resources.
Add your resource file to the corresponding folder as described in step 1. For example, to add a 2D animated effect resource:
You should put the resource in android/xmagic/src.mian/assets/MotionRes/2dMotionRes of your project:
Beauty Panel Configuration
The demo provides a simple beauty panel UI. The panel's properties are configured through JSON files, located as shown in the following diagram. The implementation of the panel can be referred from the demo project.
With abundant built-in excellent materials, special effects, templates, trendy makeup effects, and interactive games can be customized. See detailed usage instructions for more information Beauty AR Studio Introduction.
Congratulation, you have built your first Face Filter App with Flutter and Tencent RTC Beauty AR SDK.
If you want to build face filter or other special effect into your app, welcome to contact us.