


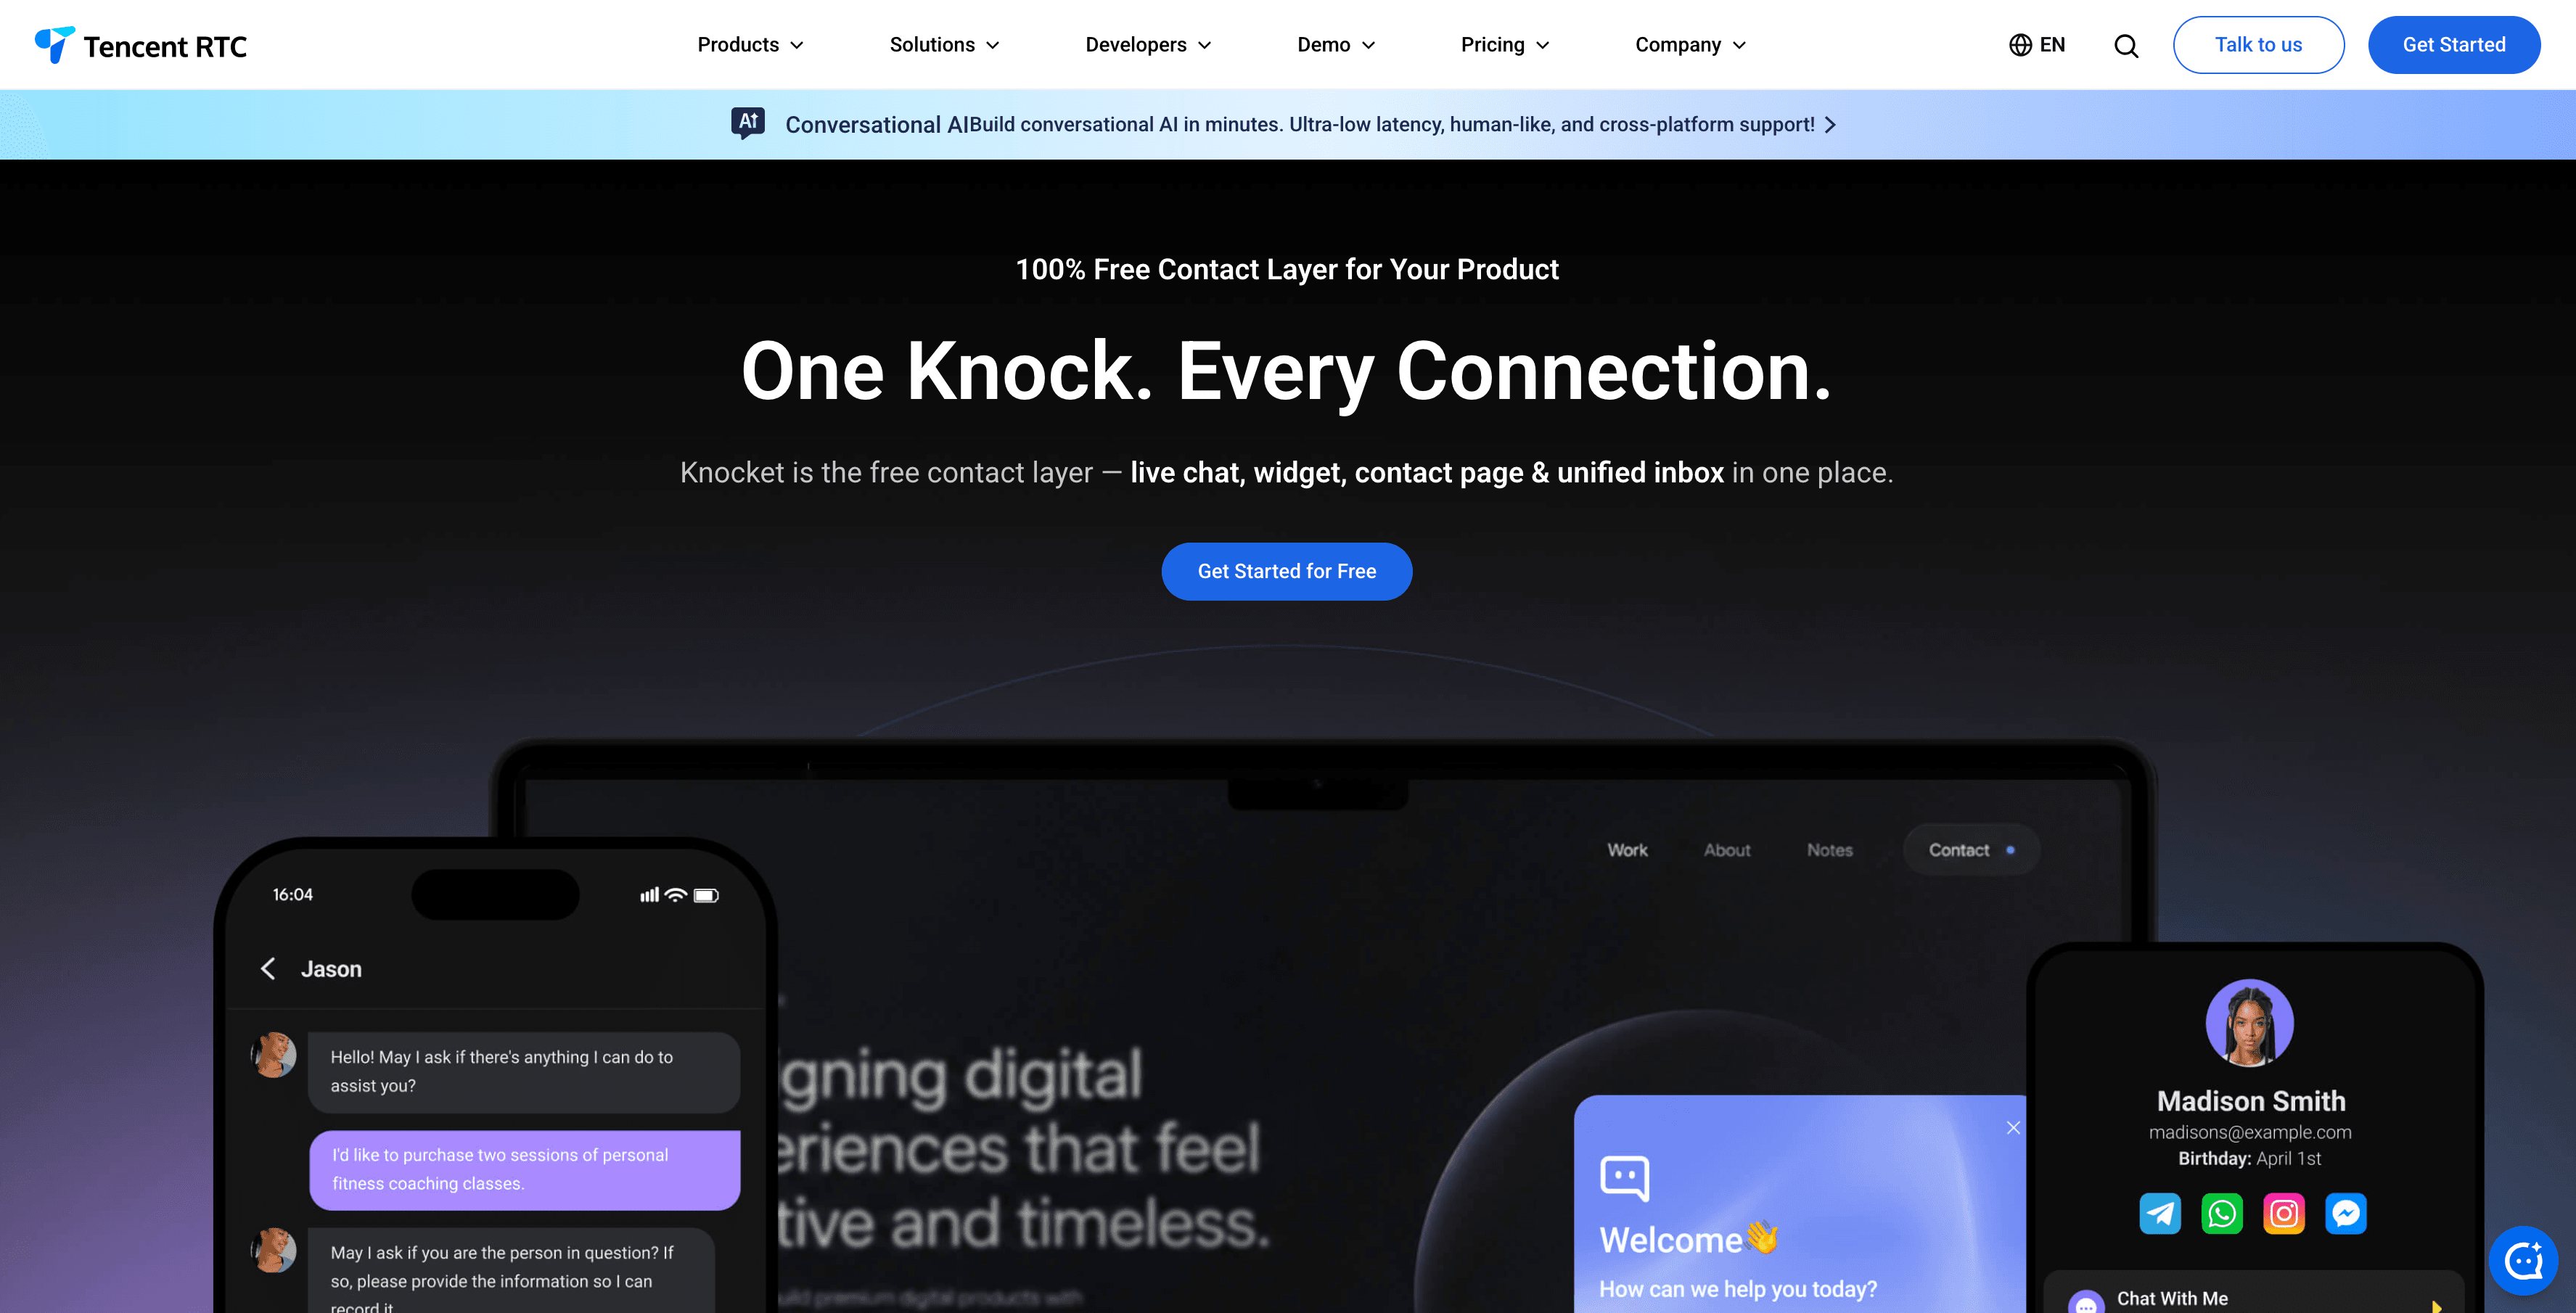
How to Add a forever free Chat Widget to Any Website in 5 Minutes (2026 Guide)

About Knocket — and why this guide is built around it
Knocket is 100% free. Not freemium. Not a free trial. Not a free plan that converts. Free — forever, for every account, for every size. There is no paid tier, no per-seat fee, no ads injected into the widget, and no feature gates that open up after you pay. The entire product stays free: the web widget you are about to install, the contact page, the mobile widget, and the unified inbox. You can read the full commitment on the Knocket product page.
What Knocket actually is. Knocket is a lightweight contact widget for indie developers, early-stage founders, and indie hackers hunting for their first 100 users. It comes in three forms:
1. Web Widget — one <script> tag on any website, live in ~5 minutes (the subject of this guide).
2. Contact Page — a shareable link (auto-generated from the console) you can drop into Link in Bio, waitlist pages, or anywhere a visitor needs to reach a real person.
3. Unified Inbox — web chat, Telegram, and email in one place, with replies automatically routed back to the channel the message came from.
Under the hood, Knocket runs on Tencent RTC’s real-time infrastructure, which is why the same chat experience ships in a web <script>, a mobile WebView, and a shared contact page without three different code paths.
You can add a chat widget like Knocket to almost any website in under five minutes: create a free account, customize the widget, copy a single <script> tag, and paste it into your site. No build step, no npm install, no backend configuration. This guide walks through the exact process for plain HTML, WordPress, Shopify, Wix, Squarespace, Webflow, Ghost, React, Next.js, Vue, Astro, and Nuxt 3 — plus the no-code Google Tag Manager path, the right way to handle Content Security Policy, and how to verify the widget loads without hurting your Core Web Vitals.
If you are still choosing what to install, the rest of this article covers the decision framework, a fair comparison of the main installation methods, and answers to the questions indie developers and small teams actually ask in 2026.
What You Need Before You Start
Before pasting a single line of JavaScript, decide which category of tool you actually need. The four options on the market solve very different problems:
If you want… | Tool type | Common examples |
Visitors to reach you, leave messages, and book time | Contact widget | |
AI to answer visitor questions automatically from your docs | AI chat tool | |
A human sales or support agent to handle live conversations | Live chat software | |
Tickets, SLAs, a knowledge base, and routing | Support suite |
For most indie developers, early-stage founders, and small teams in their first 100 users, a contact widget covers the actual need: letting visitors reach a real person on the other end. This guide uses Knocket as the running example because it installs with one line of code, costs nothing, and works on every platform we cover — but the installation steps are the same shape for any contact widget that gives you a <script> tag.
How to read the rest of this guide. Steps 1–3 are universal; pick the platform you use in Step 3 and skip the rest. Steps 4–5 are verification and optimization. The “Beyond the Web Widget” section shows two extra places the same tool can live once you have it on your site.
Step 1: Create Your Account and Customize the Widget
Head to trtc.io/solutions/knocket and create a free account. The setup wizard shows a live preview on the right as you fill in the left side, so you can see the widget exactly as visitors will see it.
Theme color. Pick from the preset palette or use the color picker to match your brand. The color is applied to the chat bubble, header, and action buttons. Tip: pull the value from your existing CSS — for example the accent color from your landing page hero — so the widget feels native instead of bolted on.
Brand logo. Drag and drop or click to upload a square logo. It appears at the top of the chat window when a visitor opens the widget. If you do not have a square asset, a wordmark on a transparent PNG works fine.
Components to enable. Toggle what the widget actually shows:
● Chat — real-time conversation with you. On by default.
● Meeting scheduler — paste a calendar URL and visitors can book time without leaving the widget.
● Social links — WhatsApp, Instagram, Telegram, Messenger, X / Twitter, LinkedIn, email, phone. Visitors who prefer a different channel can reach you there.
Greeting. The default “Hello. How can I help you today?” is fine, but a tailored greeting consistently converts better. Match it to the most likely visitor intent:
Site type | Example greeting |
SaaS / dev tool | “Found a bug? Have feedback? We’re here.” |
Freelancer portfolio | “Want to work together? Drop me a message.” |
Small business | “Questions about our services? Chat with us.” |
Side project | “Found something broken? Let me know.” |
Pre-launch waitlist | “We’re launching soon — leave your email and we’ll let you in first.” |
Language and offline message. Set the widget language to whatever your visitors actually speak — English, Spanish, French, German, Portuguese, Chinese, and several dozen more. The offline message is the fallback visitors see when you are not online. Write it as if a friend were answering tomorrow: “We’re away right now. Leave your email and we’ll reply within 24 hours.”
When the live preview looks right, click Next.
Step 2: Copy the Script Tag
Knocket generates a unique script tag bound to your account identifier:
<script src="https://trtc.io/knocket-sdk/sdk.js?identifier=YOUR_ID" async></script>Click “Copy to clipboard”. That is the only code you will ever need to paste. The technical properties that matter:
● One line. No additional files, no npm install, no build step, no environment variables.
● async attribute. Per the MDN reference for <script> async, the script downloads in parallel with the rest of the page and executes as soon as it is ready, without blocking the HTML parser.
● No dependencies. Works with any tech stack, framework, or hosting provider — from a hand-rolled HTML file to a fully server-rendered Astro site.
● Globally cached. Served from a CDN with edge presence, so the first byte is close to every visitor regardless of region.
● Inherited security headers. Loads over HTTPS, and the underlying platform is backed by Tencent RTC infrastructure, the same real-time network that powers enterprise-grade voice and video at Tencent.
If you ever need to roll the widget out across many sites or environments, store the snippet in a centralized config — a .env value, a head-include partial, or a tag in your CMS — so changing one place updates everywhere.
Step 3: Paste the Snippet Into Your Website
The exact location you paste the script depends on your platform. The general rules: in raw HTML, paste it just before the closing </head> or </body> tag; in a CMS, look for the “header code” or “code injection” section; in a modern framework, use the framework’s official script-loading mechanism. The subsections below cover every major case.
3.1 Plain HTML
Open your HTML file and paste the script before the closing </head> tag (or </body> — both work because the snippet is async):
<!DOCTYPE html>
<html lang="en">
<head>
    <meta charset="UTF-8">
    <title>My Website</title>

    <!-- Knocket contact widget -->
    <script src="https://trtc.io/knocket-sdk/sdk.js?identifier=YOUR_ID" async></script>
</head>
<body>
    <!-- your page content -->
</body>
</html>
If your site has multiple HTML pages, add the script to every page where you want the widget to appear. For a site with a shared header or template, add it once in the template file and you are done.
3.2 WordPress
You have three options. Pick the one that matches how comfortable you are editing your own theme files.
Method 1 — Theme editor (visual, fast):
1. In the WordPress admin, go to Appearance → Theme File Editor.
2. Open header.php from the file list on the right.
3. Find the </head> tag.
4. Paste the Knocket snippet just above it.
5. Click Update File.
Method 2 — Plugin (no code edits, safest for live sites):
1. Install WPCode – Insert Headers and Footers (free, WordPress.org plugin directory).
2. Go to Code Snippets → Header & Footer.
3. Paste the Knocket snippet in the Header section.
4. Click Save Changes.
Method 3 — functions.php (developer-preferred, version-controlled):
Add this to your active theme’s functions.php (or a must-use plugin if you want it to survive theme switches):
<?php
/**
 * Enqueue the Knocket contact widget in the site head.
 */
function knocket_enqueue_widget() {
    $knocket_id = defined( 'KNOCKET_ID' ) ? KNOCKET_ID : 'YOUR_ID';
    ?>
    <script src="https://trtc.io/knocket-sdk/sdk.js?identifier=<?php echo esc_attr( $knocket_id ); ?>" async></script>
    <?php
}
add_action( 'wp_head', 'knocket_enqueue_widget' );
Using a defined constant (KNOCKET_ID) means the identifier lives in wp-config.php rather than being hard-coded into the snippet.
3.3 Shopify
1. In your Shopify admin, go to Online Store → Themes.
2. On your active theme, click Actions → Edit code.
3. Open theme.liquid in the Layout folder.
4. Find the </head> tag (usually near the bottom of the file).
5. Paste the Knocket snippet just above it.
6. Click Save.
The widget will appear on every page of your Shopify store, including product pages, the cart, and checkout pre-funnel pages. (Note: Shopify does not allow third-party scripts on the actual checkout pages, but the chat bubble loads in time to engage shoppers on every other step.)
3.4 Wix
1. In your Wix dashboard, open Settings → Custom Code (under “Developer Tools” in some Wix plans).
2. Click + Add Custom Code.
3. Give the snippet a name (e.g. “Knocket Widget”), paste it in the code area, and set placement to Head.
4. Pick whether to apply it to All pages, Specific pages, or by URL pattern.
5. Click Apply.
Wix custom code requires a Wix Premium plan. Free Wix sites do not support custom code injection.
3.5 Squarespace
1. In your Squarespace dashboard, go to Settings → Advanced → Code Injection.
2. Paste the Knocket snippet in the Header field.
3. Click Save.
The widget will appear on every page of your Squarespace site. Code injection is available on the Business, Commerce, and Personal plans; it is not available on the legacy Personal plan.
3.6 Webflow
1. Open your Webflow project and go to Project Settings → Custom Code.
2. Paste the Knocket snippet in the Head Code section.
3. Click Save Changes.
4. Publish the site — custom code is shipped to production only on publish, not on the Webflow preview domain.
3.7 Ghost
1. In Ghost Admin, go to Settings → Code injection.
2. Paste the Knocket snippet in Site Header.
3. Click Save.
The widget loads on every published post and page. Ghost’s Code Injection field is per-theme, so if you switch themes you will need to re-paste the snippet.
3.8 Framer
1. Open your Framer project and go to Site Settings → Code.
2. Paste the Knocket snippet in the Head section.
3. Click Save, then Publish to push it to the live site.
3.9 Carrd
1. In the Carrd editor, open Site Settings → Embeds.
2. Paste the Knocket snippet in the Header field.
3. Click Done, then Publish.
Carrd Pro Standard and above support header embeds; the free plan does not.
3.10 React (CRA, Vite, custom Webpack)
For a React app, the simplest approach is to drop the script into public/index.html:
<!-- public/index.html -->
<!DOCTYPE html>
<html lang="en">
<head>
    <meta charset="UTF-8">
    <title>My React App</title>

    <!-- Knocket contact widget -->
    <script src="https://trtc.io/knocket-sdk/sdk.js?identifier=YOUR_ID" async></script>
</head>
<body>
    <div id='root'></div>
</body>
</html>
If you need the widget only inside specific components (for example, only on the marketing site, not the app), load it dynamically in the component that needs it:
// components/ChatLoader.jsx
import { useEffect } from 'react';

export default function ChatLoader({ identifier = 'YOUR_ID' }) {
  useEffect(() => {
    const id = 'knocket-sdk';
    if (document.getElementById(id)) return;

    const script = document.createElement('script');
    script.id = id;
    script.src = `https://trtc.io/knocket-sdk/sdk.js?identifier=${identifier}`;
    script.async = true;
    document.head.appendChild(script);

    return () => {
      const el = document.getElementById(id);
      if (el) el.remove();
    };
  }, [identifier]);

  return null;
}
Then mount <ChatLoader /> in whichever route or layout should show the chat.
3.11 Next.js (App Router and Pages Router)
For App Router (Next.js 13+), use the official next/script component with a lazy strategy in your root layout so the widget never blocks the critical render path:
// app/layout.tsx
import Script from 'next/script';

export default function RootLayout({ children }: { children: React.ReactNode }) {
  return (
    <html lang="en">
      <body>
        {children}

        {/* Knocket contact widget — loads after the page is interactive */}
        <Script
          src="https://trtc.io/knocket-sdk/sdk.js?identifier=YOUR_ID"
          strategy="lazyOnload"
        />
      </body>
    </html>
  );
}
The strategy="lazyOnload" option is documented in the Next.js Script component reference; it injects the script after the browser becomes idle, keeping your Largest Contentful Paint and Interaction to Next Paint intact.
For Pages Router projects, the snippet lives in pages/_document.js:
// pages/_document.js
import { Html, Head, Main, NextScript } from 'next/document';

export default function Document() {
  return (
    <Html lang="en">
      <Head>
        <script
          src="https://trtc.io/knocket-sdk/sdk.js?identifier=YOUR_ID"
          async
        />
      </Head>
      <body>
        <Main />
        <NextScript />
      </body>
    </Html>
  );
}
3.12 Vue 3
For a Vue 3 app with Vite, add the script to index.html:
<!-- index.html -->
<!DOCTYPE html>
<html lang="en">
<body>
    <div id='app'></div>
    <script type="module" src="/src/main.js"></script>

    <!-- Knocket contact widget -->
    <script src="https://trtc.io/knocket-sdk/sdk.js?identifier=YOUR_ID" async></script>
</body>
</html>
Or load it from inside App.vue if you only want the widget on certain routes:
<script setup>
import { onMounted } from 'vue';

onMounted(() => {
  if (document.getElementById('knocket-sdk')) return;

  const script = document.createElement('script');
  script.id = 'knocket-sdk';
  script.src = 'https://trtc.io/knocket-sdk/sdk.js?identifier=YOUR_ID';
  script.async = true;
  document.head.appendChild(script);
});
</script>
3.13 Astro
In an Astro site, the cleanest approach is a shared layout component that renders the script tag inside the <head>:
---
// src/layouts/Base.astro
const { title } = Astro.props;
const knocketId = import.meta.env.PUBLIC_KNOCKET_ID ?? 'YOUR_ID';
---
<!DOCTYPE html>
<html lang="en">
<head>
    <meta charset="UTF-8">
    <title>{title}</title>

    <!-- Knocket contact widget -->
    <script
      src={`https://trtc.io/knocket-sdk/sdk.js?identifier=${knocketId}`}
      async
    />
</head>
<body>
    <slot />
</body>
</html>
Store the real identifier in .env as PUBLIC_KNOCKET_ID=… so it never lands in git.
3.14 Nuxt 3
In a Nuxt 3 project, register the script in app.vue (or any layout) using useHead:
<!-- app.vue -->
<script setup>
useHead({
  script: [
    {
      src: 'https://trtc.io/knocket-sdk/sdk.js?identifier=YOUR_ID',
      async: true,
      tagPosition: 'head',
    },
  ],
});
</script>

<template>
  <NuxtPage />
</template>
The tagPosition: 'head' value is from the Unhead documentation — it places the script in <head> rather than at the end of <body>.
3.15 No-code option: Google Tag Manager
If you do not want to edit theme files at all, Google Tag Manager is the standard way for marketers and non-developers to ship third-party scripts. Once GTM is installed on your site, you can add the chat widget through the GTM UI:
1. In GTM, go to Tags → New.
2. Choose tag type Custom HTML.
3. Paste the Knocket snippet:
<script src="https://trtc.io/knocket-sdk/sdk.js?identifier=YOUR_ID" async></script>4. Set the trigger to All Pages (or pick a subset of pages using GTM’s built-in triggers).
5. Save the tag, then click Submit to publish a new container version.
This pattern is also documented in Brevo’s GTM widget guide and works for any widget that gives you a <script> tag. The downside: the snippet loads only after the GTM container itself has loaded, which adds one extra network request compared to a direct head placement.
Step 4: Verify Activation
After pasting the snippet and deploying your site:
1. Open your website in a fresh browser tab.
2. Hard refresh to bypass cache: Cmd + Shift + R on macOS, Ctrl + Shift + R on Windows or Linux. The same combination is documented in Chrome’s clear cache guide.
3. Look for the chat bubble in the bottom-right corner of the viewport.
4. Click the bubble. The chat window should open with the greeting you set in Step 1.
Back in the Knocket setup wizard, the system polls the live URL and switches from “Checking activation…” to “Live” once it detects the snippet.
If the widget does not appear, work through this checklist:
Symptom | Likely cause | Fix |
Script placed in the wrong tag | Snippet was inserted in <body> content instead of <head> / before </body> | Move the script into the document <head> or right before the closing </body> tag |
Page is in preview / draft mode | Site is on a staging URL, behind a password, or unpublished | Publish the page; verify on the live public URL |
Old cached page | Browser or CDN cache is serving yesterday’s HTML | Hard refresh, or purge the CDN cache (Cloudflare, Vercel, etc.) |
Content Security Policy blocks the script | Your CSP script-src directive does not include trtc.io | Add https://trtc.io to script-src; see the MDN Content Security Policy guide and the OWASP CSP cheat sheet |
Ad blocker or privacy extension hides it | uBlock Origin, AdBlock, Brave Shields, etc. | Test in an incognito window with all extensions disabled — that is also how a meaningful fraction of your real visitors see the page |
Rendered inside an <iframe> sandbox | Some CMS builders isolate embeds in sandboxed iframes | Configure the embed to allow allow-scripts; or move the script to a top-level page |
GTM preview not published | Tag was saved but never submitted | In GTM, hit Submit to publish a new container version, then hard refresh |
Step 5: Configure for Best Results
The widget is live. Now make it work harder for you.
5.1 Set working hours and offline behavior
Most indie developers cannot answer chat 24/7. In the Knocket dashboard, set your availability hours. When you are offline, visitors see an offline form instead of the live chat window. Every message lands in your inbox and waits for you — nothing is lost. The trick most teams miss: your offline message should be honest about when you will reply. “We’ll get back to you within 24 hours” is more credible than “we’ll reply soon” and produces fewer abandoned forms.
5.2 Write a greeting that matches the page
The default greeting is generic by design — it has to work everywhere. Once the widget is on a real site, override the default per page. On a pricing page, the greeting might be “Have questions about pricing? Ask away.” On a docs page, “Stuck on something? We might be online.” The widget platform supports per-page greetings via URL parameters, so a smart setup uses different greetings for the homepage, the pricing page, and the docs.
5.3 Add every social channel you actually check
Not every visitor prefers web chat. Some want WhatsApp, some want Telegram, some want email, some want to follow you on Instagram before contacting you. List the channels you genuinely monitor. The more dead links you add, the worse the widget feels. The new standard for indie projects in 2026 is three to five channels — usually WhatsApp for broad reach, Telegram for fast reply from a phone, Instagram for DMs, and email as the always-on fallback.
5.4 Connect a meeting scheduler
If your work involves calls or paid consultations, paste your Calendly (or Cal.com) URL into the Meeting Scheduler setting. Visitors book time directly from the widget, with no extra page navigation. This is the single highest-converting configuration for solo consultants and freelancers.
5.5 Wire up notifications so you do not miss messages
Knocket can send new-message notifications to your email and to Telegram (with the ability to reply to a chat message straight from the notification, without opening the dashboard). The Telegram path is the one most solo operators use day to day — your phone buzzes, you swipe down, you reply, the visitor sees your reply in the chat window. No desktop app, no new tab.
Does Adding a Chat Widget Affect Page Speed?
Yes, but the impact is small when the widget is implemented correctly and large when it is not. Below is what to measure and what to optimize.
The four numbers that matter (per the web.dev Core Web Vitals guide):
Metric | What it measures | Target |
How fast the main content renders | Under 2.5s | |
How fast the page responds to clicks | Under 200ms | |
How much the layout jumps while loading | Under 0.1 | |
How long the main thread is blocked | Under 200ms |
A chat widget that loads with async (or defer) and is hosted on a CDN has minimal effect on any of these. A chat widget that loads synchronously in the document head, that ships a multi-megabyte bundle, or that injects third-party trackers, can blow past every target.
How to verify on your own site. Open PageSpeed Insights and run your page with and without the widget snippet in place. Compare the LCP, INP, CLS, and TBT numbers in the lab report. For real-user data, watch the Chrome User Experience Report (CrUX) for your origin in Google Search Console → Experience → Core Web Vitals.
Specific optimizations that help:
● async or defer on the script tag — never load the widget synchronously. See the MDN <script> reference for the difference between the two.
● Lazy load — for Next.js, use next/script with strategy="lazyOnload". For WordPress with GTM, configure the tag to fire on Window Loaded rather than Page View.
● Self-host or CDN-cache the script — Knocket’s snippet is served from a global edge CDN. A widget that re-downloads the same script on every page view (a pattern some competing tools use) wastes bandwidth.
● Set an explicit width and height on the widget container if you self-host, to avoid CLS as the widget injects itself.
A DebugBear study of common live-chat widgets and a corewebvitals.io benchmark both show that the difference between a fast widget and a slow one comes down to loading strategy and bundle size, not to the existence of the widget itself. If you want to dig into the methodology, Lighthouse’s Total Blocking Time documentation explains exactly how that number is computed.
How Does Knocket Compare to Other Installation Methods?
The honest answer is that the end-user experience of “a chat bubble in the corner of your site” is the same across most modern tools. The differences are in how the installation works, what the rest of the product does, and how it is priced. The comparison below focuses on those three axes.
Tool | Lines of code | Tech required | Setup time | Free to install? | Pricing model |
1 | None | Under 5 min | Yes — 100% free, no ads, no seat limits | Free forever (no paid tier) | |
5–10 | None | ~10 min | Yes | Free for the widget; add-on costs for some features | |
2–3 | None | ~10 min | Yes (limited plan) | Free tier exists; paid plans charge per seat | |
3–5 | None | ~10 min | Yes (limited plan) | Free tier exists; advanced features behind paid plans | |
10–15 | JS snippet or SDK | 30+ min | Trial only | Charges per seat from day one | |
10–15 | JS snippet + config | 30+ min | Trial only | Part of the Zendesk Suite, billed per agent |
The reason this guide uses Knocket as the example is not that other tools are bad — they all do their job — but that Knocket is the simplest match for the “I am one person and I just need a chat bubble” use case. One line of code, no build step, no pricing page, no per-seat math. For a solo founder or indie hacker in the middle of finding their first 100 users, that combination is hard to beat.
A useful sanity check: any tool that asks you to choose a pricing tier before you can copy the embed snippet is solving a different problem (team inbox, ticket routing, AI deflection at scale). For a personal site, a portfolio, or a pre-launch landing page, that complexity is overhead.
Beyond the Web Widget: Two More Places the Same Tool Can Live
This is the part most “how to add a chat widget” articles skip. A contact widget is more than a chat bubble. The same tool can also power a Contact Page you share in your Instagram bio and a Mobile Widget inside your iOS or Android app. The setup is similar in each case, and you can use all three from one Knocket account.
7.1 Contact Page — a shareable URL that works without a website
A Contact Page is a one-page site with your face, a short bio, a chat window, and every social link you actually use. You get a custom URL (something like yourname.knocket.io) that you drop in your social bio, your email signature, your Linktree replacement, your conference badge QR code, and your cold email. Visitors open the link and chat with you in real time — no app, no install, no separate website required.
This is the single best swap-in for Linktree, Bento, ContactInBio, or a Google Form — the visitor does not have to fill a form and wait for an email, they open a chat and you reply.
To create one in Knocket: in the dashboard, click Contact Page → Create, configure your avatar, bio, and the channels you want to surface, and click Publish. The URL is live in seconds.
7.2 Mobile Widget — chat inside your iOS / Android / Flutter / React Native app
If you are building a mobile app and want a “Contact us” or “Send feedback” entry inside it, you can load the same Knocket page in a WKWebView (iOS), WebView (Android), WebView component in React Native, or webview_flutter on Flutter. No platform-specific build of the chat — the experience is just an H5 page running inside a WebView. The JS bridge name closeWebView is used to dismiss the page from a button inside the chat.
iOS (Swift, WKWebView):
import WebKit

class KnocketViewController: UIViewController, WKScriptMessageHandler {
    var webView: WKWebView!

    override func viewDidLoad() {
        super.viewDidLoad()
        let config = WKWebViewConfiguration()
        // Receive the close signal from the H5 page
        config.userContentController.add(self, name: "closeWebView")
        webView = WKWebView(frame: view.bounds, configuration: config)
        webView.load(URLRequest(
            url: URL(string: "https://yourname.knocket.io/contact11?platform=mobile")!
        ))
        view.addSubview(webView)
    }

    func userContentController(_ uc: WKUserContentController,
                              didReceive message: WKScriptMessage) {
        if message.name == "closeWebView" {
            navigationController?.popViewController(animated: true)
        }
    }

    deinit {
        webView.configuration.userContentController
            .removeScriptMessageHandler(forName: "closeWebView")
    }
}
Android (Kotlin):
import android.webkit.JavascriptInterface
import android.app.Activity

class CloseBridge(private val activity: Activity) {
    @JavascriptInterface
    fun postMessage(message: String) {
        activity.runOnUiThread { activity.finish() }
    }
}

// In your Activity / Fragment when initializing the WebView:
webView.settings.javaScriptEnabled = true
webView.addJavascriptInterface(CloseBridge(this), "closeWebView")
webView.loadUrl("https://yourname.knocket.io/contact11?platform=mobile")
React Native (react-native-webview):
import { WebView } from 'react-native-webview';
import { useNavigation } from '@react-navigation/native';

export default function KnocketScreen() {
  const navigation = useNavigation();

  const onMessage = (e) => {
    try {
      const msg = JSON.parse(e.nativeEvent.data);
      if (msg.type === 'closeWebView') navigation.goBack();
    } catch {}
  };

  return (
    <WebView
      source={{ uri: 'https://yourname.knocket.io/contact11?platform=mobile' }}
      javaScriptEnabled
      domStorageEnabled
      onMessage={onMessage}
    />
  );
}
The Apple WebKit guide and the Android WebView reference cover the underlying APIs in detail if you want to extend the integration with custom user-agent strings, push notifications, or deep links.
7.3 Unified Inbox — every channel in one place
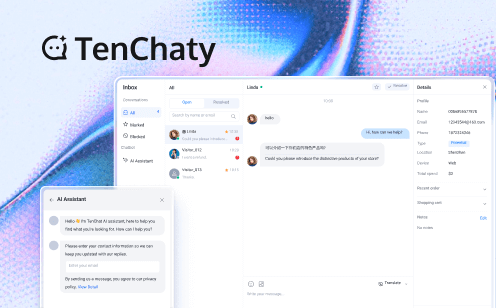
Once you have a Web Widget on your site, a Contact Page in your bio, and a Mobile Widget in your app, you do not want to log in to three different dashboards to read messages. Knocket’s unified inbox pulls every conversation — site chat, contact page, Telegram, email — into a single feed, and replies you send from the inbox go back to the visitor’s original channel automatically. The pattern is the same as a shared inbox in a helpdesk tool, but scoped to the channels a solo operator actually uses.
Frequently Asked Questions
Will adding a chat widget slow my site down?
Only if you load it synchronously, host it on a slow origin, or ship a multi-megabyte bundle. With an async script tag and a CDN-hosted snippet, the impact on LCP, INP, and CLS is typically negligible — usually well under 50ms of TBT. Verify with PageSpeed Insights before and after installation.
Can I install a chat widget without touching code?
Yes. Three paths work without any code edits: (1) the WPCode plugin for WordPress, (2) the built-in “Code Injection” or “Custom Code” sections in Wix, Squarespace, Webflow, Ghost, Framer, and Carrd, and (3) Google Tag Manager, which works on any site where you can install the GTM container. All three are covered in Step 3 above.
Will a chat widget work on a single-page application (SPA)?
Yes. The Knocket snippet loads once and stays active across route changes in React, Next.js, Vue, and other SPA frameworks — you do not need to re-initialize the widget as the user navigates. If you want the widget only on certain routes, mount the loader component only inside those routes (see Section 3.10).
Can I show the chat widget on only specific pages?
Yes. The simplest approach: paste the snippet only into the templates for the pages where you want it. In WordPress, wrap the enqueue in a conditional like is_page('contact') or use a plugin with page-level rules. In React / Next.js, mount the loader component only inside the routes that should show the widget. In GTM, configure the tag to fire only on the page paths that match.
How do I remove the chat widget from my website?
Delete the <script> tag from your HTML. The widget disappears on the next page load. There is no uninstall process, no leftover files, no cleanup. If you installed via WPCode, Wix Custom Code, or GTM, remove the entry from those tools instead.
Can I have multiple chat widgets on the same page?
Technically yes, but the consensus across user-experience research and our own data is that two chat bubbles on a single page confuse visitors, double the page weight, and create operational overhead (which one do you watch?). Pick one tool that covers your needs.
Is the chat widget mobile-responsive?
Yes. On phones and tablets, the chat window expands to fit the screen width without covering page content, and the launcher button stays pinned in the bottom-right corner at a touch-friendly size.
Is the chat widget accessible?
A well-implemented contact widget supports keyboard navigation, screen-reader announcements for new messages, sufficient color contrast for the launcher, and respects prefers-reduced-motion for any animations. The Knocket widget meets these baselines; if you have stricter accessibility requirements (WCAG 2.2 AA, Section 508), verify with your accessibility audit tool of choice — axe DevTools and Lighthouse Accessibility audits are the two most common starting points.
What about privacy and GDPR?
A contact widget collects whatever the visitor types in the chat, plus standard request metadata (IP address, user agent, the page they were on). To be GDPR-compliant in the EU, you typically need to disclose this in your privacy policy, list the widget provider as a sub-processor in your DPA, and — for visitors from the EEA / UK — obtain consent for non-essential cookies before the widget loads. The EDPB guidelines on chat widgets and the IAB Europe Transparency & Consent Framework are the two most cited references. If you collect email addresses via the offline form, you also need a clear opt-in for any marketing follow-up.
How do I know if the chat widget is actually working?
Three signals: (1) the Knocket dashboard shows the widget as “Live” with a timestamp of the last detected visit, (2) you can open the chat bubble on your own site and submit a test message, and (3) the test message arrives in your inbox (or your Telegram, if you wired that up). After that, watch your dashboard for the first real message and reply quickly — the median first-response time is the single number most correlated with conversion, per AMW’s 2026 live chat benchmark report and Comm100’s benchmark data.
A chat widget is one of the highest-leverage five-minute tasks in web development: it changes how visitors interact with you, and it does not require a developer, a budget, or a backend. Start with the simplest option that fits your stack, test it, and customize the greeting and notifications once it is live. The rest of your time is better spent shipping the product itself.
For a free, one-line contact widget that works on any platform and any framework: Get started with Knocket.