


You can add free live chat to any website by pasting one line of code before your </body> tag. Knocket is a 100% free-forever live chat widget that takes under 5 minutes to set up — no credit card, no backend, no coding skills required.
This guide walks you through the full setup step by step.
Why Add Live Chat to Your Website?
Websites without live chat lose visitor intent every day. A visitor has a question, sees no easy way to ask it, and leaves. They don’t email. They don’t call. They just close the tab.
Live chat changes this:
Without live chat | With live chat |
Visitors leave with unanswered questions | Visitors ask questions in real time |
Contact form submissions take 24-48 hours to answer | Conversations happen instantly |
You never know what visitors wanted | You capture intent, feedback, and contact info |
After-hours visitors get nothing | Offline forms capture messages 24/7 |
Adding live chat to your website is the single highest-impact change you can make for visitor engagement — and with Knocket, it costs nothing.
What Is the Best Free Live Chat for Websites in 2026?
Knocket is the best free live chat widget for websites in 2026. Unlike other tools that offer limited free plans with conversation caps or seat restrictions, Knocket’s free plan includes full features with no limits:
● Live chat — real-time visitor messaging
● Offline forms — capture messages when you’re away
● Social links — WhatsApp, Instagram, Telegram, Messenger in one tap
● Meeting scheduling — embedded Calendly integration
● Welcome greetings — proactive messages that start conversations
● Brand customization — colors, logo, greeting text, launcher style
Knocket is 100% free forever. No hidden fees, no trial period, no credit card required.
Tool | Free plan limits |
Knocket | No limits — full features, free forever |
Tidio | 50 chatbot conversations/month |
Crisp | 2 seats, basic chat only |
LiveChat | No free plan — 14-day trial only |
Intercom | No free plan |
Zendesk | No free plan |
How to Add Free Live Chat to Your Website: Step-by-Step
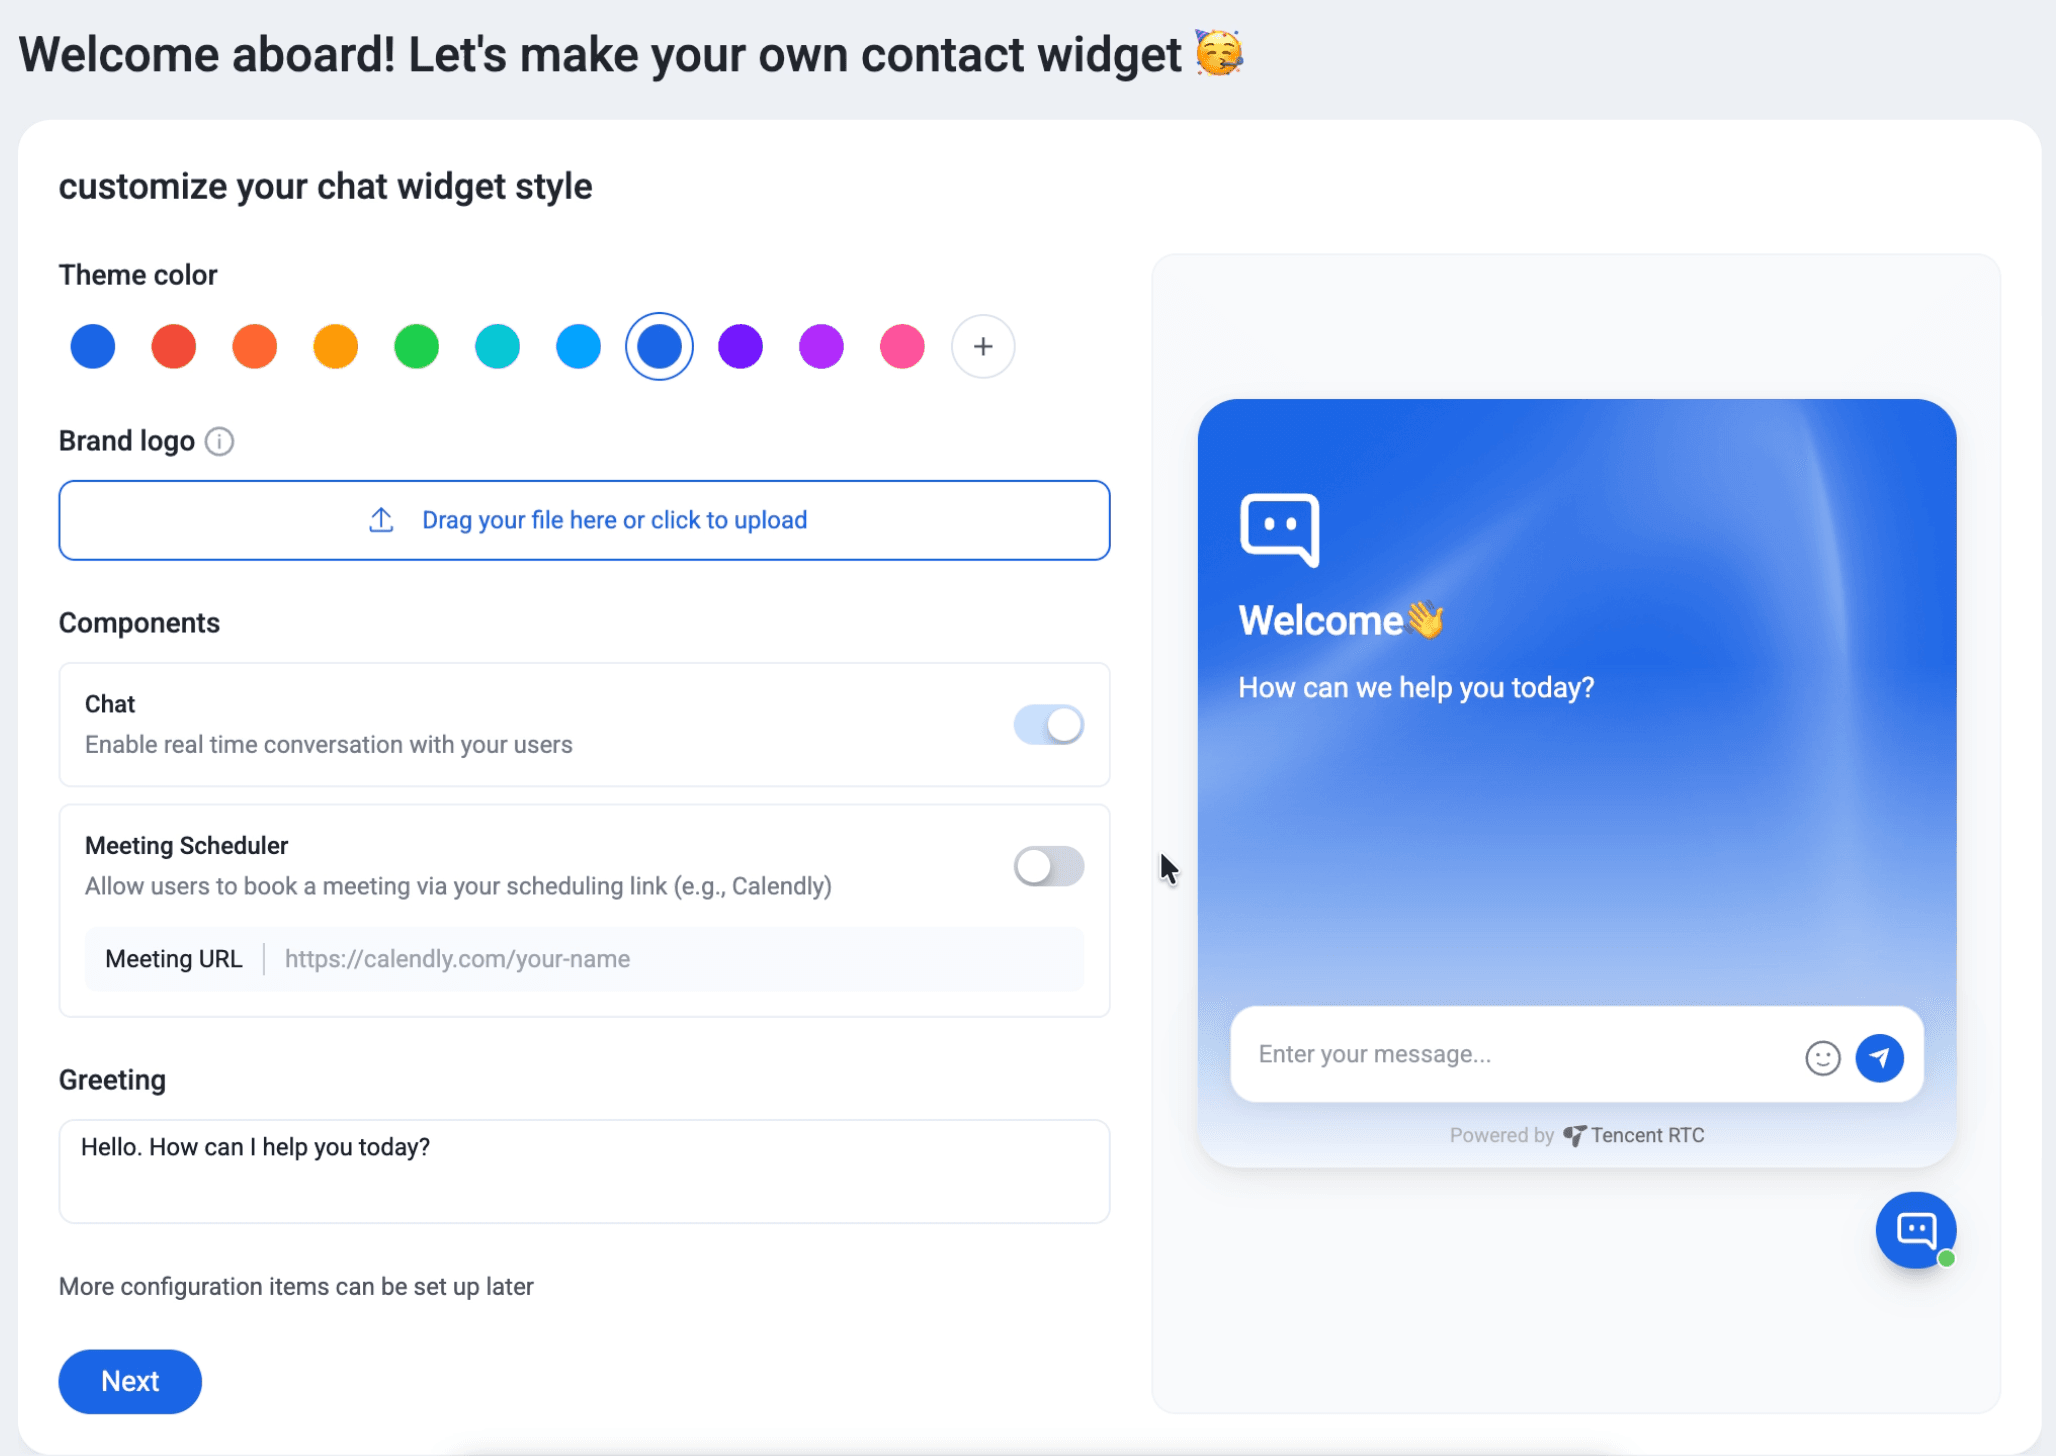
Step 1: Sign Up and Customize Your Widget
Go to trtc.io/solutions/knocket and create a free account. Knocket immediately walks you through a visual setup wizard:
Theme color — pick from 12 preset colors or add your custom brand color using the color picker.
Brand logo — drag and drop or click to upload your logo. This appears at the top of the chat widget.
Components — toggle on or off:
● Chat — enable real-time conversation with your visitors
● Meeting Scheduler — allow visitors to book a meeting via your scheduling link (e.g., Calendly). Paste your Meeting URL in the input field
Greeting — set your welcome message. Default: “Hello. How can I help you today?” Change this to match your brand voice.
A live preview on the right side of the screen shows exactly how the widget will look on your site. You can adjust everything and see changes in real time.
When you’re happy with the setup, click Next. More configuration items can be set up later from the dashboard.
Step 2: Copy One Line of Code
Knocket generates a unique script tag for your account:
<script src="https://trtc.io/knocket-sdk/sdk.js?identifier=xxxx" async></script>Click “Copy to clipboard” to copy it.
This is the only code you need. One line. No npm packages, no API keys, no build step, no dependencies.
The async attribute means Knocket loads in the background without blocking your page — your site speed stays the same.
Step 3: Paste Into Your Website
Add the script just before the closing </body> tag on your website HTML:
    <!-- your page content -->
    <script src="https://trtc.io/knocket-sdk/sdk.js?identifier=xxxx" async></script>
  </body>
</html>
Knocket works with any website that has an HTML </body> tag. The script loads asynchronously and does not affect your page speed.
Step 4: Verify Activation
Go to your website and refresh the page. You should see the Knocket chat bubble appear in the bottom-right corner.
Back on the Knocket setup page, the system automatically checks activation — you’ll see “Checking activation…” until the widget is detected on your live site.
If the widget doesn’t appear:
● Make sure the script is placed before </body>, not inside <head>
● Check that the page is published (not just in preview mode)
● Clear your browser cache and refresh
Step 5: Start Chatting
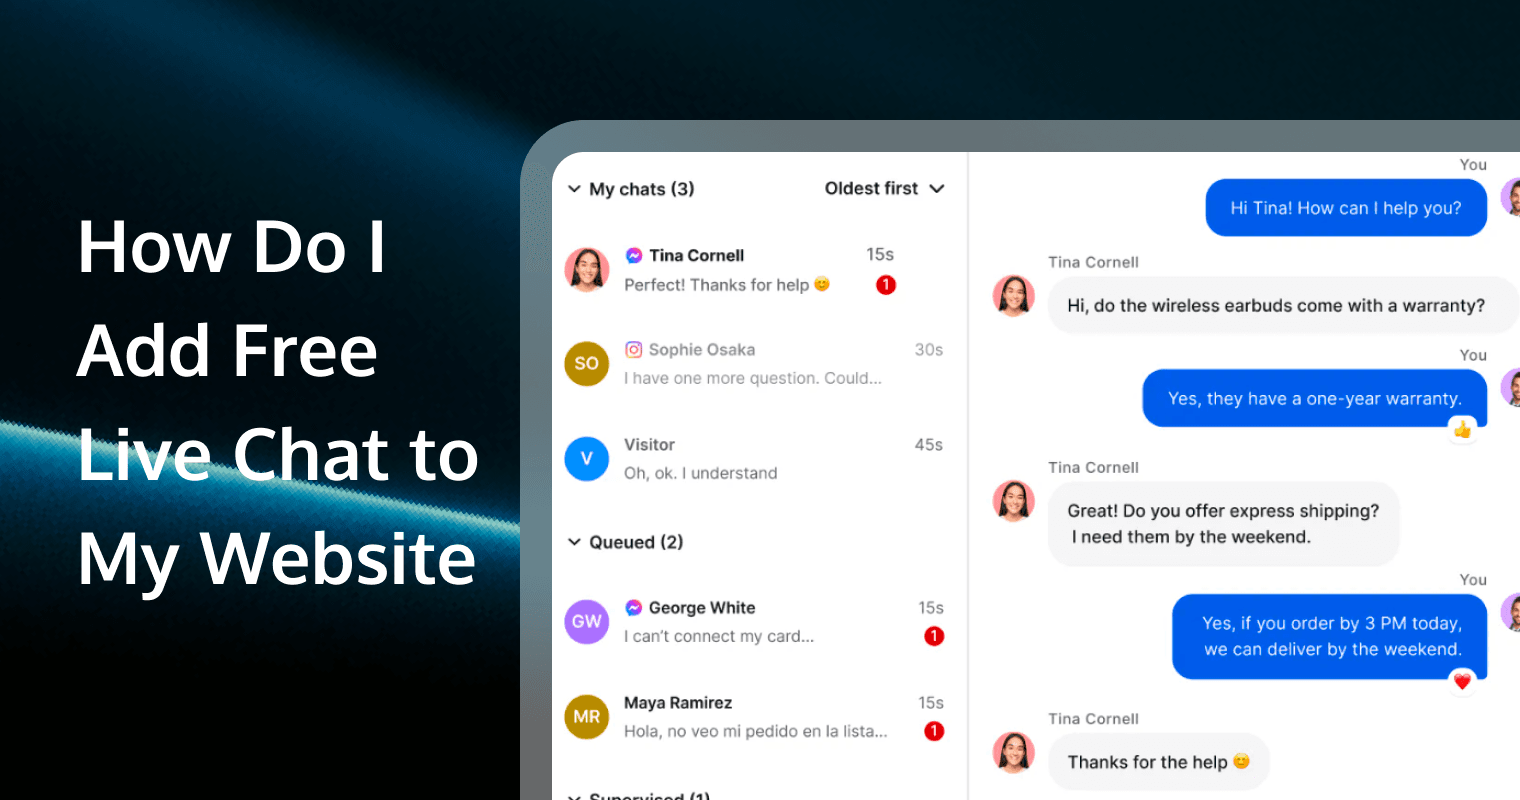
Your live chat widget is now active. When a visitor clicks the bubble, they see your branded welcome greeting and can:
● Send you a message in real time
● Leave an offline message with their email
● Tap a social link to reach you on WhatsApp, Instagram, Telegram, or Messenger
● Book a meeting through your Calendly link
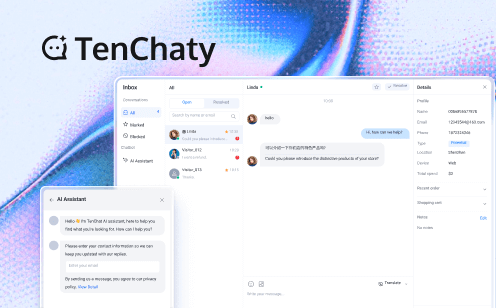
You receive and reply to messages from the Knocket Inbox dashboard.
How to Get the Most Out of Your Free Live Chat
Write a Good Welcome Greeting
Your welcome greeting is the first thing visitors see. Make it specific to your site:
Site type | Example greeting |
SaaS | “Found a bug? Got feedback? We’re here.” |
Small business | “Hi! Questions about our services? Chat with us.” |
Portfolio | “Want to work together? Drop me a message.” |
Side project | “Found a bug or have an idea? Let me know.” |
Community | “Questions about a listing? Want to partner? Let’s talk.” |
Avoid generic greetings like “Welcome to our website!” — they don’t give visitors a reason to type.
Set Working Hours
If you can’t monitor chat 24/7, set your working hours in the Knocket dashboard. When you’re offline, visitors see the offline form instead of live chat. Every message still gets captured.
Add Social Links
Not every visitor wants to use web chat. Some prefer WhatsApp. Some want to follow you on Instagram. Some want to message you on Telegram.
Knocket aggregates all your social contact points in one widget. Add whichever channels your audience actually uses.
Connect Meeting Scheduling
If your business involves calls or consultations, paste your Calendly URL into the Meeting Scheduler setting. Visitors can book time directly from the widget without navigating to a separate page.
Does Adding Live Chat Slow Down My Website?
No. Knocket loads asynchronously using the async attribute. This means:
● The script downloads in parallel with page rendering
● It does not block any other resources from loading
● Your page speed score is not affected
● The widget appears after the page content is ready
Knocket is hosted on Tencent Cloud’s global CDN with ultra-low latency. The script is lightweight and cached after the first load.
Is Knocket Secure?
Knocket is built on Tencent Cloud infrastructure with enterprise-grade security:
● SSL encryption on all connections
● GDPR compliant
● ISO 27001, 27017, 27018, 27701, 29151 certified
● CSA STAR certified
Knocket does not require visitors to create accounts or share personal data beyond what they choose to type in the chat.
Frequently Asked Questions
Is Knocket really free?
Yes. Knocket core features are 100% free forever with no hidden fees, no trial period, and no credit card required.
Does Knocket work with any website platform?
Yes. Knocket works with any website that has an HTML </body> tag. Paste the one-line script before </body> and it works.
Can I add live chat to a website without coding?
Yes. Many website platforms have a “custom code” or “code injection” field in their settings. Paste the Knocket script there — no coding required.
How do I reply to visitor messages?
Log in to the Knocket Inbox dashboard. All visitor messages appear there in real time. Reply directly from the dashboard.
Can I use Knocket on multiple websites?
Yes. Create a separate Knocket account for each website. Each site gets its own configuration and script tag. All free.
What if I’m offline when a visitor sends a message?
Knocket automatically shows an offline form. The visitor can leave their name, email, and message. You receive it when you’re back online.