


TL;DR
If you want to add a chat widget for website visitors without installing a heavy support suite, Knocket lets you do it with one async script:
- Create a free Knocket workspace in the Knocket console.
- Configure your widget: color, welcome message, avatar, language, and offline state.
- Copy your one-line script from Knocket installation.
- Paste it before
</head>or</body>on your website. - Send yourself a test visitor message.
- Reply from the Knocket Inbox, Telegram notification, or Email flow.
Knocket is built for independent developers, indie hackers, and early startup teams who are still trying to find their first 100 users. It is not a CRM, not a helpdesk, and not an Intercom replacement. It is a lightweight, 100% free forever contact layer: a live chat widget, a shareable Contact Page, and a unified Inbox for real conversations.
For the fastest path, start from the Knocket live chat widget overview, then copy your script from the console.
What is a website chat widget and when should you add one?
A website chat widget is a small floating contact button embedded on your website. When a visitor clicks it, they can send a message without leaving the page. For an early-stage product, this is often more useful than a long contact form, a generic support email, or a “book a demo” button that asks too much too soon.
A good website chat widget answers one simple question: “Can a real person behind this product hear me?”
That matters most when your website is still small. If you are an independent developer, bootstrapped founder, open-source maintainer, or early SaaS builder, every visitor message can contain product insight:
- “Does this work with Shopify?”
- “I tried the demo but got stuck.”
- “Do you support Flutter?”
- “Can I use this for my client?”
- “Is there a free option?”
These are not just support questions. They are demand signals.
Chat widget vs contact form vs social inbox
A contact form is structured. A chat widget is conversational. A social inbox is fragmented unless you centralize it.
| Contact option | Best for | Limitation |
|---|---|---|
| Contact form | Structured requests, long forms, applications | Feels slow and impersonal |
| Support email | Async conversations | Easy to miss, no on-page context |
| Social DM | Casual inbound from Twitter/X, LinkedIn, Telegram, etc. | Scattered across apps |
| Website chat widget | Fast visitor questions and high-intent leads | Needs notifications and replies to be useful |
| Contact Page | No-code link you can share anywhere | Works best when paired with a real inbox |
Knocket focuses on a lightweight live chat widget for website visitors and a shareable Contact Page. Both route conversations into one Knocket Inbox, with Telegram and Email notifications available so you do not have to keep a dashboard open all day.
If you need a full CRM pipeline, automated ticket routing, service-level reporting, and enterprise support workflows, Knocket is intentionally not that. If you need to talk to real users before they bounce, Knocket is designed for that moment.
When should you add live chat to your website?
You should add a live chat widget when you have visitors who may want to contact you but the current path is too slow or hidden.
Common signs:
- Your landing page has traffic but few signups.
- People email questions that should have been asked before signup.
- Your docs or pricing page creates repeated confusion.
- You are collecting beta users, waitlist users, or early customers.
- Visitors come from Product Hunt, Hacker News, Reddit, GitHub, or social posts and may leave quickly.
For e-commerce and SaaS teams, fast communication affects conversion and trust. Google’s web.dev guidance on interaction responsiveness also reinforces a practical point: user-facing interactive elements should be fast and non-blocking. That is why Knocket’s widget loads through an async script, so it does not block your page rendering.
For early products, the bigger win is learning. A chat bubble can become your fastest qualitative research channel.
Why use Knocket instead of a heavier chat product?
Tools like Tawk.to, Tidio, Crisp, and other live chat platforms are useful for many businesses. But early developers often run into a different problem: the tool becomes bigger than the communication job.
Knocket takes a lighter approach:
- 100% free forever
- No ads
- No seat limits
- One script for web installation
- No npm package or build step required
- Contact Page for no-code sharing
- Unified Inbox for website, app, Contact Page, Telegram, and Email conversations
- Telegram notifications that can support quoted replies back to live chat messages
The goal is not to replace a mature customer support operation. The goal is to help you catch the first real conversations that might become your first users.
Before you start: what you need to install Knocket
Before you add a free chat widget for website visitors, gather a few basics. You do not need a developer environment, package manager, backend server, or billing setup.
Installation checklist
| Requirement | Needed? | Notes |
|---|---|---|
| Knocket account | Yes | Create one from the console |
| Website access | Yes | You need permission to edit custom code, theme files, or site settings |
| Widget identifier | Yes | Available in your installation code |
| Code editor | Optional | Useful for custom websites, not needed for many builders |
| Telegram or Email | Optional | Recommended for notifications |
| npm/build tooling | No | The web widget uses a script tag |
| Paid subscription | No | Knocket is 100% free forever |
Start with the Knocket product page if you want the high-level overview, or go directly to the Knocket console if you are ready to install.
Choose your channel first
Knocket supports three practical contact channels:
- Web Widget: the floating live chat widget you embed on a website with one script.
- Contact Page: a shareable page with live chat and contact links, useful when you do not have a website or want a “link in bio” contact hub.
- Mobile Widget: an in-app contact entry using a WebView in iOS, Android, Flutter, or React Native apps.
For this tutorial, we will focus on the Web Widget. But if you do not have access to your website code yet, you can publish a no-code page from Knocket Contact Page settings and share that link in your social bio, email signature, beta invite, or README.
Know where your website allows custom code
Most website platforms provide one of these installation points:
- Global head code
- Global footer code
- Theme template file
- Tag manager custom HTML
- Framework layout file
- CMS code injection setting
Knocket’s script can be pasted before </head> or </body>. If your builder has a “Head code” section, use that. If it only supports footer injection, that is also fine.
The script is async, which means it is designed not to block the rest of your page. MDN’s documentation on the HTML async attribute explains that async scripts are fetched in parallel and executed when available.
Step-by-step: add Knocket to any website with one script
This section shows the core installation flow. The exact menu names vary by platform, but the logic is the same: create widget, copy script, paste script, publish, test.
Step 1: Create your Knocket workspace
Go to the Knocket console dashboard and sign in. Create or select your workspace.
Knocket is designed for small teams and solo builders, so you do not need to model a support department, configure complex roles, or set up a sales pipeline. You only need a place where visitor messages can arrive and be answered.
Step 2: Create or open your Web Widget
In the console, create a widget for your website. Configure the basics first:
- Website or project name
- Theme color
- Welcome message
- Avatar or brand image
- Language
- Offline message
Do not overthink the first version. A simple, human welcome message usually works better than a generic “How may we assist you?” prompt.
Examples:
- “Hey, I’m the founder. Ask me anything about the product.”
- “Building with the API? Send your question here.”
- “Trying the beta? Tell us what broke.”
- “Need help choosing a plan? Message us before you leave.”
Step 3: Copy your installation script
Open Knocket installation settings and copy the full script generated for your widget.
It will look like this:
<!doctype html>
<html lang="en">
  <head>
    <title>Your Website</title>

    <!-- Knocket live chat widget -->
    <!-- Paste before </head> or </body>. Replace YOUR_ID with the identifier from the console. -->
    <script
      src="https://trtc.io/knocket-sdk/sdk.js?identifier=YOUR_ID"
      async>
    </script>
  </head>
  <body>
    <main>Your page content</main>
  </body>
</html>
Replace YOUR_ID only if you are manually adapting the snippet. The safest option is to copy the complete script directly from the console, because it already includes your identifier.
Step 4: Paste it into your website
For most websites, paste the script into one of these places:
- Before the closing
</head>tag - Before the closing
</body>tag - In your builder’s global custom code area
- In your framework’s root layout
If you are using a static site generator or frontend framework, add the script to the global layout so it appears on every page where you want chat available.
Step 5: Publish or deploy
After saving the code, publish your site or deploy your app. Then open your website in a normal browser tab.
You should see the Knocket floating contact button. If you do not, check:
- Did you publish the latest version?
- Did you paste the script into the live theme, not a draft theme?
- Is the identifier correct?
- Is a browser extension blocking third-party scripts?
- Are you viewing a cached version of the site?
Step 6: Send your first test message
Open the widget as a visitor and send a short test message, such as:
“Testing the Knocket widget from the homepage.”
Then go to your Knocket Inbox and confirm the message arrived. If you have Telegram or Email notifications enabled, confirm those too.
This is the five-minute validation loop that matters:
- Install
- Send visitor message
- Receive notification
- Reply
- See visitor receive the reply
Once that loop works, your website has a real contact channel.
Where to paste the live chat script on common website builders
The most common installation question is not “What is the script?” but “Where exactly do I paste it?”
Use this table to find the right location for your website builder or framework.
| Platform | Where to paste the Knocket script |
|---|---|
| WordPress | Appearance → Theme File Editor → header.php before </head>, or use an Insert Headers and Footers plugin |
| Shopify | Online Store → Themes → Edit Code → theme.liquid before </head> |
| Webflow | Project Settings → Custom Code → Head code |
| Framer | Site Settings → Code → Head |
| Carrd | Site Settings → Embeds → Header |
| Ghost | Code Injection → Site Header |
| Wix | Settings → Custom Code → Head |
| Squarespace | Settings → Advanced → Code Injection → Header |
| Next.js | Add the script in app/layout.tsx or _app.tsx using the framework’s script support |
| Astro | Add the script to the shared layout <head> |
| Nuxt 3 | Add it through useHead in app.vue or your layout |
WordPress
For WordPress, use a header/footer injection plugin or edit your active theme’s header.php file and paste the script before </head>. If your theme updates frequently, use a child theme or plugin-based injection so your change is not overwritten.
Shopify
For Shopify, go to Online Store → Themes → Edit Code. Open theme.liquid, find the closing </head> tag, and paste your Knocket script just above it.
This is useful for early stores where visitors may ask pre-purchase questions:
- “Do you ship to my country?”
- “Is this compatible with my device?”
- “Can I change my order?”
- “Do you offer a founder discount?”
Webflow, Framer, Carrd, Wix, and Squarespace
No-code site builders usually provide a global custom code section. Paste the script into the Head area when possible.
This works well for landing pages, waitlists, portfolio sites, agency sites, productized services, and coming soon pages.
If your builder only allows custom code on paid site hosting, use a Knocket Contact Page as an immediate fallback. You can publish one from Knocket Contact Page and link it from your buttons, navigation, or social profile.
Next.js example
For Next.js, use the framework’s script handling instead of manually injecting raw script tags in random components. This keeps the widget global and avoids duplicate loading.
import Script from "next/script";

export default function RootLayout({
  children,
}: {
  children: React.ReactNode;
}) {
  return (
    <html lang="en">
      <body>
        {children}
        <Script
          src="https://trtc.io/knocket-sdk/sdk.js?identifier=YOUR_ID"
          strategy="lazyOnload"
        />
      </body>
    </html>
  );
}
Use your real identifier from the Knocket installation page. lazyOnload is a common fit for chat widgets because the main page content should remain the priority.
Static sites and documentation
If you use Astro, Hugo, Jekyll, Docusaurus, VitePress, or another static site setup, put the script in the global layout, not on individual pages. That way, your chat widget appears consistently across the site.
For documentation sites, consider adding the widget to installation pages, API quickstarts, pricing pages, migration guides, and troubleshooting docs. These are the places where high-intent visitors are most likely to have specific questions.
Customize the widget: colors, welcome message, avatar, language, and offline state
Installing the script is the technical part. Customizing the widget is the communication part. Open your widget settings in the console after installing the script. You can adjust the visual and conversational details without changing your website code.
Theme color
Choose a color that fits your website but still stands out enough to be noticed.
Practical guidance:
- Use your primary brand color if it has enough contrast.
- Avoid colors that blend into the page background.
- Test on both light and dark pages.
- Check mobile visibility.
A chat widget should not distract from the page, but it should be easy to find when someone needs help.
Welcome message
This is the most important customization. Your welcome message sets expectations: who is listening, what visitors can ask, and how human the conversation will feel.
Weak examples:
- “Welcome.”
- “How can we help?”
- “Customer support is online.”
Stronger examples:
- “Hey, I’m building this product. Ask me anything.”
- “Stuck during setup? Send a message and I’ll help.”
- “Have a question before joining the beta?”
- “Want to know if this fits your use case? Tell me what you’re building.”
For indie developers, the founder-led tone is an advantage. You do not need to pretend to be a large support team.
Avatar
Use an avatar that helps visitors understand who they are contacting.
Good options:
- Founder photo
- Product logo
- Project mascot
- Team avatar for a small group
If you are comfortable using your own photo, it can increase the sense of real communication. If not, a clean product logo is fine.
Language
Set the widget language based on your primary audience. If your website is in English and targets global users, English is usually the best default. If you run a local service or a language-specific community, match the page language.
Offline state
An offline state is important because early builders are not online 24/7. You might be coding, sleeping, shipping, or handling another job.
A good offline message should be honest and reassuring:
- “I’m not online right now, but leave a message and I’ll reply.”
- “Thanks for reaching out. I’ll get back to you by Email or Telegram notification.”
- “I may be away, but I read every message.”
Do not promise instant support unless you can deliver it. Knocket helps you receive and reply to messages without keeping the console open all the time, especially when you connect Telegram and Email.
Keep the widget lightweight
A common mistake is to over-customize the first version. You do not need elaborate flows, automated decision trees, or long pre-chat forms. For an early product, every extra field can reduce the chance that a visitor sends the message at all.
Start with:
- One clear welcome message
- One recognizable avatar
- One simple offline message
- Notifications connected
- A founder or team member ready to reply
You can refine based on the conversations you receive.
Test the full flow in 5 minutes: visitor message, notification, reply, and follow-up
A live chat script is not “installed” until the full conversation loop works. The widget appearing on the page is only step one.
Use this five-minute test.
Test 1: Visitor can open the widget
Open your website in a fresh browser tab. If possible, use an incognito/private window so you are closer to a first-time visitor experience.
Check:
- Is the chat button visible?
- Does it overlap important mobile UI?
- Does it open quickly?
- Does the welcome message look correct?
- Is the page still usable while the widget is present?
If your page has cookie banners, sticky footers, newsletter popups, or mobile bottom navigation, confirm that the chat button does not fight with them.
Test 2: Visitor can send a message
Send a message as if you were a real visitor.
Use something specific:
“Hi, I’m testing the homepage widget. Can you reply to this?”
Avoid sending only “test” because later you may not remember which site, page, or configuration the message came from.
Test 3: Message arrives in the Knocket Inbox
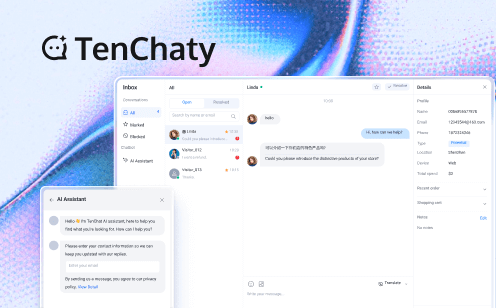
Open your Knocket Inbox and confirm that the visitor message appears. This is the central place where Knocket brings together conversations from live chat and connected channels.
The unified Inbox matters because small teams usually do not have time to monitor every channel separately. You can learn more from the Knocket lightweight contact tool overview.
Test 4: Notification arrives
If you enabled browser notifications, Telegram, or Email, confirm that the alert arrives.
This step is critical. A chat widget that silently collects unread messages is worse than no chat widget, because visitors expect a response. You do not need to respond instantly every time, but you do need a reliable signal that someone contacted you.
Test 5: Reply and verify the visitor sees it
Reply from the Knocket Inbox. Then return to the visitor browser and confirm the reply appears.
If Telegram reply forwarding is enabled for your setup, test that too: receive a Telegram notification, quote or forward reply as supported, and confirm the response goes back to the visitor’s live chat conversation.
Test 6: Follow up after the first answer
A visitor’s first message often reveals the next action:
- If they ask about setup, send the relevant doc or quick instruction.
- If they report confusion, ask what they expected to happen.
- If they ask for a feature, ask what workflow they are trying to complete.
- If they want to buy, remove friction quickly.
- If they are not ready, invite them to leave an email or continue the conversation later.
Knocket is not a CRM, but your conversations can still guide product decisions. Copy important insights into your roadmap, issue tracker, or notes.
Connect Telegram and Email so you never miss a visitor message
The biggest operational risk with live chat is missed messages. Early teams often install a widget, forget to check the dashboard, and discover visitor questions days later. That breaks trust.
Knocket helps avoid this by routing messages into a unified Inbox and supporting Telegram and Email notifications. This lets you keep your existing habits instead of living inside another tool.
Why Telegram is useful for indie developers
Telegram is fast, lightweight, and common among developer communities, crypto communities, open-source projects, and global indie teams. If you already use it daily, connecting Telegram can make website chat feel like a natural extension of your workflow.
With Knocket notifications enabled, you can receive live chat messages in Telegram. Depending on your configuration, Telegram can also support quoted forwarding replies back to the live chat user, so you can respond without opening the console.
That is especially useful when you are away from your laptop, monitoring a launch, handling early beta users, running a one-person product, or supporting users across time zones.
Why Email still matters
Email is slower than chat, but it remains universal. For many early products, Email is the safest fallback channel because every serious user has it.
Use Email notifications if:
- You prefer async communication
- You work from an email inbox
- You want a searchable record
- Your users are less likely to use Telegram
- You cannot respond immediately during the day
Knocket’s role is to bring these contact points together so the visitor does not have to guess the best way to reach you.
Connect channels in the console
In the Knocket console, open your channel or notification settings and connect the channels you want to use. At minimum, connect one notification path before announcing your site publicly.
Recommended setup for most indie projects:
| Project type | Recommended notification setup |
|---|---|
| Solo SaaS | Telegram + Email |
| Open-source project | Telegram for maintainers, Contact Page in README |
| Shopify store | Email plus Telegram during launch periods |
| Agency landing page | Email for official requests, Telegram for fast lead response |
| Mobile app | Inbox plus Email notification |
| Waitlist or beta | Telegram for fast replies during launch week |
If you are not ready to install the widget on your website, publish a Contact Page from Knocket Contact Page publishing and connect the same notification channels.
Use Contact Page as a second contact surface
A chat widget works when visitors are already on your website. A Contact Page works anywhere you can share a link.
Use it in:
- Twitter/X bio
- LinkedIn profile
- GitHub README
- Product Hunt launch page
- Email signature
- Newsletter footer
- QR code on a business card
- Beta invitation
- “Contact us” button
- Waitlist confirmation page
The Contact Page can include live chat plus your social links, website, email, phone, or blog. For builders who do not want a full website yet, it can act as the first public contact surface.
Troubleshooting: script placement, async loading, and common setup mistakes
Most Knocket installs are straightforward, but website builders and themes can behave differently. If the widget does not appear or messages do not arrive, work through the checklist below.
Problem: the widget does not appear
Common causes:
- The script was pasted into the wrong site or theme.
- The website was not published after editing.
- The script was placed inside a text block instead of a custom code area.
- The identifier is missing or incorrect.
- The script was modified by a builder or sanitizer.
- A browser extension is blocking scripts.
- A caching plugin is serving an old version of the page.
What to do:
- View the live page source and search for
knocket-sdk. - Confirm your identifier matches the console snippet.
- Hard refresh the page.
- Disable aggressive optimization plugins temporarily.
- Test in another browser.
- Test on a simple page first, then move to your main layout.
Problem: the widget appears on desktop but not mobile
This is usually a layout conflict. Many websites have sticky mobile elements:
- Bottom navigation
- Cookie banner
- App install banner
- Floating WhatsApp button
- Newsletter popup
- Promotional bar
Check whether the Knocket button is hidden behind another element. If so, adjust the other element’s placement or reduce competing floating widgets. Also test the widget on a real phone, not only a desktop browser’s responsive mode.
Problem: messages send but you do not receive notifications
First, check the Knocket Inbox. If the message is there, the widget is working and the issue is notification configuration.
Then check:
- Telegram connection is active.
- Email address is correct.
- Browser notification permission was granted.
- Notifications are not muted at the OS level.
- The message did not land in spam or promotions.
- You are checking the correct workspace.
For Telegram, send another test message after reconnecting. For Email, use a clear subject or sender filter so you can find future messages quickly.
Problem: replies do not show up for the visitor
Check whether you replied in the correct conversation thread. If you have multiple test messages, it is easy to reply to the wrong one.
Also confirm the visitor browser tab is still open and connected. If the visitor left, they may not see the reply in real time, but your response is still part of the conversation history depending on the channel flow.
For Telegram-based replies, make sure you are using the supported quote or forward reply behavior from the notification flow, rather than starting a separate unrelated message.
Problem: your page speed tool complains about third-party scripts
Any third-party widget can appear in performance reports. The practical question is whether it blocks critical rendering or hurts user interaction.
Knocket’s web install uses an async script, so it is designed not to block initial HTML parsing. Still, follow good performance hygiene:
- Do not install duplicate chat widgets.
- Remove old chat scripts you no longer use.
- Load the widget globally only where it is useful.
- Avoid stacking multiple marketing popups.
- Test real user flows, not only lab scores.
A lightweight contact widget should help the user, not slow the page down.
Problem: you pasted the script twice
Duplicate scripts can cause duplicate widgets, strange loading behavior, or unnecessary requests. This often happens when a site has both a global code injection area and a theme-level script edit.
Search your codebase or page source for:
knocket-sdk
If it appears twice, remove one copy. Keep the script in the most global, maintainable location.
Problem: your platform strips script tags
Some hosted platforms do not allow custom JavaScript on certain account levels or in certain content areas. For example, a blog post editor may strip scripts even if the global site settings allow them.
Use the official custom code or header injection setting when available. If your platform does not allow scripts at all, use a Knocket Contact Page instead and link to it from buttons or navigation. You can create one from Knocket Contact Page settings.
Problem: you are using a single-page app
In most SPAs, adding the script once in the root layout is enough. Do not inject it on every route change. If you place the script inside a component that mounts repeatedly, you may create duplicate loads.
For frameworks like Next.js, Nuxt, and Astro, prefer the global layout approach described earlier. For client-rendered apps, add the script in your main HTML template or root shell.
Common setup mistakes to avoid
| Mistake | Why it hurts | Better approach |
|---|---|---|
| Generic welcome message | Lowers visitor confidence | Write like a real founder or developer |
| No notification channel | Messages get missed | Connect Telegram or Email |
| Installing multiple chat tools | Slows site and confuses visitors | Keep one primary contact widget |
| Hiding contact behind long forms | Reduces early feedback | Let visitors send a simple message |
| Only testing desktop | Misses mobile conflicts | Test real mobile devices |
| Treating chat as support only | Misses product insights | Use conversations for learning |
| Waiting for “perfect” setup | Delays feedback | Install, test, improve |
A practical launch checklist
Before you announce your website, run through this list:
- Knocket script installed once
- Widget visible on desktop
- Widget visible on mobile
- Welcome message sounds human
- Offline message is honest
- Test visitor message received
- Reply tested from Inbox
- Telegram or Email notification enabled
- Contact Page created if useful
- Old unused chat scripts removed
If every item passes, your website has a lightweight live contact layer ready for real users.
FAQ
1. What is the easiest way to add a chat widget for website visitors?
The easiest way is to use a one-script widget like Knocket. Create a widget in the console, copy the script from the installation page, and paste it before </head> or </body> on your website. You do not need npm, backend code, or a paid subscription.
2. Is Knocket a free chat widget for website owners?
Yes. Knocket is 100% free forever, with no ads and no seat limits. It is built for independent developers and early teams that need a lightweight way to talk with visitors, not a complex customer service system.
3. Where should I paste the live chat script for website installation?
Paste the script in your global website head code, before the closing </head> tag, when possible. If your platform only supports footer injection, placing it before </body> also works. For frameworks, use the root layout or global app shell.
4. Can I add live chat to my website without coding?
If your website builder has a custom code box, you only need to paste the Knocket script. If your platform does not allow scripts, you can create a Knocket Contact Page instead and link to it from your navigation, social bio, email signature, or call-to-action button.
5. Does Knocket work with WordPress, Shopify, Webflow, Framer, and Carrd?
Yes. Knocket works on websites that allow custom JavaScript. That includes WordPress, Shopify, Webflow, Framer, Carrd, Ghost, Wix, Squarespace, Next.js, Astro, Nuxt, and many other platforms.
6. Will the Knocket script slow down my website?
Knocket’s web widget uses an async script, which means it is designed not to block page rendering. As with any third-party script, avoid duplicate installs and remove old chat tools you no longer use. Test your real pages after installation.
7. Can I receive chat messages in Telegram or Email?
Yes. Knocket supports Telegram and Email notifications. Messages from your website widget can flow into the Knocket Inbox, and notifications help you respond without constantly watching a dashboard.
8. Is Knocket a CRM or helpdesk?
No. Knocket is not a CRM, not a helpdesk, and not an Intercom replacement. It is a lightweight contact tool for early-stage builders who need to catch real visitor conversations from a website widget, Contact Page, app WebView, Telegram, and Email.
9. What if I do not have a website yet?
Use a Knocket Contact Page. It gives you a shareable contact link with live chat and your configured contact channels. You can use it in a social bio, GitHub README, email signature, Product Hunt launch, or waitlist campaign.
10. How do I start?
Open the Knocket live chat widget overview, create your workspace in the Knocket console, then copy your one-line script from Knocket installation and paste it into your website.