


Sending real-time alerts to millions of iPhones, iPads, Apple Watches, and Macs all starts in one place — Apple Push Notification Service (APNs). APNs is the backbone of every iOS push notification you've ever received, from iMessage pings and breaking-news alerts to ride-arrival updates and abandoned-cart reminders.
Yet for many developers, getting APNs up and running for the first time feels overwhelming. Between Apple Developer Portal certificates, provisioning profiles, Xcode entitlements, and backend token management, there are plenty of places where things can silently break — and debugging a push notification that simply never arrives is one of the most frustrating experiences in mobile development.
This guide walks you through the entire Apple Push Notification Service setup process — step by step — from configuring your Apple Developer account and generating authentication keys, all the way through backend integration with Swift, Node.js, and Python code snippets, device token management, and common troubleshooting fixes. Whether you're building APNs push notification iOS support for the first time or migrating from the legacy certificate-based approach to token-based authentication, this tutorial has you covered.
What Is Apple Push Notification Service (APNs)?
Apple Push Notification Service is Apple's centralized, cloud-based service responsible for delivering push notifications to all Apple devices. Every iOS push notification — whether it originates from your own server, Firebase, or a third-party push provider — ultimately passes through APNs before reaching the user's device.
Here's a simplified flow of how it works:
- Your app registers for push notifications and receives a unique device token from APNs.
- Your app sends that device token to your backend server.
- When you want to notify a user, your server sends a push payload to APNs, addressed to that device token.
- APNs validates your request (authentication, token validity, payload format) and delivers the notification to the target device.
- The device's operating system displays the notification on the lock screen, banner, or notification center.
APNs handles the heavy lifting of maintaining persistent, encrypted connections to billions of Apple devices worldwide. Your job is to authenticate correctly, manage device tokens, and send well-formed payloads.
APNs Authentication: Certificates vs. Token-Based (p8 Keys)
Apple supports two authentication methods for connecting your server to APNs:
| Feature | Certificate-Based (.p12) | Token-Based (.p8 Key) |
|---|---|---|
| Expires | Every 12 months | Never (key itself doesn't expire) |
| Scope | Per app (one cert per Bundle ID) | Per team (one key works for all apps) |
| Setup complexity | Higher (CSR, download, export) | Lower (download once, use everywhere) |
| Recommended | Legacy apps | All new projects ✅ |
Token-based authentication (p8) is Apple's recommended approach for all new projects. It uses JSON Web Tokens (JWT) signed with your private key, eliminating the headache of annual certificate renewals. The rest of this guide focuses on the token-based method, with notes on the certificate approach where relevant.
Step 1: Configure Your Apple Developer Account
Before writing any code, you need to set up push notification capabilities in the Apple Developer Portal.
Prerequisites
- An active Apple Developer Program membership ($99/year)
- A registered App ID (Bundle Identifier) with push notifications enabled
- Xcode 14+ installed on your Mac
Enable Push Notifications for Your App ID
- Sign in to developer.apple.com and navigate to Certificates, Identifiers & Profiles.
- Go to Identifiers → select your App ID (or create one).
- Scroll to Push Notifications and check the box to enable it.
- Click Save.
If you're creating a new App ID, make sure the Bundle ID matches exactly what you'll use in Xcode (e.g., com.yourcompany.yourapp).
Step 2: Generate Your APNs Authentication Key (.p8)
This key is what your backend server uses to authenticate with Apple Push Notification Service.
- In the Apple Developer Portal, go to Keys (under Certificates, Identifiers & Profiles).
- Click the + button to create a new key.
- Enter a name (e.g., "APNs Push Key"), and check Apple Push Notifications service (APNs).
- Click Continue → Register.
- Download the
.p8file immediately — Apple only lets you download it once. - Note your Key ID (displayed on the key details page) and your Team ID (visible in Membership details).
⚠️ Critical: Store the
.p8file securely. If you lose it, you'll need to revoke the key and create a new one. Never commit it to version control.
For Certificate-Based Auth (Legacy)
If you need the apple push notification service certificate approach instead:
- Go to Certificates → click + → select Apple Push Notification service SSL.
- Choose your App ID, then follow the CSR (Certificate Signing Request) flow using Keychain Access.
- Download the
.cerfile, double-click to install in Keychain, then export as.p12with a password.
Step 3: Configure Xcode for Push Notifications
With your key ready, it's time to set up your Xcode project.
Add Push Notification Capability
- Open your project in Xcode → select your app target.
- Go to Signing & Capabilities tab.
- Click + Capability → search and add Push Notifications.
- Also add Background Modes and check Remote notifications (for silent/background pushes).
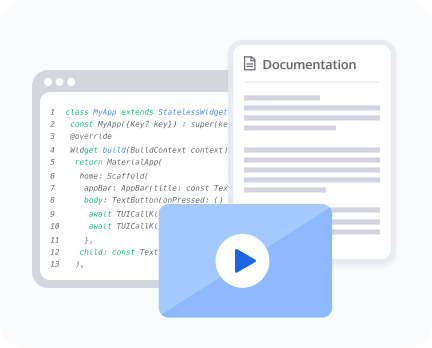
Register for APNs in Your App (Swift)
In your AppDelegate.swift, add the following code to request notification permissions and register with APNs:
import UIKit
import UserNotifications

@main
class AppDelegate: UIResponder, UIApplicationDelegate {

    func application(_ application: UIApplication,
                     didFinishLaunchingWithOptions launchOptions: [UIApplication.LaunchOptionsKey: Any]?) -> Bool {

        // Request notification permission
        UNUserNotificationCenter.current().requestAuthorization(options: [.alert, .badge, .sound]) { granted, error in
            if granted {
                DispatchQueue.main.async {
                    application.registerForRemoteNotifications()
                }
            }
            if let error = error {
                print("Notification permission error: \(error.localizedDescription)")
            }
        }

        return true
    }

    // Successfully registered — receive device token
    func application(_ application: UIApplication,
                     didRegisterForRemoteNotificationsWithDeviceToken deviceToken: Data) {
        let token = deviceToken.map { String(format: "%02.2hhx", $0) }.joined()
        print("APNs Device Token: \(token)")
        // Send this token to your backend server
        sendTokenToServer(token: token)
    }

    // Registration failed
    func application(_ application: UIApplication,
                     didFailToRegisterForRemoteNotificationsWithError error: Error) {
        print("Failed to register for APNs: \(error.localizedDescription)")
    }

    private func sendTokenToServer(token: String) {
        // POST the token to your backend API
        // e.g., https://yourserver.com/api/register-device
    }
}
Note: Push notifications do not work in the iOS Simulator (with limited exceptions on Apple Silicon Macs running Xcode 14+). Always test on a physical device.
Step 4: Send Push Notifications from Your Backend
Now comes the backend piece — your server needs to send push payloads to APNs, authenticated with your .p8 key.
APNs Endpoints
| Environment | URL |
|---|---|
| Development/Sandbox | https://api.sandbox.push.apple.com:443 |
| Production | https://api.push.apple.com:443 |
APNs Payload Structure
APNs payloads are JSON objects sent via HTTP/2. Here's a typical payload:
{
  "aps": {
    "alert": {
      "title": "Order Shipped!",
      "body": "Your package is on the way. Tap to track."
    },
    "badge": 1,
    "sound": "default",
    "category": "ORDER_STATUS"
  },
  "orderId": "12345"
}
Node.js Example (using apn library)
const apn = require("apn");

const provider = new apn.Provider({
  token: {
    key: "./path/to/APNsAuthKey.p8",   // Your .p8 file
    keyId: "YOUR_KEY_ID",               // From Apple Developer Portal
    teamId: "YOUR_TEAM_ID",             // From Membership page
  },
  production: false  // Set to true for production
});

const notification = new apn.Notification();
notification.topic = "com.yourcompany.yourapp";  // Your Bundle ID
notification.expiry = Math.floor(Date.now() / 1000) + 3600;
notification.badge = 1;
notification.sound = "default";
notification.alert = {
  title: "Order Shipped!",
  body: "Your package is on the way. Tap to track."
};
notification.payload = { orderId: "12345" };

const deviceToken = "a1b2c3d4e5f6...";  // The token from the device

provider.send(notification, deviceToken).then((response) => {
  console.log("Sent:", response.sent.length);
  console.log("Failed:", response.failed);
});
Python Example (using PyAPNs2)
from apns2.client import APNsClient
from apns2.payload import Payload

# Token-based authentication
from apns2.credentials import TokenCredentials

token_credentials = TokenCredentials(
    auth_key_path="./path/to/APNsAuthKey.p8",
    auth_key_id='YOUR_KEY_ID',
    team_id='YOUR_TEAM_ID'
)

client = APNsClient(
    credentials=token_credentials,
    use_sandbox=True  # Set False for production
)

payload = Payload(
    alert={"title": "Order Shipped!", "body": "Your package is on the way."},
    badge=1,
    sound="default",
    custom={"orderId": "12345"}
)

device_token = "a1b2c3d4e5f6..."

client.send_notification(
    token_id=device_token,
    notification=payload,
    topic="com.yourcompany.yourapp"
)
Step 5: Device Token Management Best Practices
Device tokens are not permanent. Mismanaging them is the #1 cause of failed APNs push notification iOS deliveries.
Key Rules for Token Management
- Tokens can change — the system may issue a new device token after an OS update, app reinstall, or restore from backup. Always update your server when
didRegisterForRemoteNotificationsWithDeviceTokenfires. - Never cache tokens locally as the single source of truth. Always rely on your backend database.
- Handle invalid tokens — when APNs returns a
410 Goneor400 BadDeviceTokenresponse, immediately remove that token from your database to avoid wasting resources. - Separate sandbox and production tokens — a token generated in a development build will not work with the production APNs endpoint, and vice versa.
- Register on every app launch — call
registerForRemoteNotifications()every time the app starts, not just once. iOS will return the current valid token.
Step 6: Testing Your APNs Integration
Using macOS Terminal (curl)
You can send a test push directly from your terminal using HTTP/2:
curl -v \
  --header "authorization: bearer YOUR_JWT_TOKEN" \
  --header "apns-topic: com.yourcompany.yourapp" \
  --header "apns-push-type: alert" \
  --http2 \
  --data '{"aps":{"alert":{"title":"Test","body":"Hello from APNs!"},"sound":"default"}}' \
  https://api.sandbox.push.apple.com/3/device/DEVICE_TOKEN_HERE
Generating the JWT for curl
# You'll need to generate a JWT signed with your .p8 key
# Header: {"alg":"ES256","kid":"YOUR_KEY_ID"}
# Payload: {"iss":"YOUR_TEAM_ID","iat":UNIX_TIMESTAMP}
Using Xcode Console
Monitor the Xcode debug console for real-time APNs registration events and incoming push data while testing on a physical device.
Common APNs Troubleshooting Issues
Even experienced iOS developers run into APNs issues. Here are the most frequent problems and fixes:
| Problem | Cause | Fix |
|---|---|---|
| Notification never arrives | Wrong environment (sandbox vs. production) | Match APNs endpoint to your build type |
| BadDeviceToken error | Token from wrong environment or expired | Re-register on launch; verify endpoint match |
| InvalidProviderToken | JWT expired or malformed | Regenerate JWT (tokens expire after 60 min) |
| TopicDisallowed | Bundle ID doesn't match key/certificate | Verify apns-topic matches your App ID |
| PayloadTooLarge | Payload exceeds 4 KB limit | Compress data; move large content to mutable-content |
| TooManyRequests (429) | Rate limit exceeded | Implement exponential backoff |
| No callback fired | Missing capability or provisioning issue | Re-check Xcode Push Notification capability and provisioning profile |
Debugging Checklist
- ✅ Push Notifications capability added in Xcode
- ✅ Correct provisioning profile (with push entitlement)
- ✅ Testing on a physical device (not Simulator)
- ✅ Device token sent to the correct backend environment
- ✅
.p8key / certificate is valid and not revoked - ✅
apns-topicmatches your Bundle ID exactly - ✅ Payload is valid JSON and under 4 KB
Scaling APNs: When to Consider a Push Notification Service
Setting up Apple Push Notification Service for a single app is manageable. But as your app grows, you'll quickly encounter operational complexity:
- Multi-platform delivery — maintaining separate integrations for APNs (iOS), FCM (Android), and web push
- Token lifecycle management at scale — deduplication, expiration, environment separation across millions of devices
- Delivery analytics — APNs doesn't provide built-in open/click tracking
- Rich notification formatting — images, action buttons, and deep links that behave differently per OS version
- Compliance and rate limiting — avoiding throttling while maintaining delivery speed
This is where a managed push notification service can save significant engineering time. Instead of building and maintaining all of this infrastructure yourself, a dedicated platform handles multi-platform delivery, token management, analytics, and intelligent routing — letting your team focus on the product experience rather than push plumbing.
Tencent Push Notification Service, for example, provides a unified SDK that abstracts away APNs and FCM complexity, offers built-in delivery and engagement analytics, supports rich media notifications out of the box, and handles token lifecycle management automatically — all with a free tier that covers most growing apps.
APNs Payload Advanced Features
Once your basic setup is working, explore these advanced APNs capabilities:
Silent Push Notifications
Trigger background app refreshes without displaying anything to the user:
{
  "aps": {
    "content-available": 1
  },
  "dataKey": "background-sync"
}
Mutable Content (Notification Service Extension)
Modify notification content before display — useful for decrypting payloads, downloading images, or localizing text:
{
  "aps": {
    "alert": { "title": "New Photo", "body": "Someone shared a photo with you." },
    "mutable-content": 1
  },
  "imageUrl": "https://example.com/photo.jpg"
}
Grouped Notifications (Thread ID)
Group related notifications together in the notification center:
{
  "aps": {
    "alert": { "title": "Chat: Team Alpha", "body": "New message from Sarah" },
    "thread-id": "chat-team-alpha"
  }
}
Frequently Asked Questions
1. Is Apple Push Notification Service free?
Yes. APNs itself is completely free to use — Apple does not charge per notification or per device. Your only cost is the $99/year Apple Developer Program membership. However, you're responsible for your own backend server infrastructure to send pushes.
2. What's the maximum payload size for APNs?
The maximum payload size is 4 KB (4096 bytes) for regular push notifications and 5 KB for Voice over IP (VoIP) notifications. If you need to send more data, use mutable-content to trigger a Notification Service Extension that fetches additional data from your server.
3. Do APNs push notifications work in the iOS Simulator?
Historically, no. Starting with Xcode 14 on Apple Silicon Macs, there is limited support for simulating push notifications by dragging .apns payload files onto the Simulator. However, for reliable end-to-end testing, always use a physical device.
4. How long does APNs store undelivered notifications?
If a device is offline, APNs stores only the most recent notification per app. When the device comes back online, it receives only that latest notification — earlier ones are discarded. If you need reliable delivery of every message, consider implementing your own message queue or using a push notification platform with offline message storage.
5. Certificate-based vs. token-based auth — which should I use?
Token-based (.p8) is recommended for all new projects. It never expires (unlike certificates which expire annually), works across all your apps with a single key, and is simpler to configure. Only use certificate-based auth if you're maintaining a legacy system that already depends on it.
6. Why do device tokens change?
Device tokens can change after iOS updates, app reinstalls, device restores from backup, or at the system's discretion. This is why you should call registerForRemoteNotifications() on every app launch and update your server whenever a new token is received.
7. Can I send push notifications to users who haven't opened my app?
No. A user must have opened your app at least once, and the app must have successfully registered for remote notifications (receiving a device token). Additionally, the user must grant notification permission — unless you're sending silent pushes, which don't require user permission but have strict rate limits.
8. What happens if I send a push to an invalid device token?
APNs will return a 400 BadDeviceToken or 410 Gone HTTP response. You should remove these tokens from your database immediately. Continuing to send to invalid tokens can impact your delivery performance and may trigger APNs rate limiting.
Conclusion
Setting up Apple Push Notification Service is a multi-step process — Apple Developer Portal configuration, authentication key generation, Xcode capability setup, client-side Swift registration, backend HTTP/2 integration, and ongoing token management. Each piece must be configured correctly for notifications to flow reliably from your server to your users' devices.
For teams that want to skip the infrastructure complexity and focus on crafting great notification experiences, a managed push service provides a faster path. Tencent Push Notification Service unifies APNs, FCM, and web push behind a single API, handles token lifecycle and delivery optimization automatically, and provides the analytics dashboard that APNs alone doesn't offer.
Whichever path you choose — DIY APNs integration or a managed platform — the fundamentals covered in this guide will give you a solid understanding of how iOS push notifications work under the hood.