Introduction
Whether it's staying connected with friends and family or collaborating with colleagues, chat apps like WhatsApp and Telegram have revolutionized the way we communicate. If you've ever wondered how to create your own 1v1 chat app, this tutorial is for you! We'll guide you through the process of building a feature-rich 1v1 chat app using Android Studio, Tencent UIKit, and Tencent SDK, enabling you to create a seamless and engaging chatting experience for your users. By the end of this tutorial, you'll have a fully functional 1v1 chat app ready to be customized and deployed.
Environment requirements
- Android Studio-Chipmunk
- Gradle-6.7.1
- Android Gradle Plugin Version-4.2.0
- kotlin-gradle-plugin-1.5.31
Step 1: Create an App
1. Log in to the Console. If you already have an app, record its SDKAppID and SDKSecretKey.
Note:
1. A Chat account can create a maximum of 300 Chat apps. If you want to create a new app, you can disable and delete an unwanted app first.
2. Once an app (along with its SDKAppID) is deleted, the service it provides and all its data are lost. Please operate with caution.
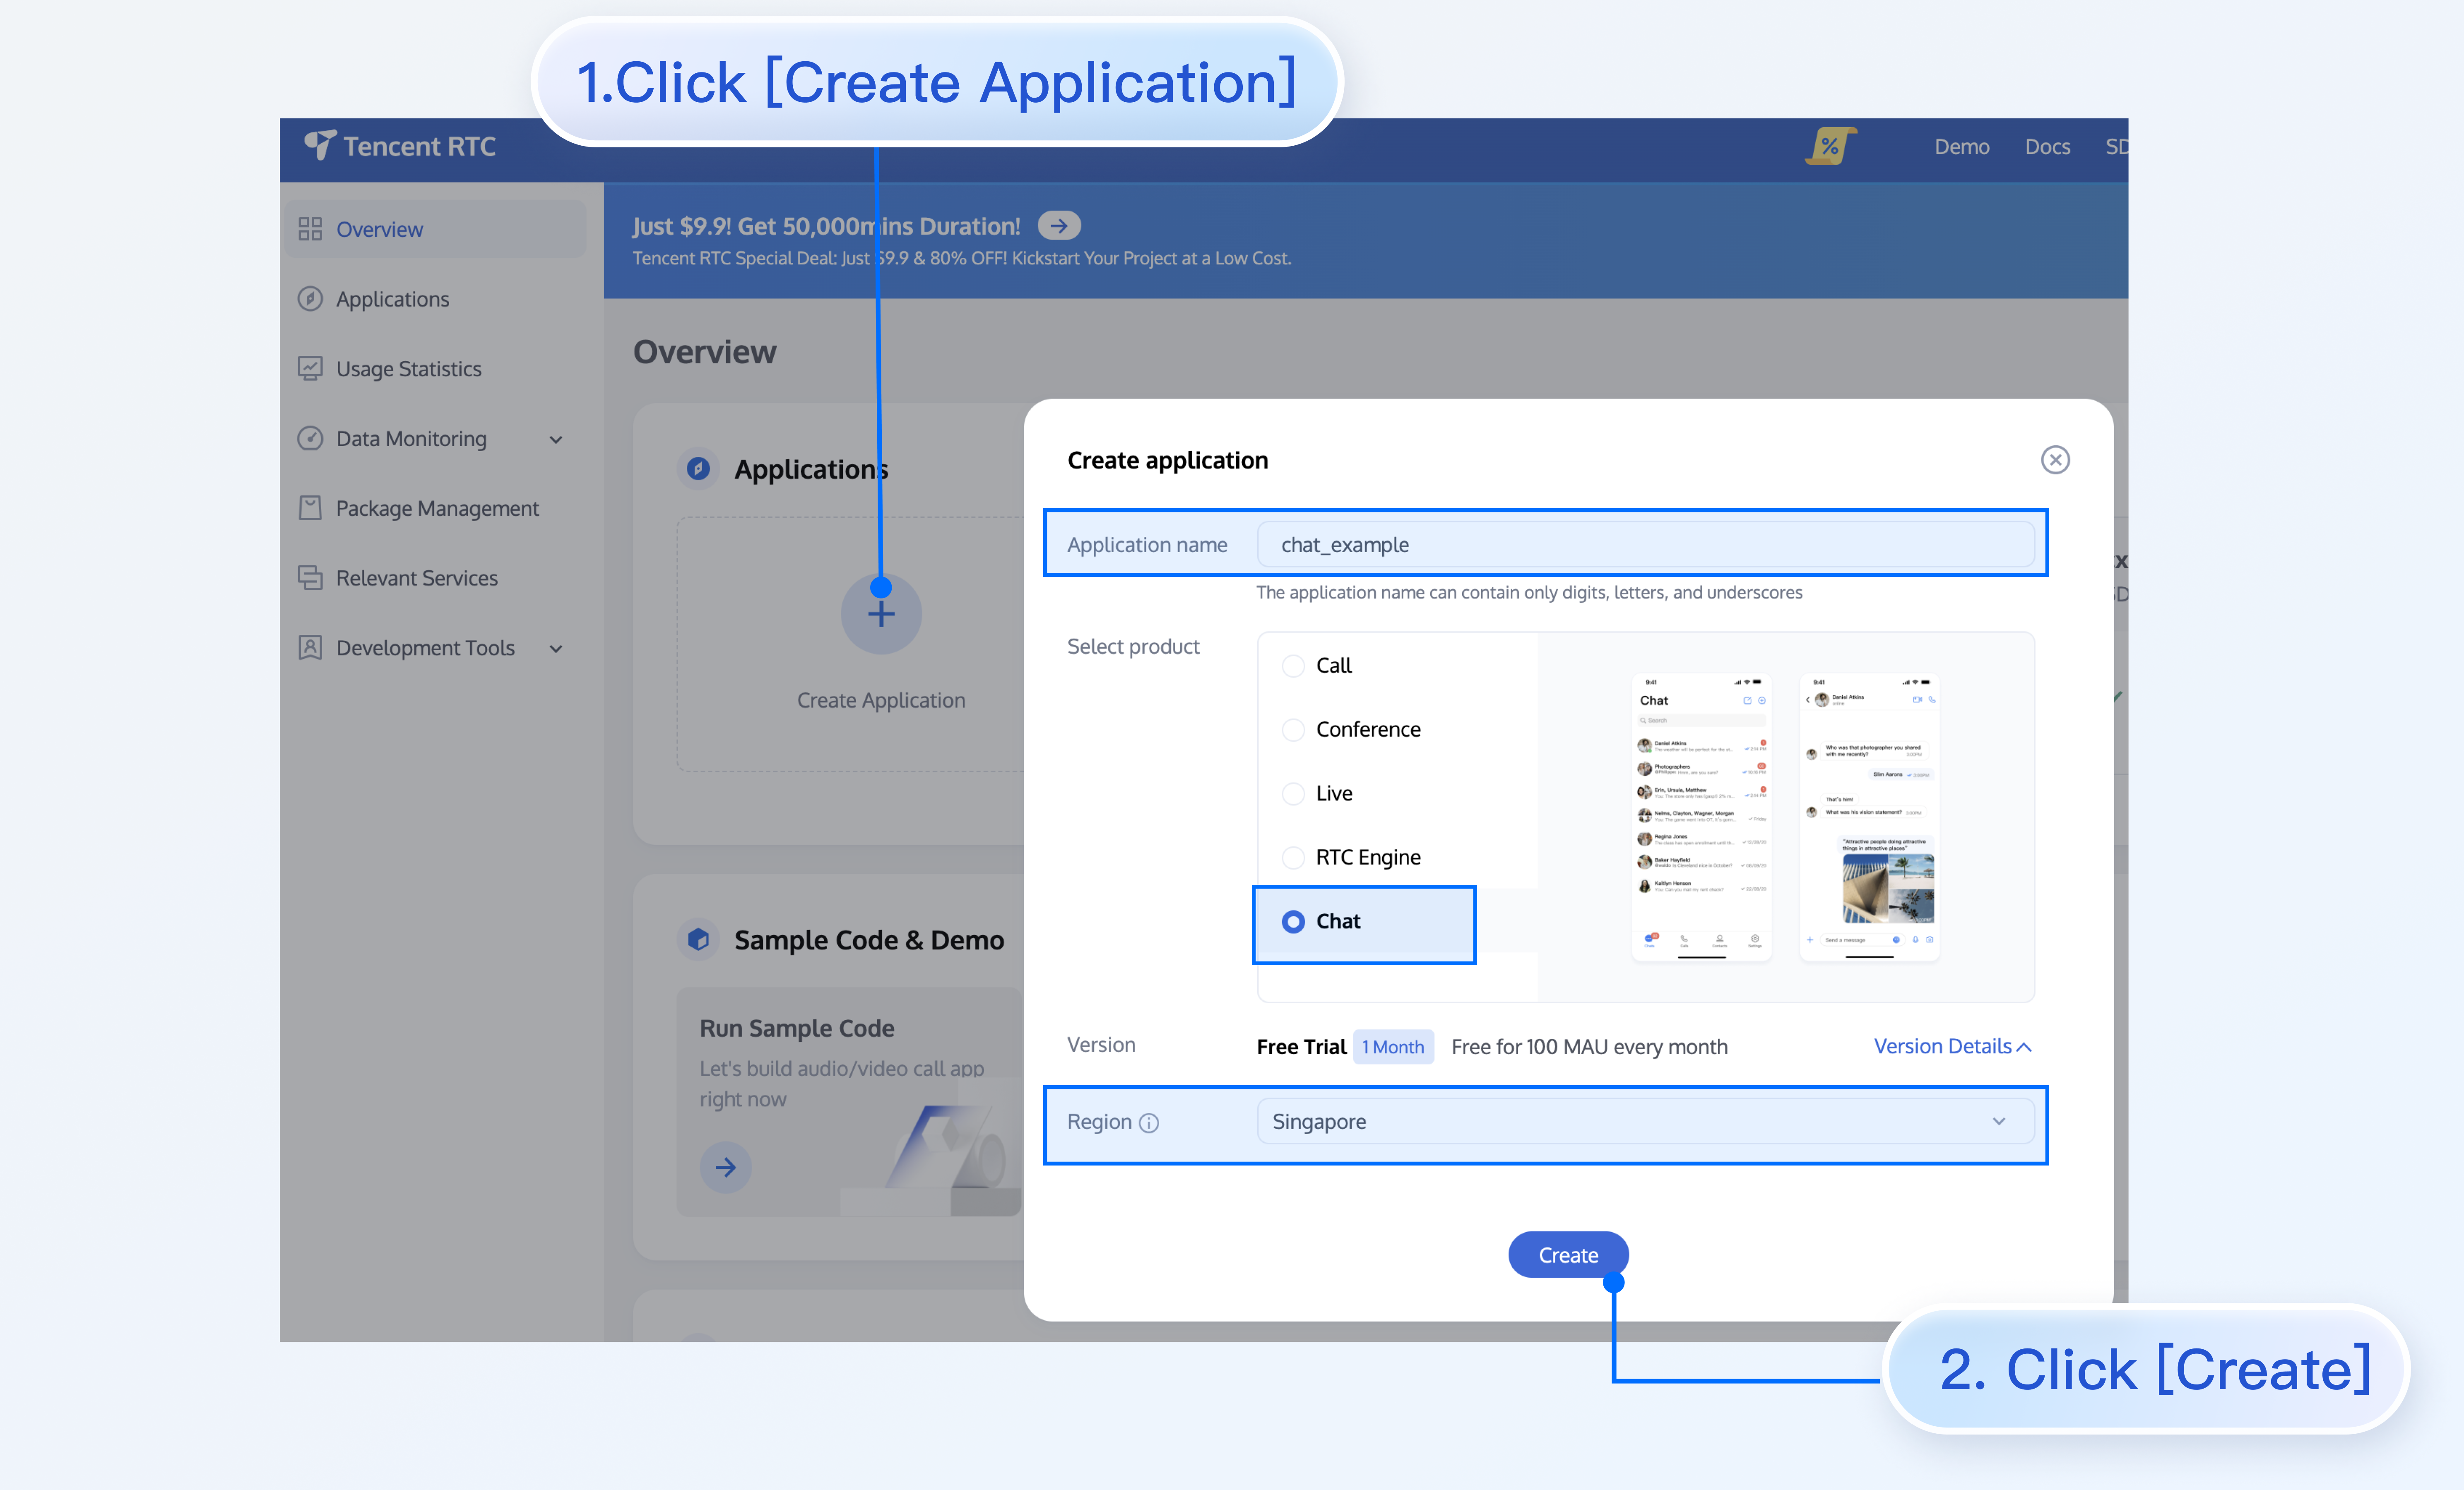
2. Click Create Application, enter your Application name, product, Region, and click Create.

Step 2: Obtain SDKAppID and SDKSecretKey
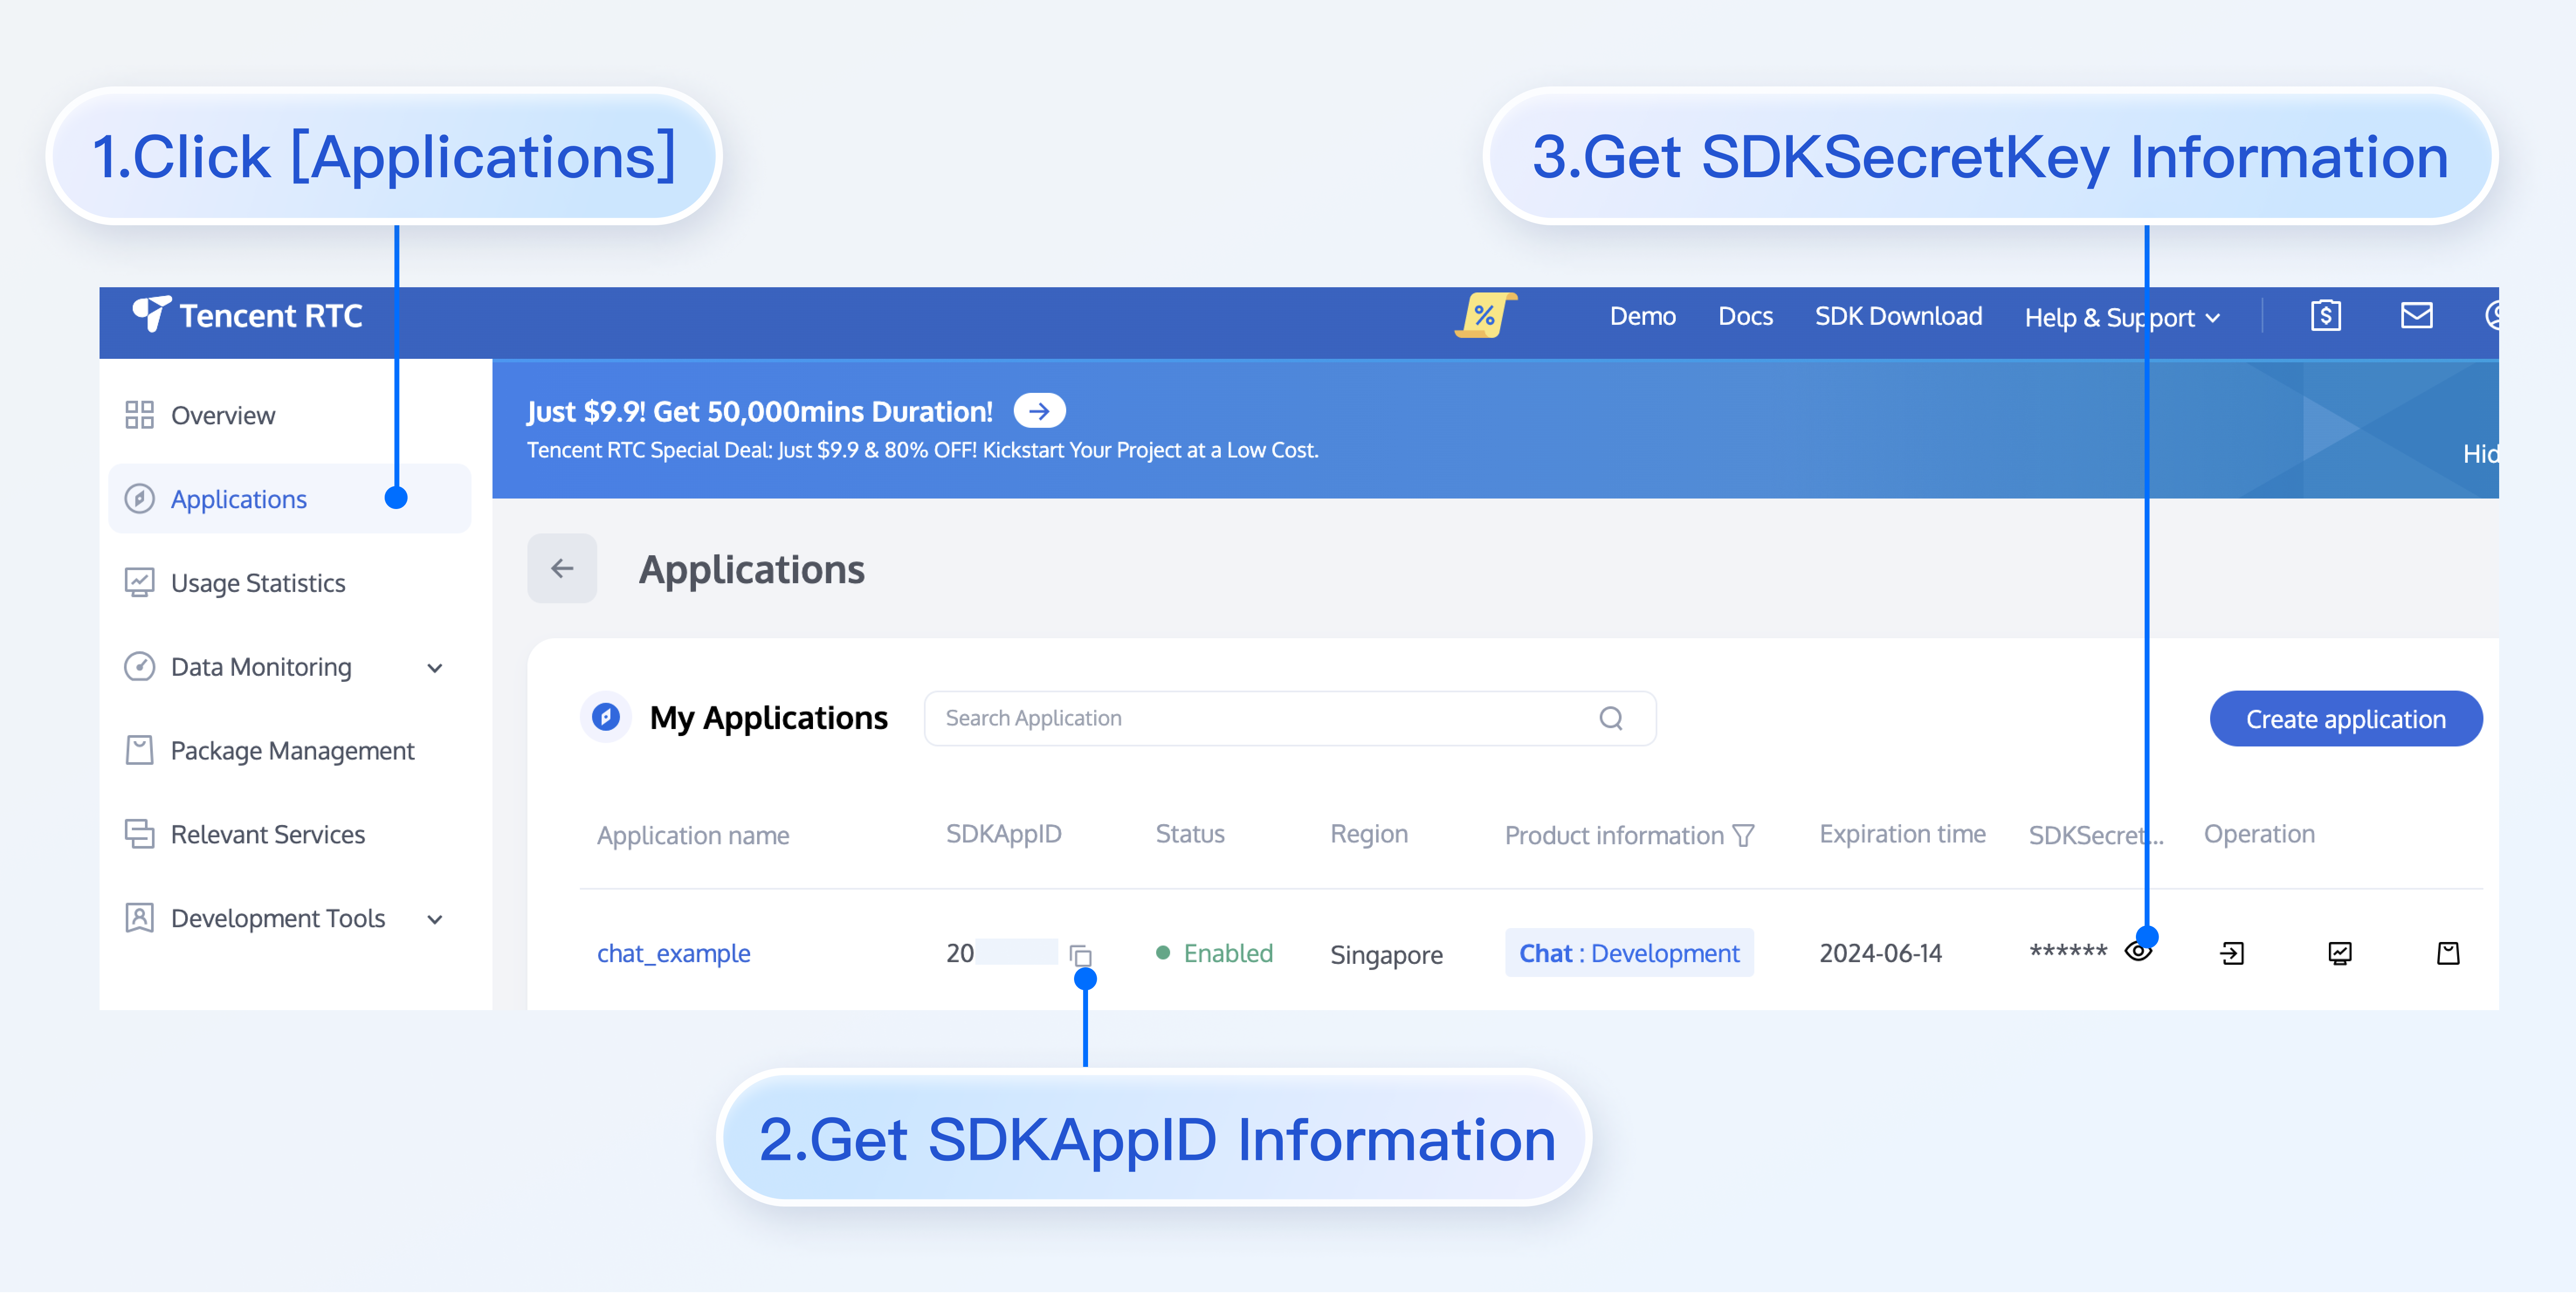
After creation, you can view the newly created app's Status, SDKAppID, Expiration time, etc., on the Applications page:

Record the SDKAppID and SDKSecretKey from the Application Information.
Danger:
Keep the SDKSecretKey properly to prevent disclosure.
Step 3: Download and Configure the Demo
1. Download the Android demo project from Github.
2. Open the project in the terminal directory and find the GenerateTestUserSig.java file. The path is Android/Demo/app/src/main/java/com/tencent/qcloud/tim/demo/signature/GenerateTestUserSig.java, and set the relevant parameters:
SDKAPPID: set it to the SDKAppID obtained above.
SECRETKEY: set it to the SDKSecretKey obtained above.
Warning:
In this tutorial, the method to obtain UserSig is to configure a SECRETKEY in the client code. In this method, the SECRETKEY is vulnerable to decompilation and reverse engineering. Once your SECRETKEY is disclosed, attackers can steal your Tencent Cloud traffic. Therefore, this method is only suitable for locally running a demo project and feature debugging.
The correct UserSig distribution method is to integrate the calculation code of UserSig into your server and provide an app-oriented API. When UserSig is needed, your app can send a request to the business server to obtain a dynamic UserSig.
Step 4: Compile and Run the Demo
Import the demo project with Android Studio, and then compile and run it. For more information, see the file README.md in the corresponding directory of the demo project cloned above.
Conclusion
Congratulations! You have now built a fully functional 1v1 chat app using Android Studio, Tencent UIKit, and Tencent SDK. With features like 1v1 chatting, group chat, search, and support for multiple message types, your app is ready to be customized and deployed.
But this is just the beginning! You can further enhance your app by adding additional features such as user authentication, push notifications, and end-to-end encryption to ensure a secure and seamless chatting experience for your users.
As you continue to develop and refine your 1v1 chat app, keep in mind the importance of user feedback and iteration. Listen to your users' suggestions and incorporate their ideas to create an app that truly meets their needs. With dedication and persistence, your 1v1 chat app can become the next big thing in the world of instant messaging.
If you have any questions or need assistance online, our support team is always ready to help. Please feel free to Contact us or join us on Telegram or Discord.


