


Chat apps play a crucial role in both personal and professional communication. They provide a seamless way for people to connect, share information, and collaborate in real-time.
Use Cases
Personal Communication
- Staying Connected: Keep in touch with family and friends, share updates, and maintain relationships regardless of distance.
- Instant Messaging: Faster and more interactive than traditional SMS, with options for text, voice, and video.
Business Collaboration:
- Team Communication: Enhance productivity with real-time discussions, project updates, and feedback.
- Remote Work: Essential for virtual meetings, file sharing, and collaborative tasks in distributed teams.
Customer Support:
- Instant Assistance: Provide real-time help and support to customers, improving satisfaction and loyalty.
- Chatbots: Use AI to handle common queries and offer 24/7 support.
Education:
- Online Classes: Facilitate student-teacher interactions, Q&A sessions, and homework submissions.
- Study Groups: Enable students to collaborate, discuss topics, and share resources.
Social and Entertainment:
- Interest Groups: Join communities based on shared hobbies or interests to exchange ideas and experiences.
- Live Interaction: Engage with live streams and gaming communities in real-time.
By building a powerful chat app, you can enhance user communication experiences across various scenarios. Do you want to quickly build it with conversation, chat, group and a complete UI on the web? Follow our step-by-step guide to create a real-time chat app using React.js and Tencent RTC in 10 minutes!
Environment Requirements
- React v18.0 (Version 17.x is not supported.)
- TypeScript
- Node (The Node version should not be earlier than 12.13.0 and not later than 17.0.0. The official LTS version 16.17.0 of Node.js is recommended.)
- npm (Use a version that matches the Node version in use.)
chat-uikit-react Integration
Step 1: Create a project
Create a new React project. You can choose whether to use a TS template or not.
npx create-react-app sample-chat --template typescriptAfter the project is created, go to the project directory.
cd sample-chatStep 2: Download the chat-uikit-react component
Use npm to download chat-uikit-react and use it in your project. Additionally, related open source code is also provided on GitHub, which you can use as a basis to develop your own component library.
npm install @tencentcloud/chat-uikit-reactStep 3: Include the chat-uikit-react component
Note:
- In the following code,
SDKAppID,userID, anduserSigare not input. Acquire the necessary information in Step 4 and replace it accordingly. - npm Integration Method
- Source Code Integration Method
- Replace the content in App.tsx, or you can create a new component for inclusion.
import React, { useEffect, useState } from 'react';
import { ChatSDK } from '@tencentcloud/chat';
import { TUIKit } from '@tencentcloud/chat-uikit-react';
import { TUILogin } from '@tencentcloud/tui-core';
import '@tencentcloud/chat-uikit-react/dist/cjs/index.css';
export default function SampleChat() {
const [chat, setChat] = useState<ChatSDK>();
const init = () => {
const loginInfo = {
SDKAppID: 0, // Your SDKAppID. Get it from Step 4
userID: 'xxx', // Your userID. Get it from Step 5
// UserSig is a cipher for a user to log in to IM. It is the ciphertext generated by
//encrypting information such as userID. Get it from Step 5
userSig: 'xxx', // Your userSig. Get it from Step 5
useUploadPlugin: true,
};
TUILogin.login(loginInfo).then(() => {
const { chat } = TUILogin.getContext();
setChat(chat);
}).catch(() => {});
}
useEffect(() => {
init();
}, [])
return (
<TUIKit chat={chat} language={'en'}></TUIKit> // language support en or zh
)
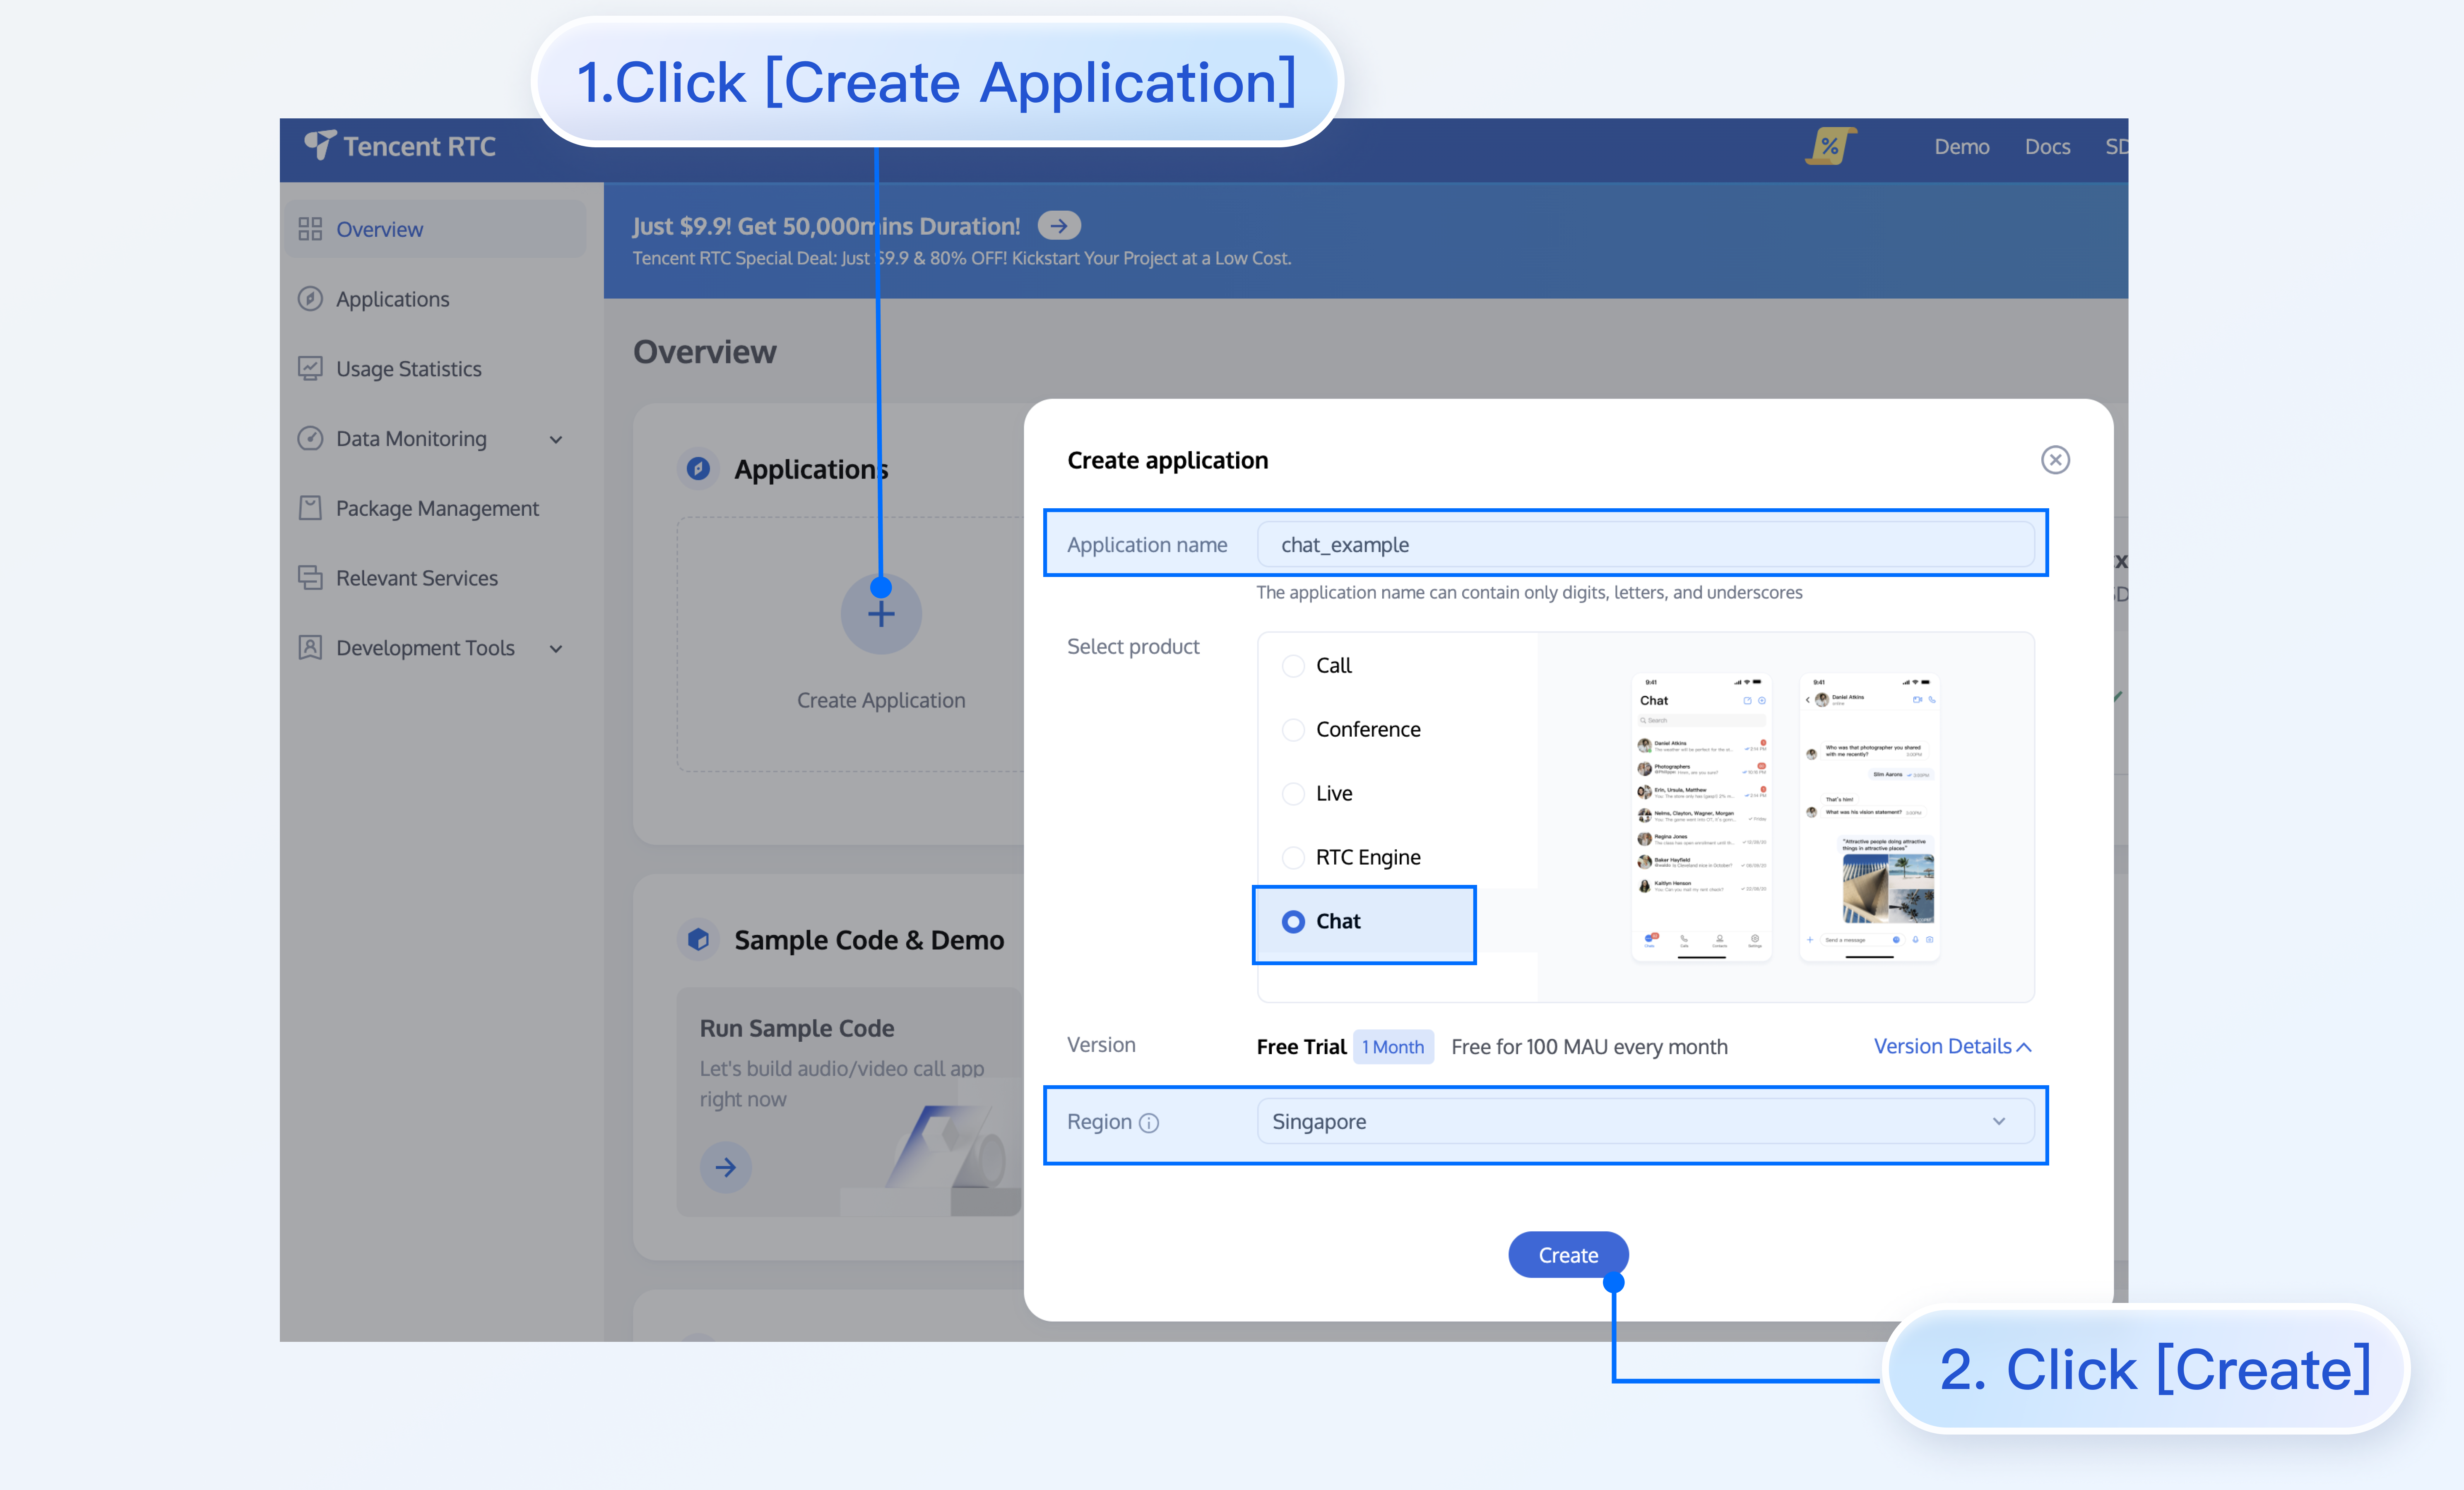
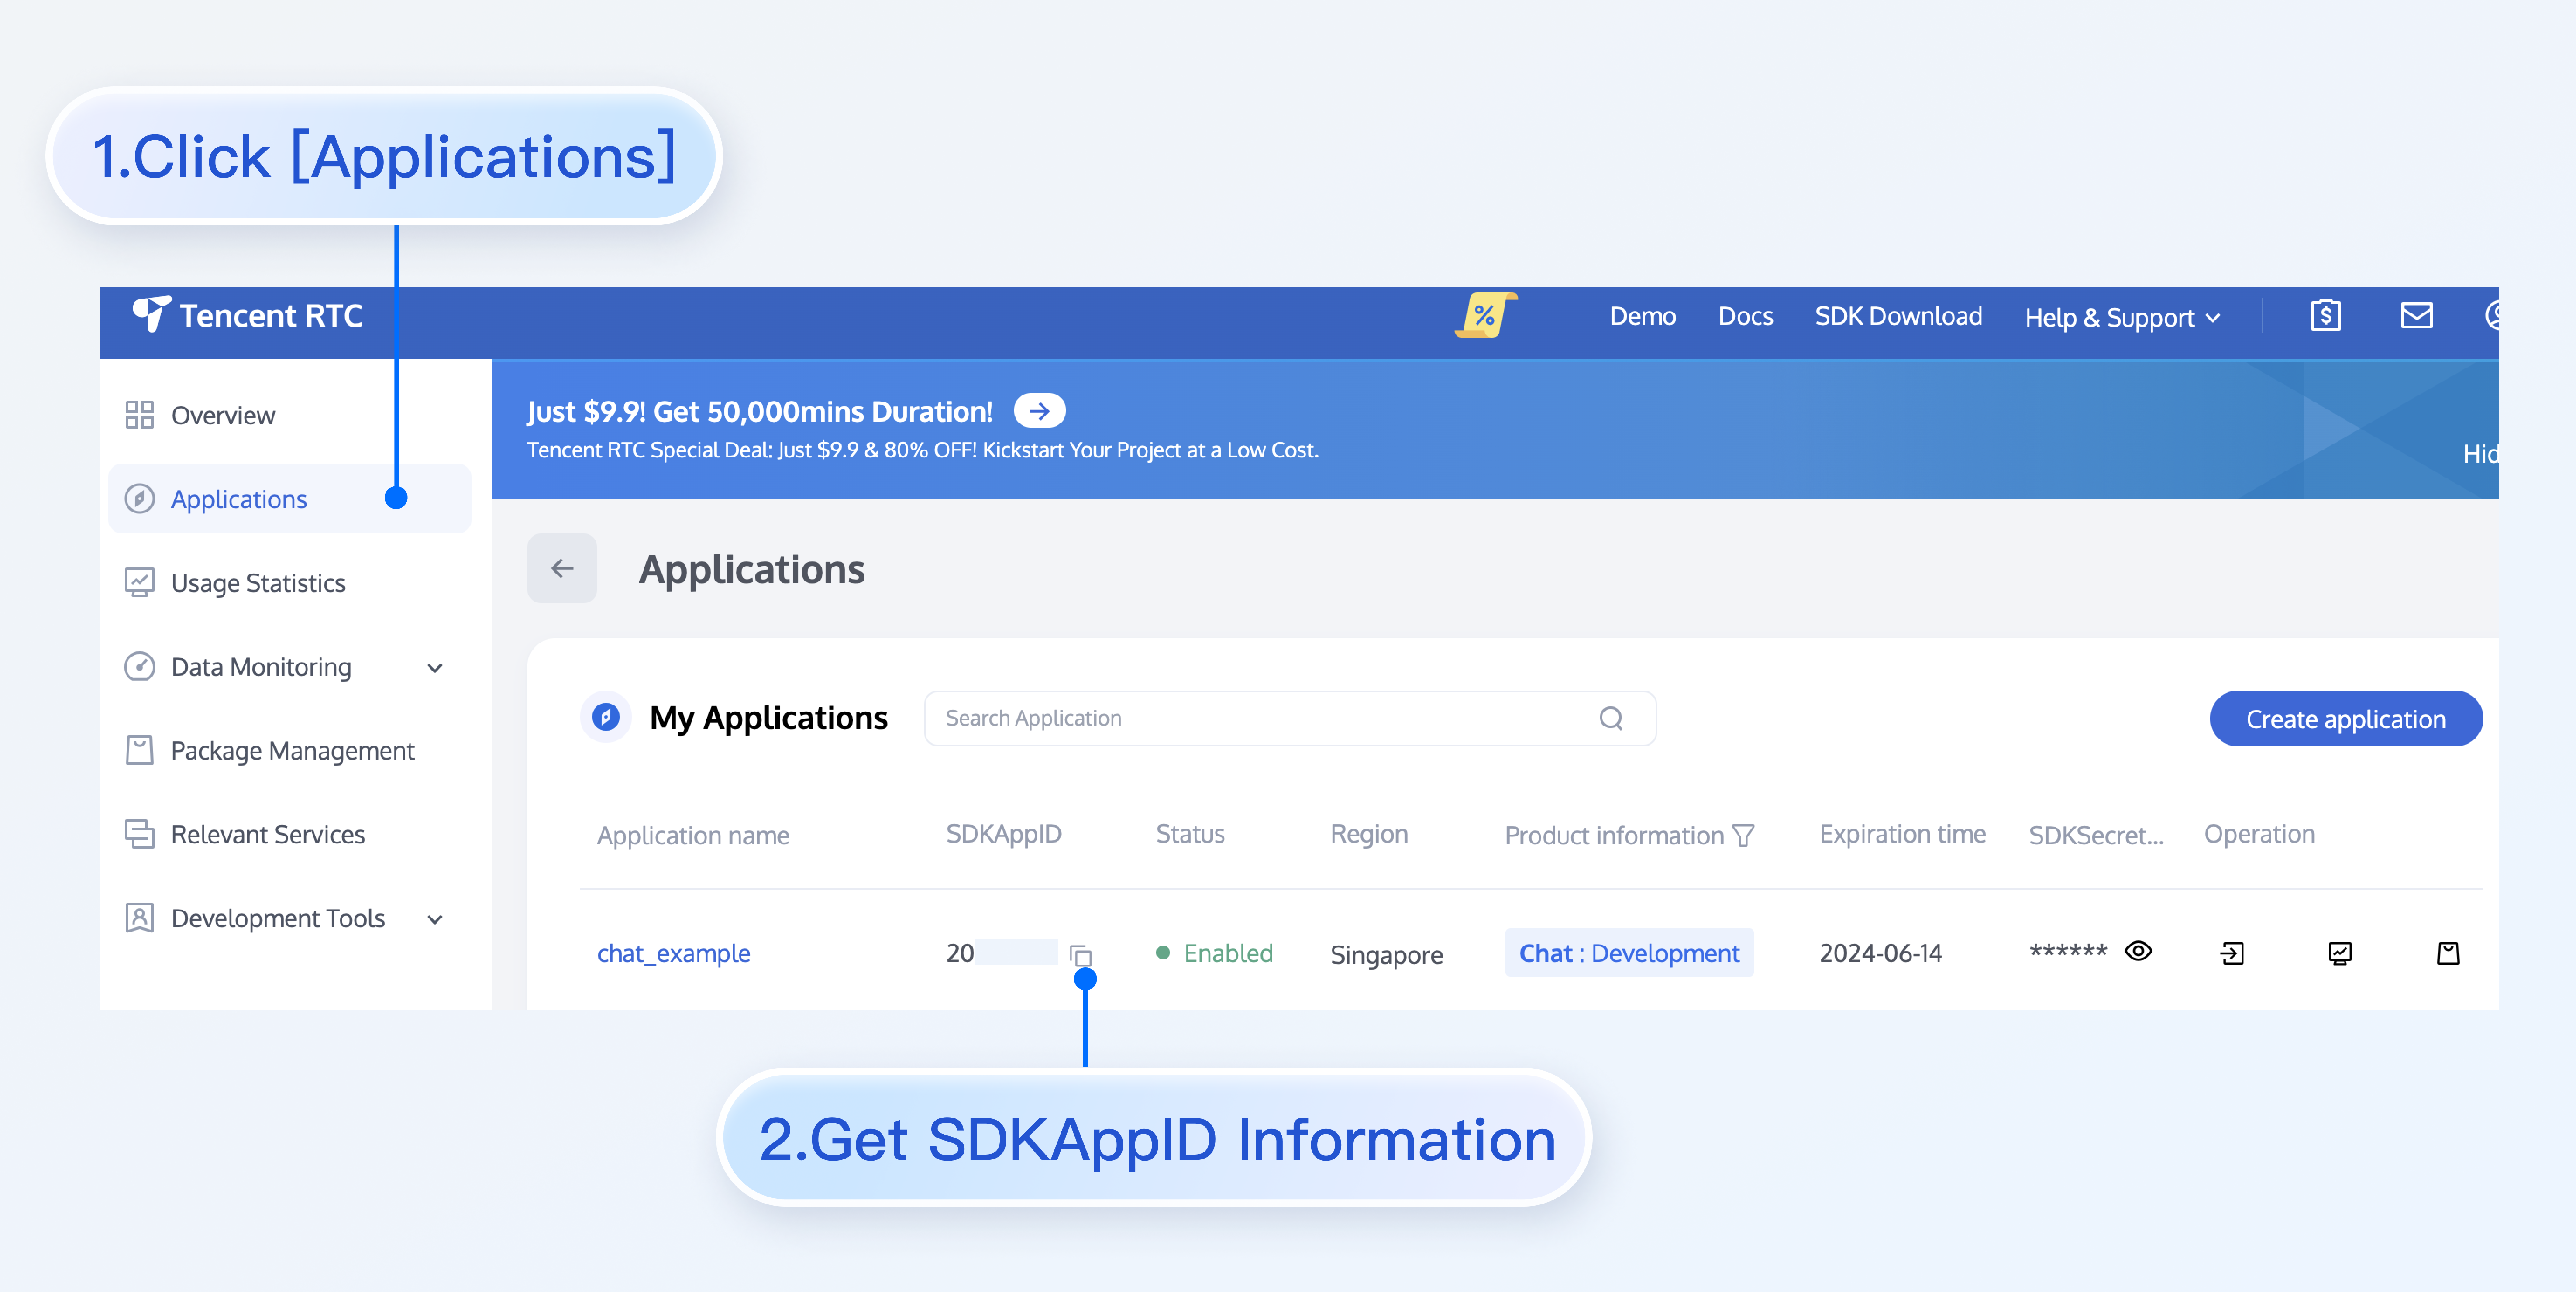
}Step 4: Create an application
1. Log in to the Chat console.
2. Click Create Application, enter your application name, and then click Create.
3. After creation is complete, you can view the status, service version, SDKAppID, creation time, tag, and expiration time of the new application on the console overview page.
Step 5: Obtain userID and userSig
Click the target application tab, enter the Account Management page, create an account, and obtain userID.
Go to the IM console > UserSig Tools , enter the userID to generate a userSig, and copy the userSig. For more information about userSig, see Generating UserSig.
Step 6: Start the project
Replace SDKAppID, userID, and userSig in App.tsx, and then run the following command:
npm run startNote:
- Ensure that
SDKAppID,userID, anduserSigare successfully replaced in Step 3, as the failure to do so may cause the project to operate abnormally. - A
userIDcorresponds to auserSig. For more information, see Generating UserSig. - If the project fails to start, please check whether the environment requirements are met.
Step 7: Send your first message
1. After starting the project, click + on the left to start a one-to-one chat.
2. Enter the userID created in Step 5 in the search box, and then press Enter.
3. Enter your message in the input box and press Enter to send.
FAQs
What is UserSig?
A UserSig is a cipher with which you can log in to IM. It is the ciphertext generated by encrypting information such as userID.
How can I generate a UserSig?
The issuance method for UserSig involves integrating the computation code of UserSig into your server, and providing an API oriented towards your project. When UserSig is needed, your project sends a request to the business server to obtain the dynamic UserSig. For more information, see How to Generate a UserSig on the Server.
If you have any questions or need assistance online, our support team is always ready to help. Please feel free to Contact us or join us on Telegram or Discord.


